This is the next lesson in your course on Process Automation, showing you how to make your service business more efficient and predictable using ProcessKit.
Throughout this course we've been building out our "New Client Onboarding" process, which is designed to, well, onboard new clients!
But the onboarding is only the start of an engagement. Hopefully we will be doing many projects, sometimes recurring projects, for each client. Managing all of those client deliverables becomes hectic fast!
That's why it helps to have a way to truly centralize all of your clients' information and organize which projects are for which clients.
Storing client information is one thing. But surfacing key client information when and where you need it makes all the difference.
In this lesson, we'll cover:
- Which client information should you store?
- How to manage your client list and client attributes in ProcessKit
- Managing client deliverable projects
- How to associate projects with clients in ProcessKit
- Automating tasks based on which client the work is for
- How to use client attributes in conditional logic on tasks
Which client information should you store?
Ever find yourself hunting for specific information about one of your clients? You're searching your email inbox sifting through past conversations. You're pulling up billing invoices to check what exactly they purchased. You're digging up the original contract to see if something is in scope or out of scope.
You need to get these clients' deliverables done, but not having the info you need on hand is really slowing that down (making it very inefficient).
This is why you really should have a centralized client list with all the key client information saved in one place.
So which pieces of information should you store with each client? Start with storing the pieces of information that you will routinely need easy, fast access to.
Here are a few ideas:
- Company name
- Website URL
- The primary point of contact (and their contact information)
- Which service package did they buy?
- Technical specs, like which web hosting provider or CMS do they use? (if that's relevant for your work)
- Special instructions about how to handle things for this client a bit differently than usual (like a special way to upload images to their website).
How to centralize clients' information in ProcessKit
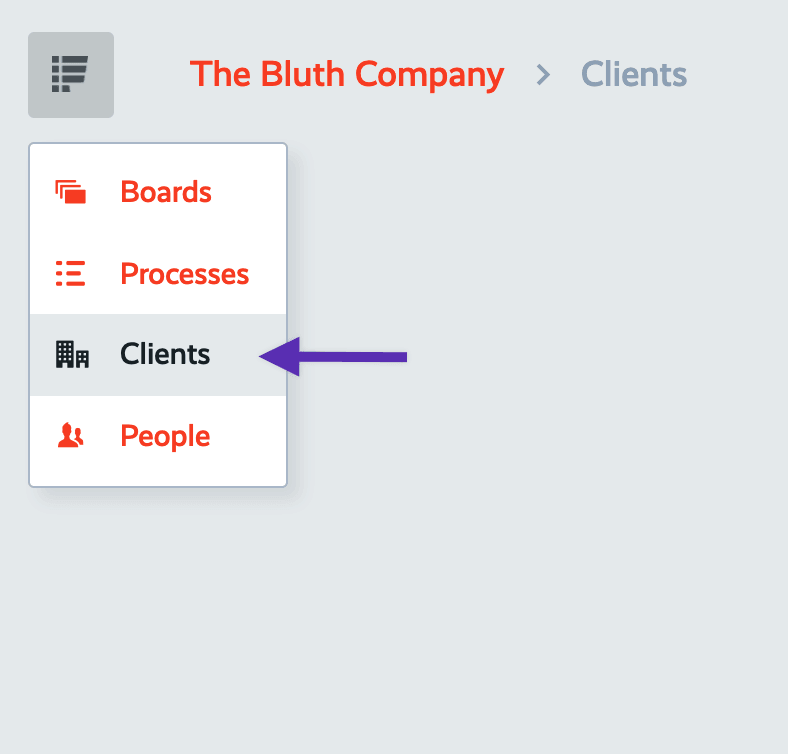
In ProcessKit, we make Clients a first-class feature. To manage your clients list, simply go to "Clients".
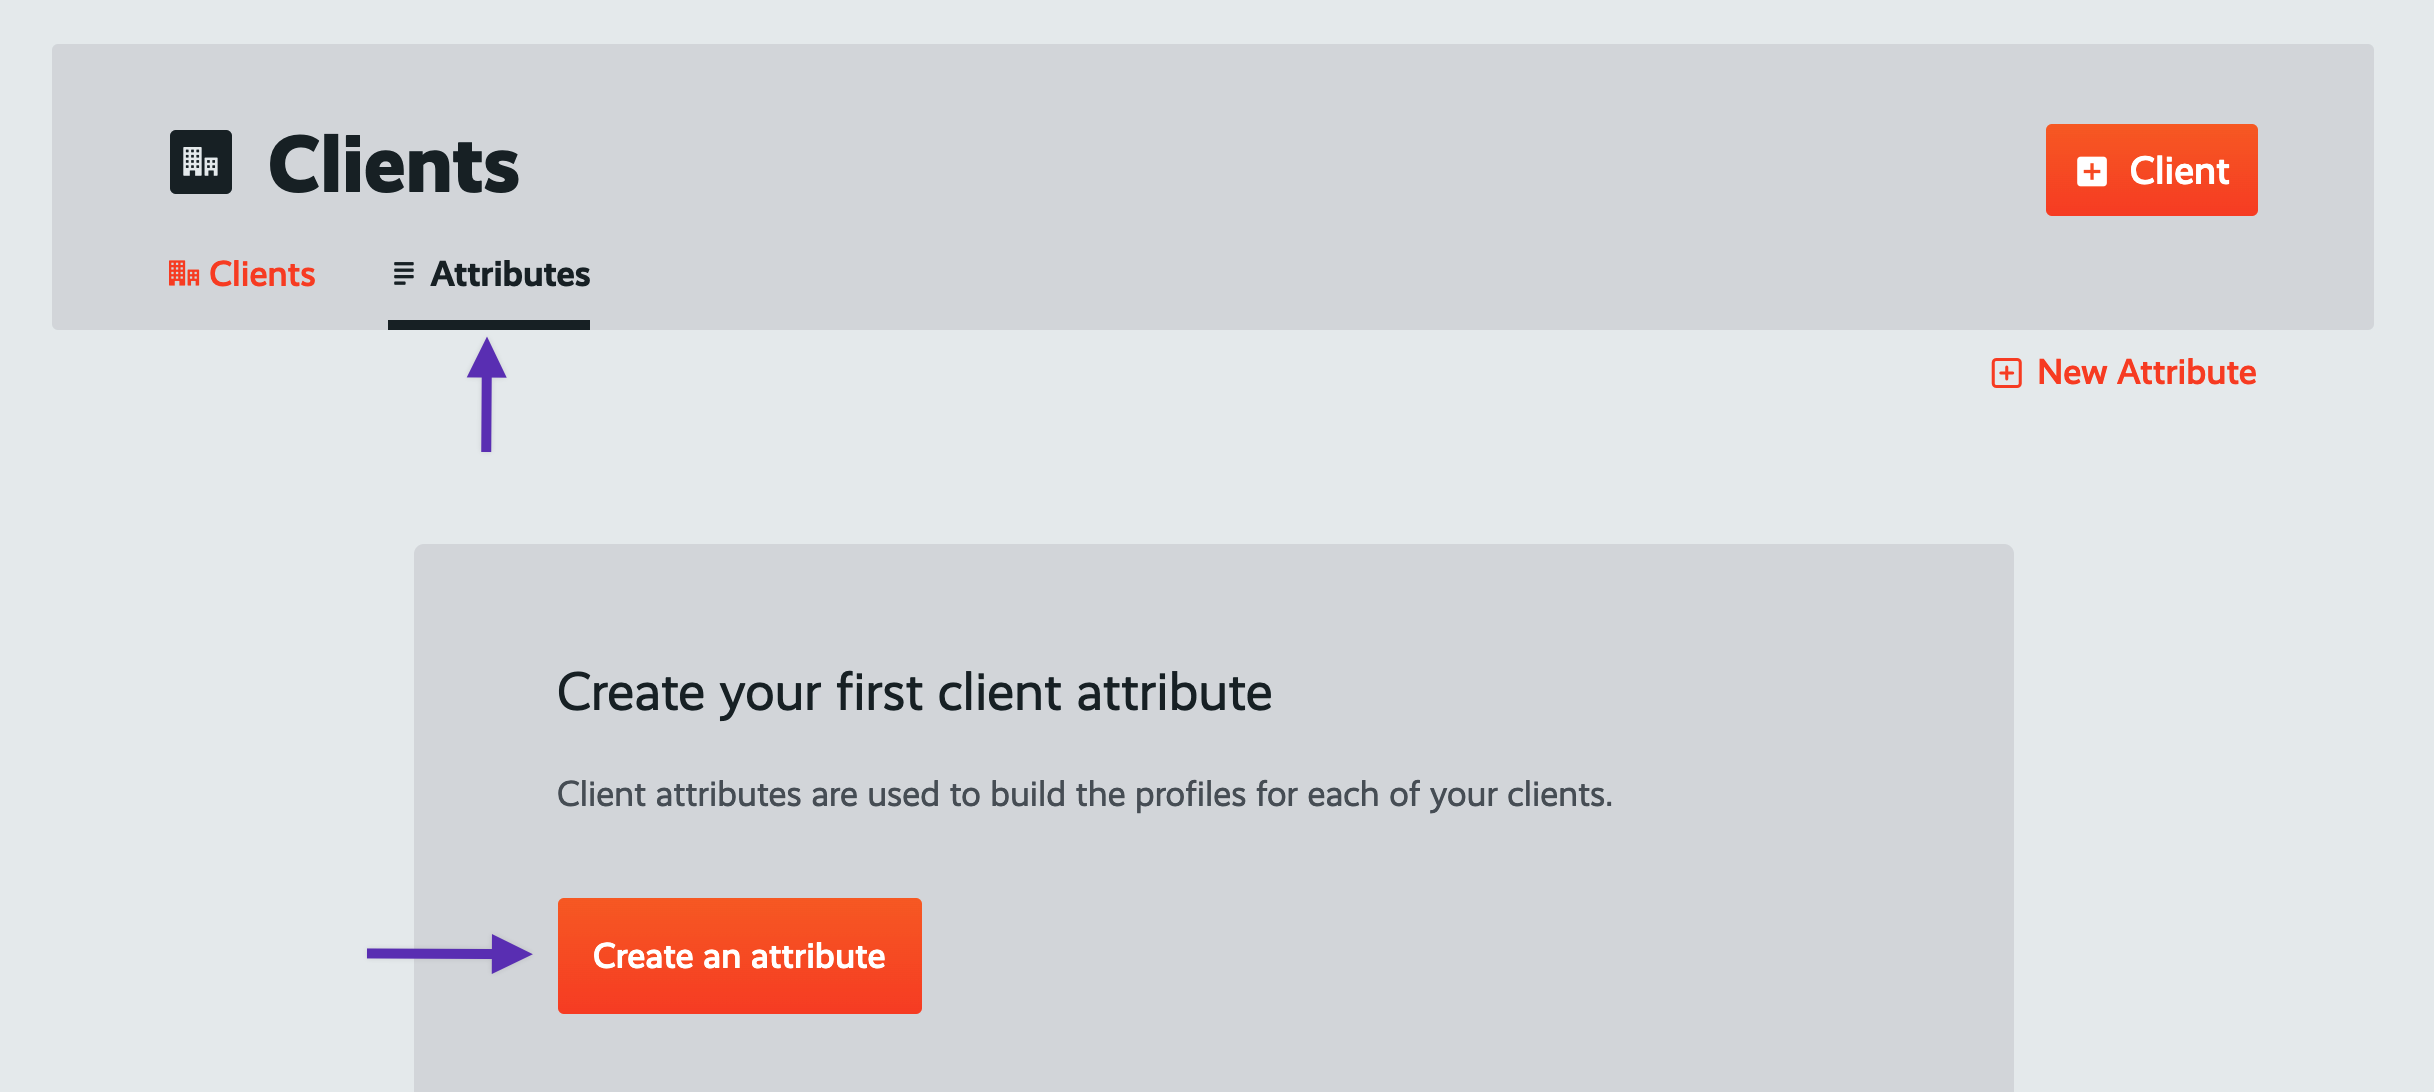
Before we start creating clients, first let's manage the custom attributes that will be saved for each client. Click "Attributes".
Every client starts with 2 attributes by default:
- The client name (often this is their company name)
- The client's logo
You can use custom attributes to store any other piece of information you need to. Let's create a few custom attributes now. Click "Create an Attribute".
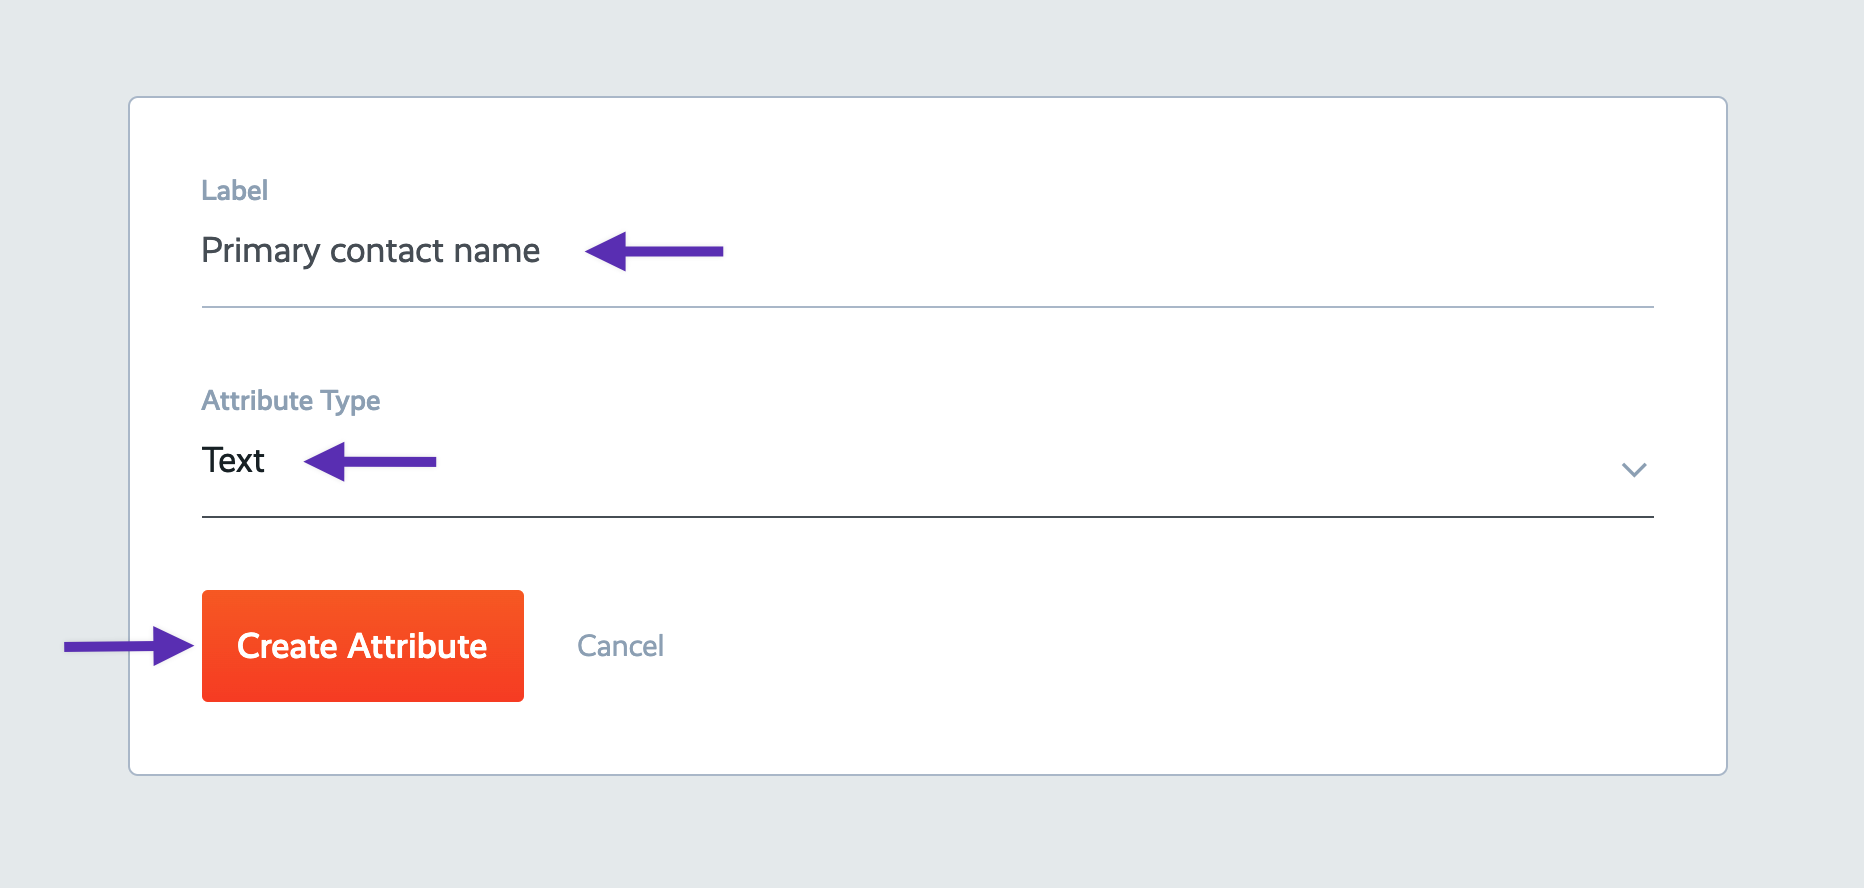
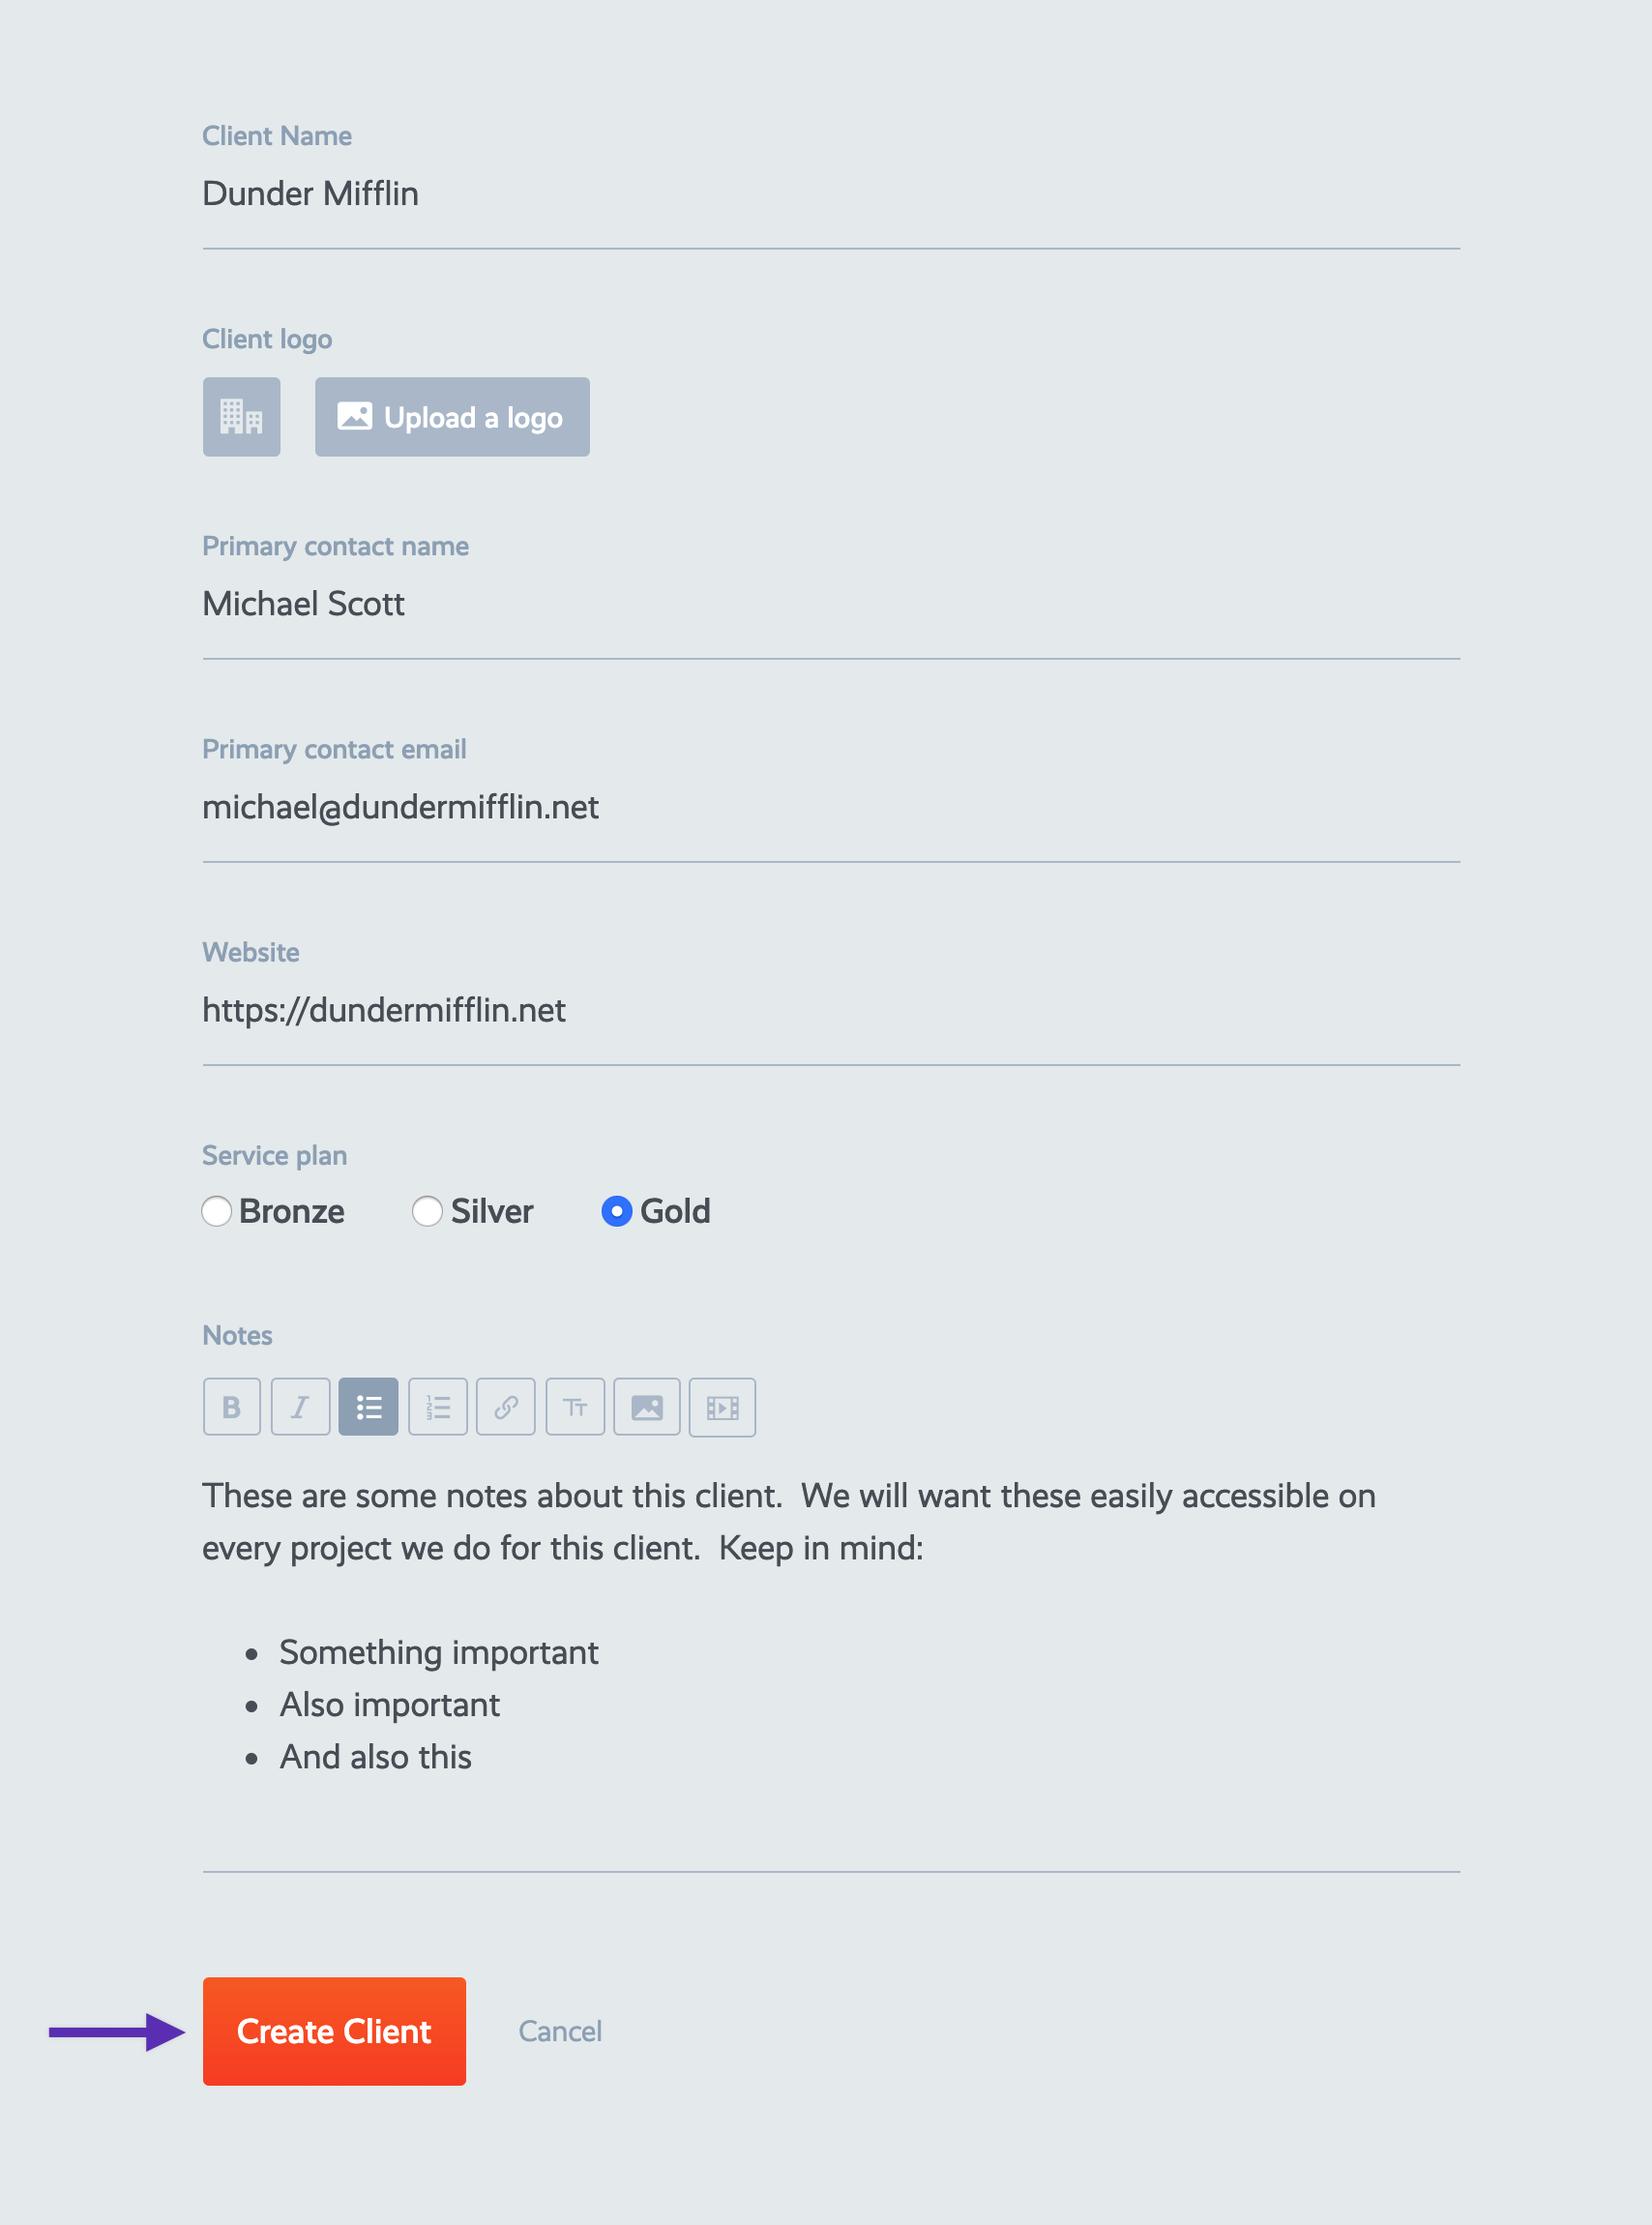
Give your first client attribute a label of "Primary contact name". Leave the Attribute Type set to "Text". Then click "Create Attribute".
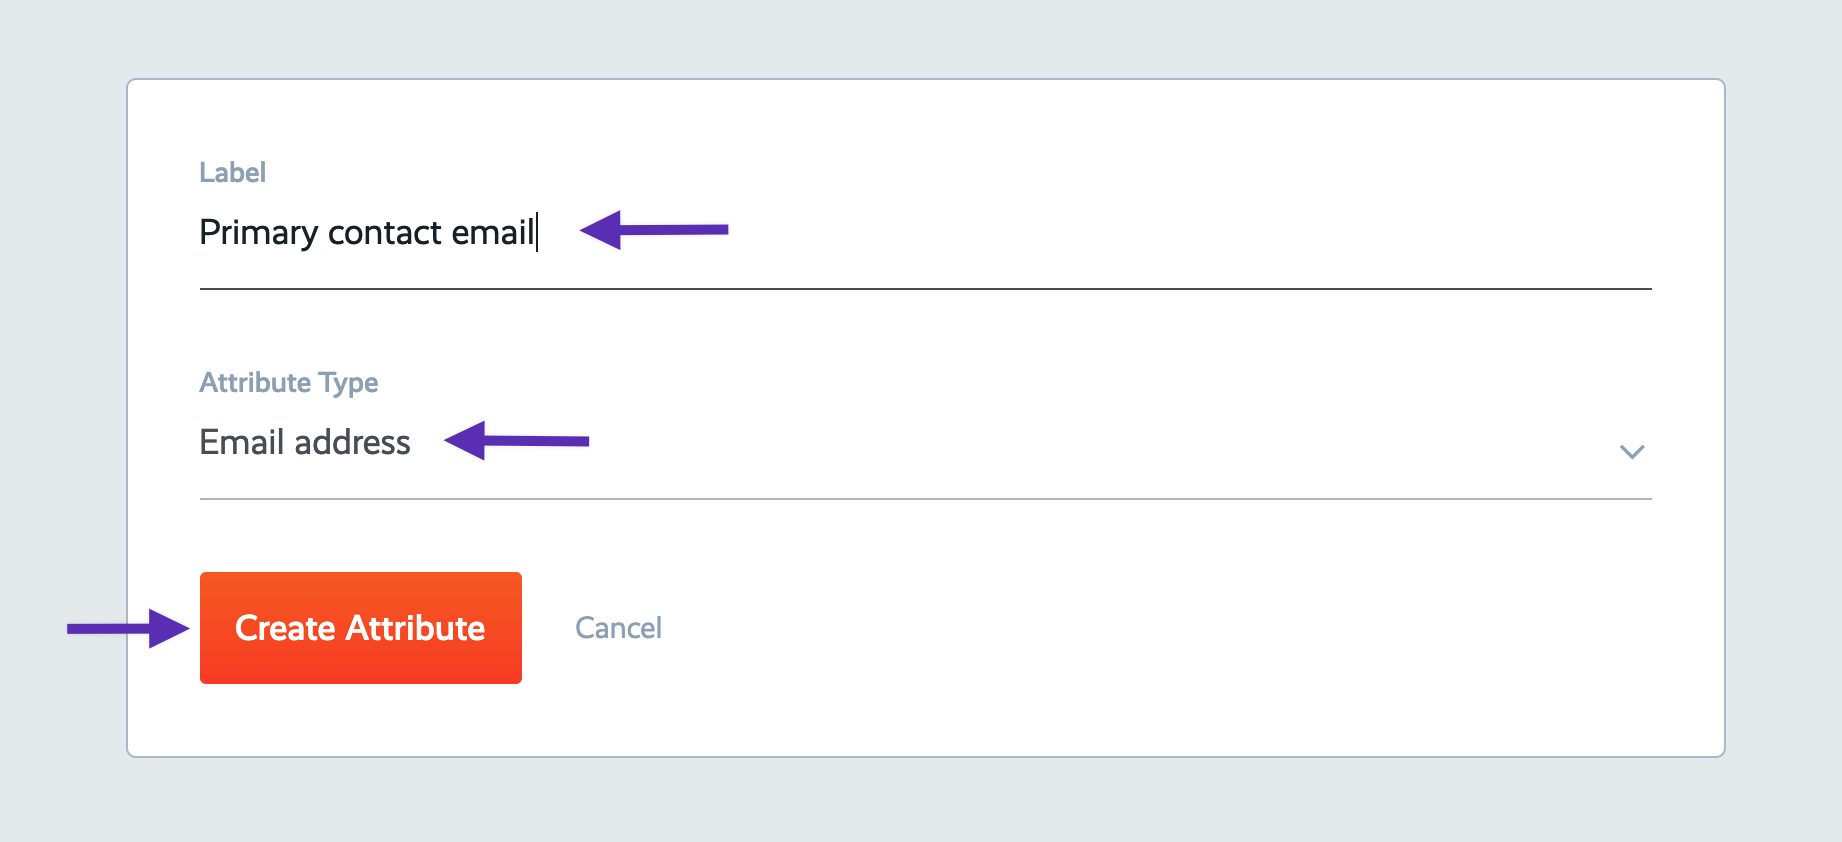
Next let's have an attribute to store the primary contact person's email address. Add another attribute and give it a label of "Primary contact email" and set it's Attribute Type to "Email address". Click "Create Attribute".
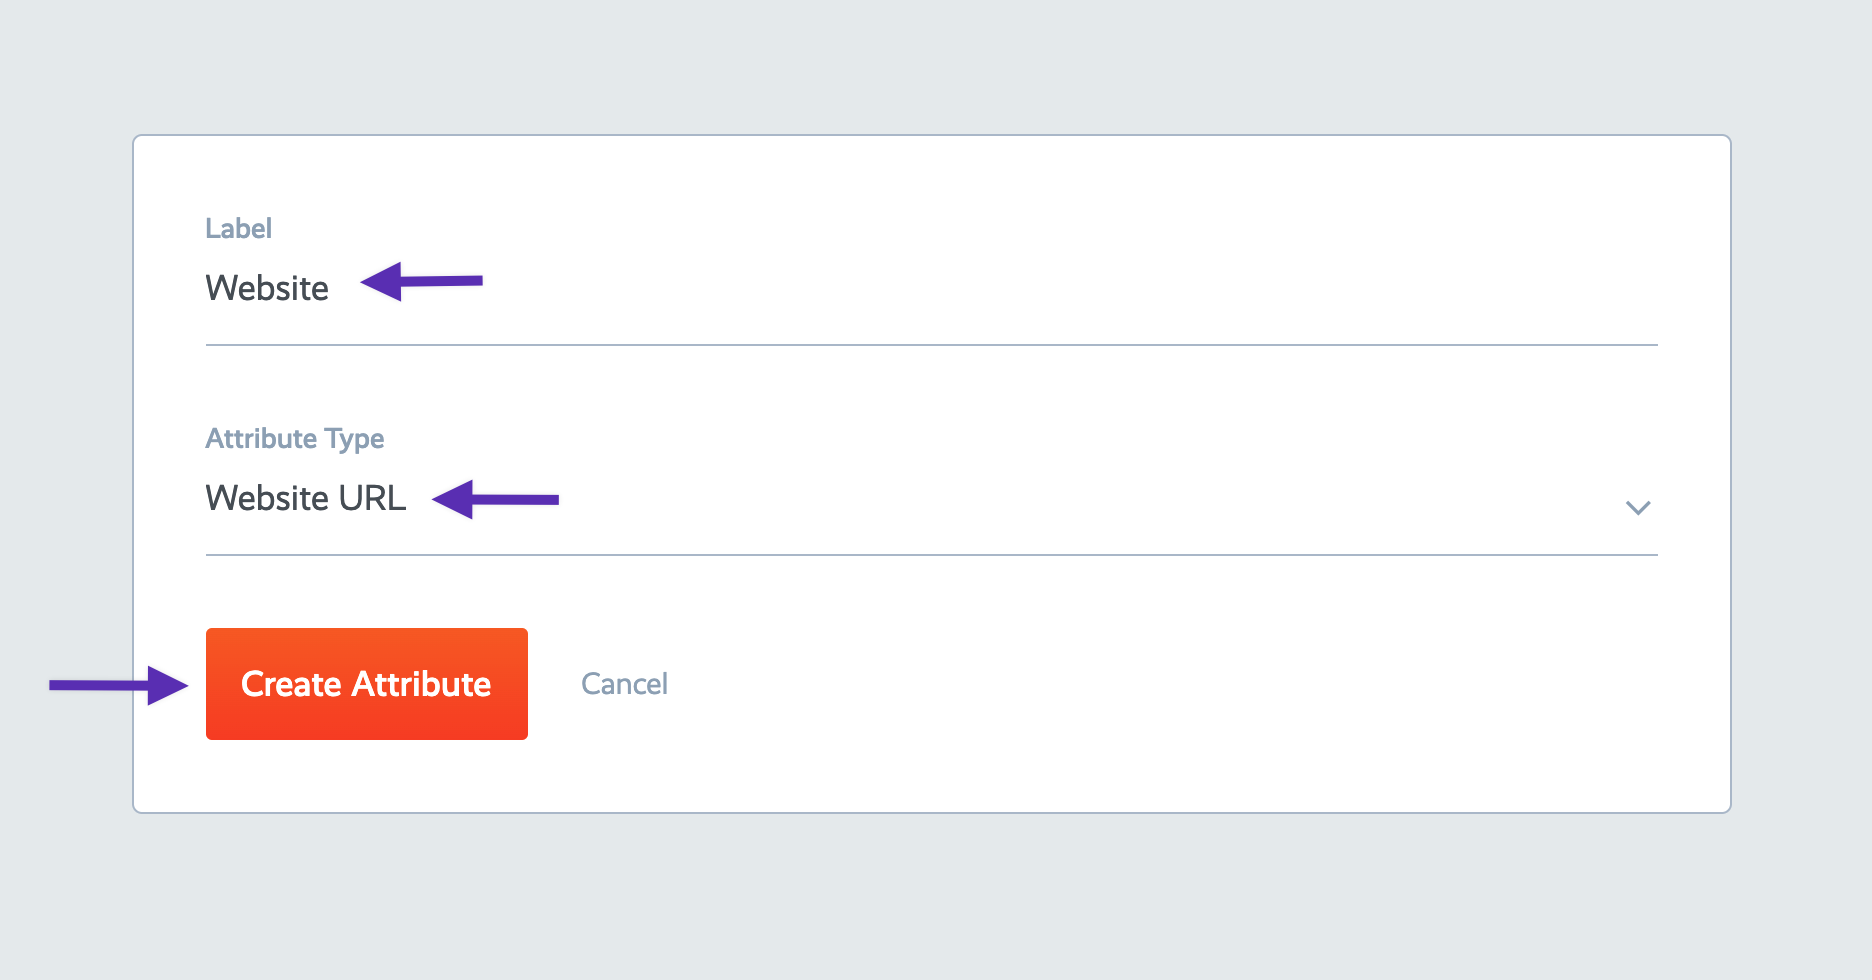
Next let's make sure we always store the client's website address. Add another attribute and give it a label of "Website" and set its Attribute Type to "Website URL". Click "Create Attribute".
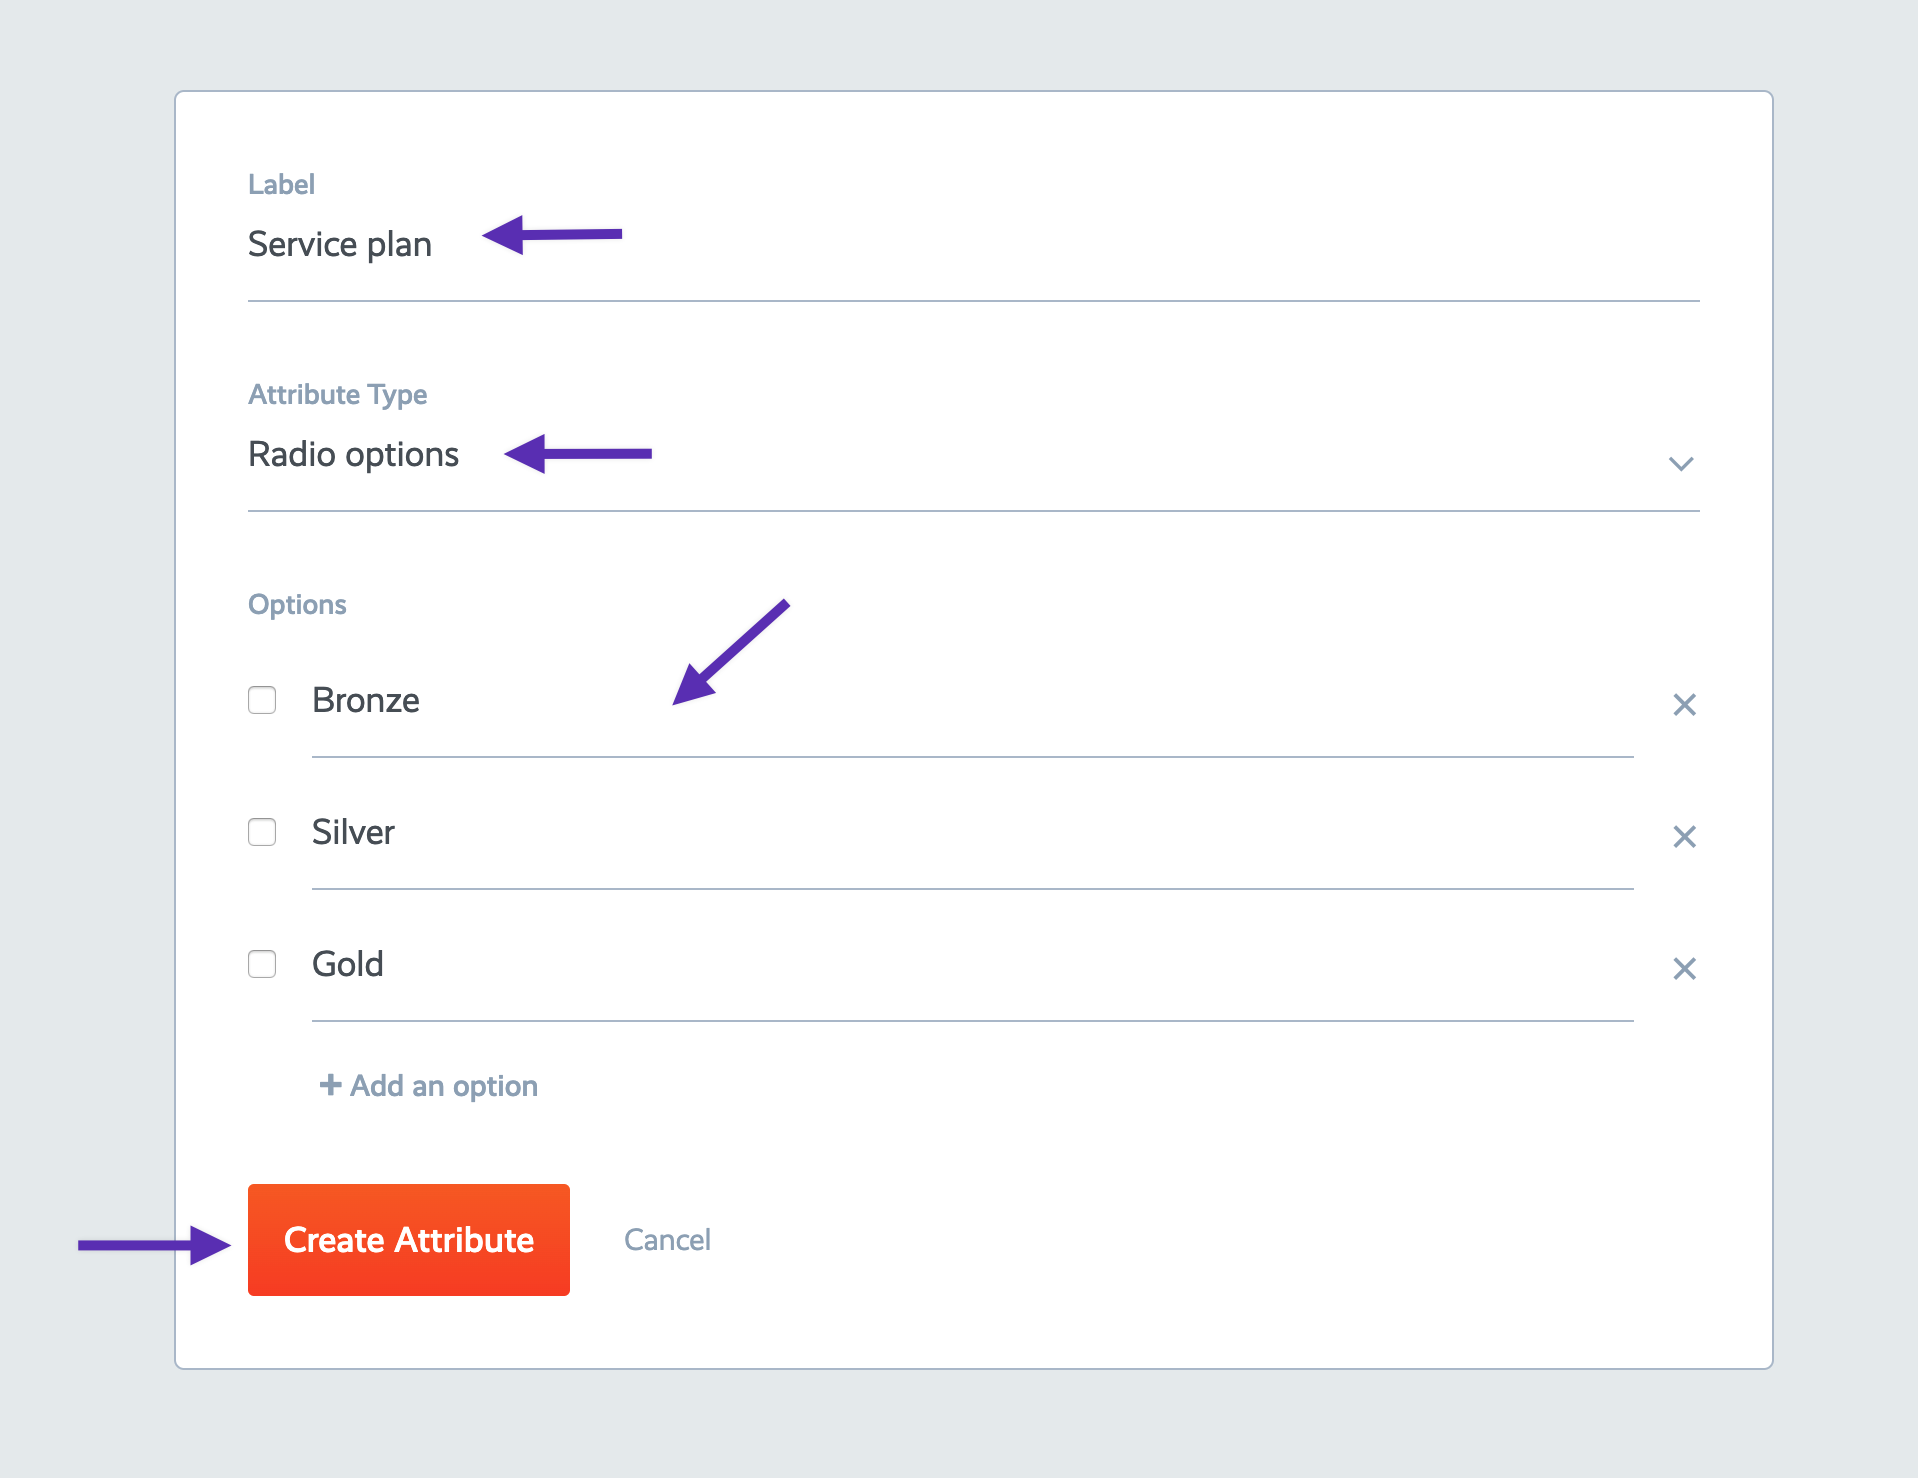
Now let's create a radio selection where we can specify which of our service plans the client has purchased. Call this one "Service plan" and select "Radio options" as the type.
Then add options for "Bronze", "Silver", and "Gold". (this is just an example)
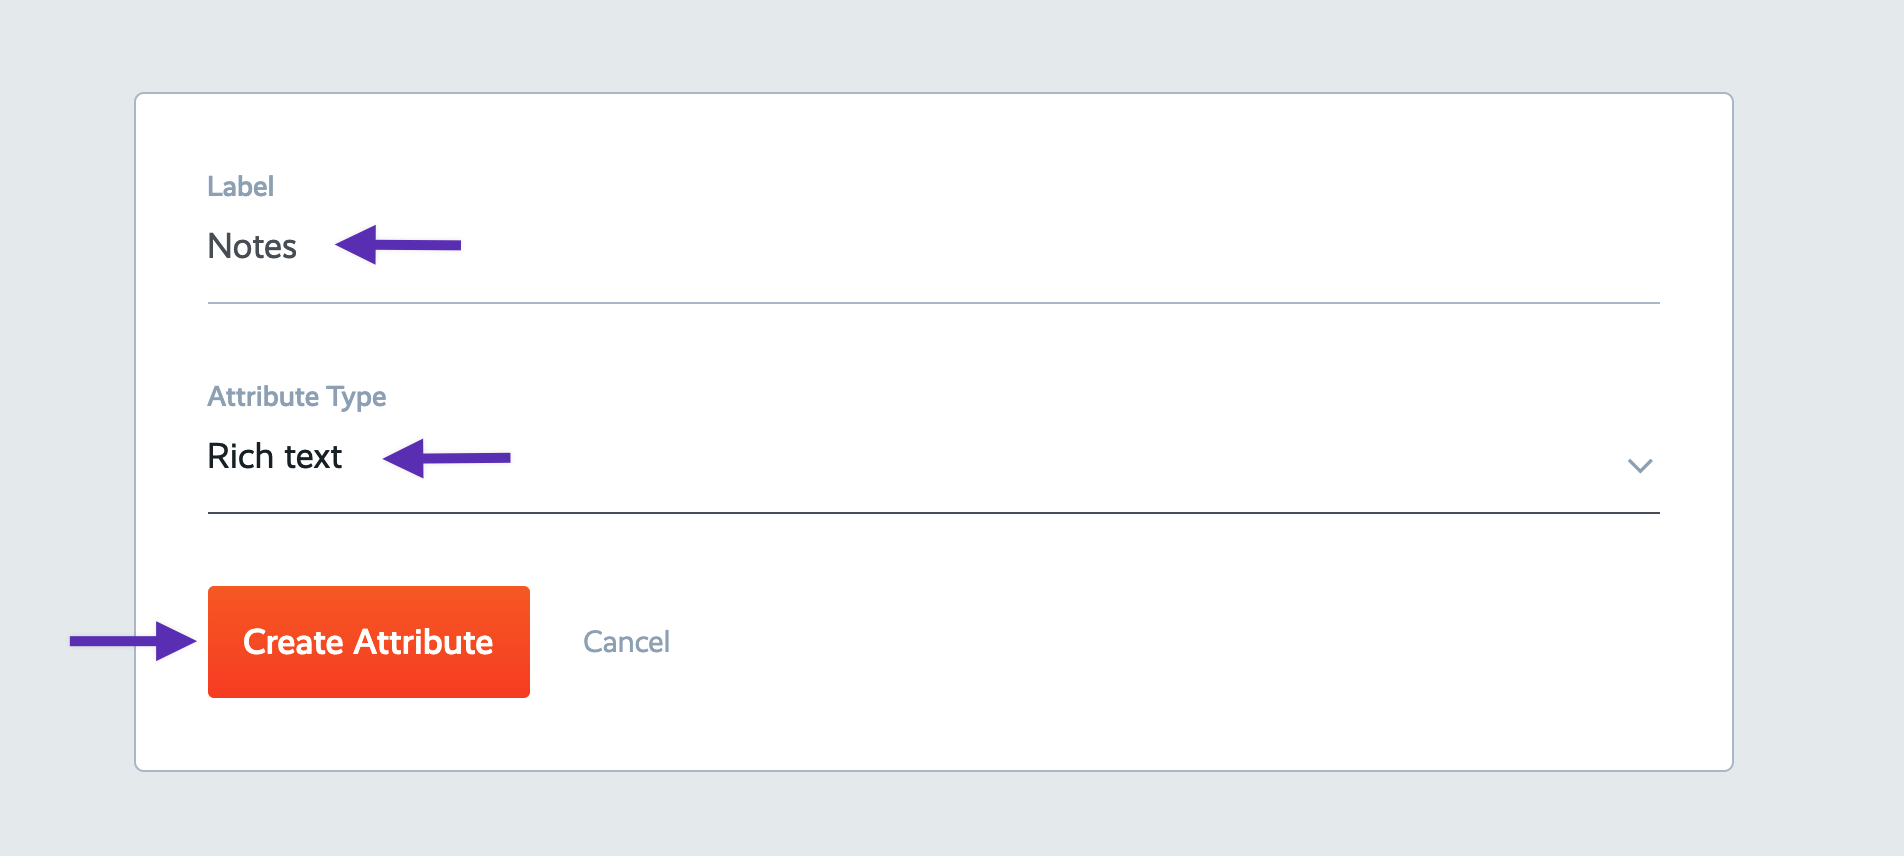
We'll add one more attribute, which we'll use as a place to store miscellaneous notes about this client. Create an attribute called "Notes" and select "Rich Text" as the type. Rich text will allow you to add rich formatting, lists, embedded images, videos, links, etc.
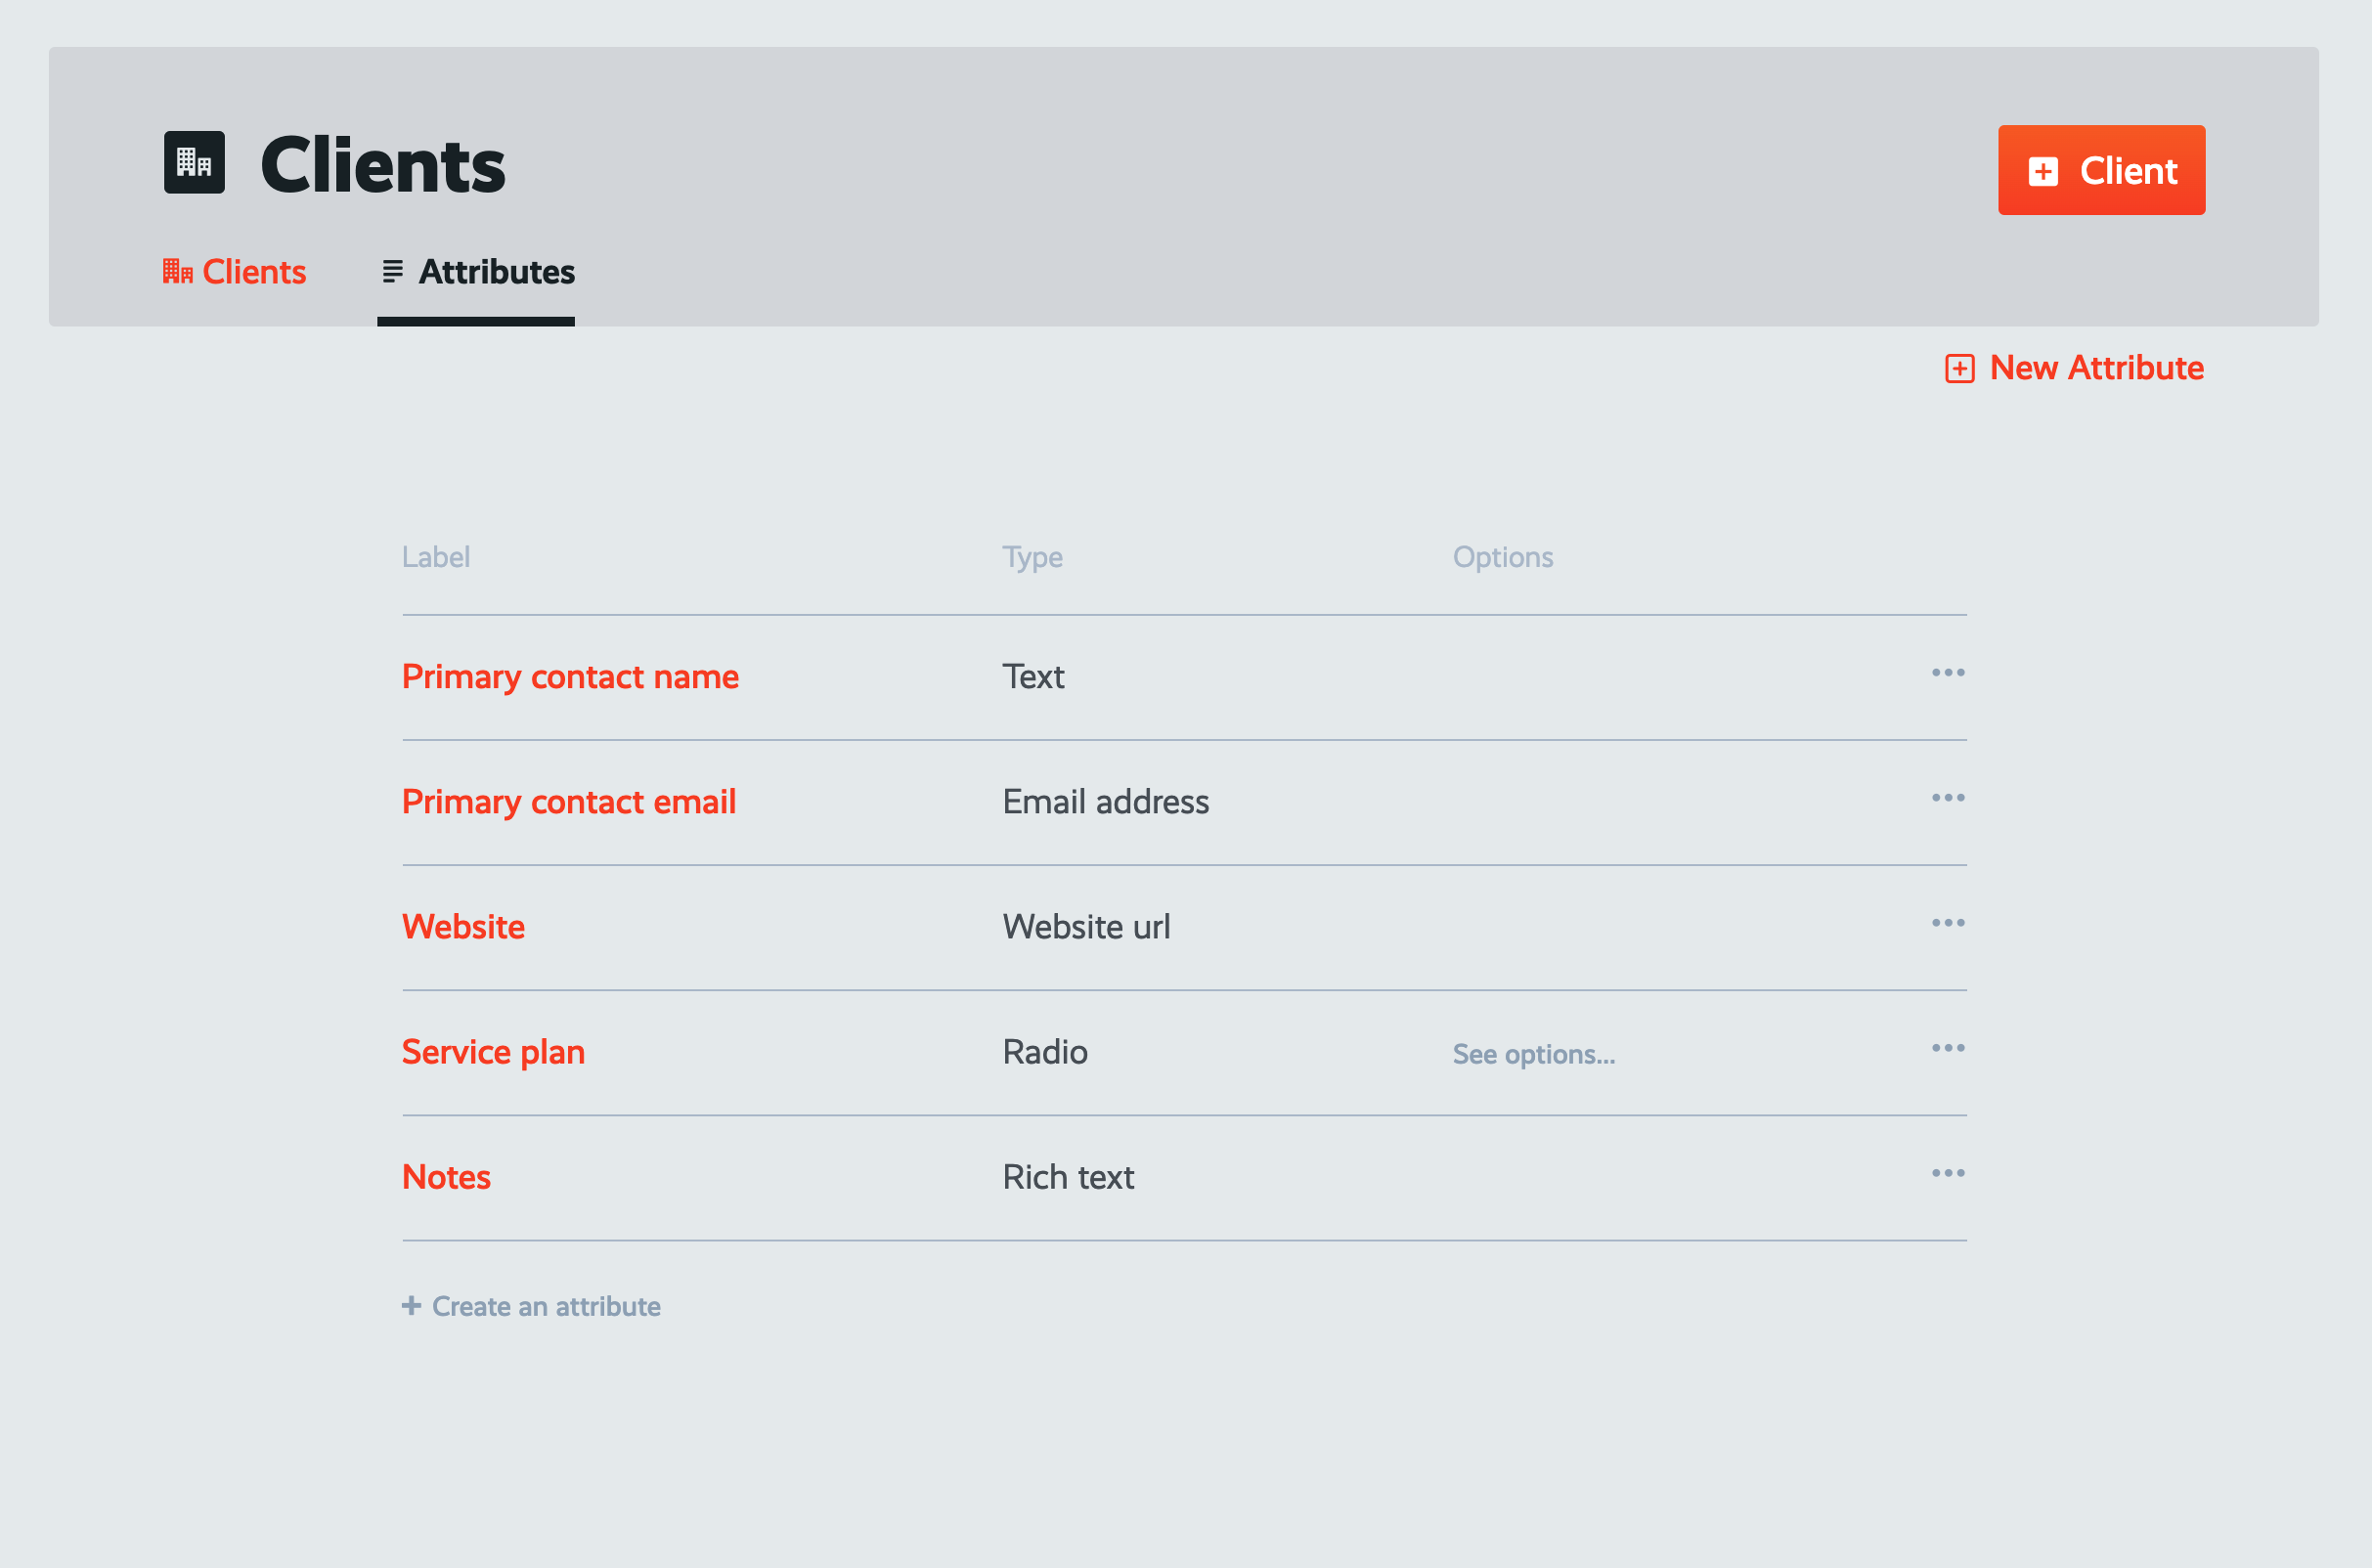
Here's our list of custom client attributes. Here we can reorder them, edit, delete or add more in the future:
Let's go ahead and create our first client. Click the "+ Client" button. Fill in all of the attributes for this first client. If you have their logo handy, upload that as well. When finished, click "Create Client".
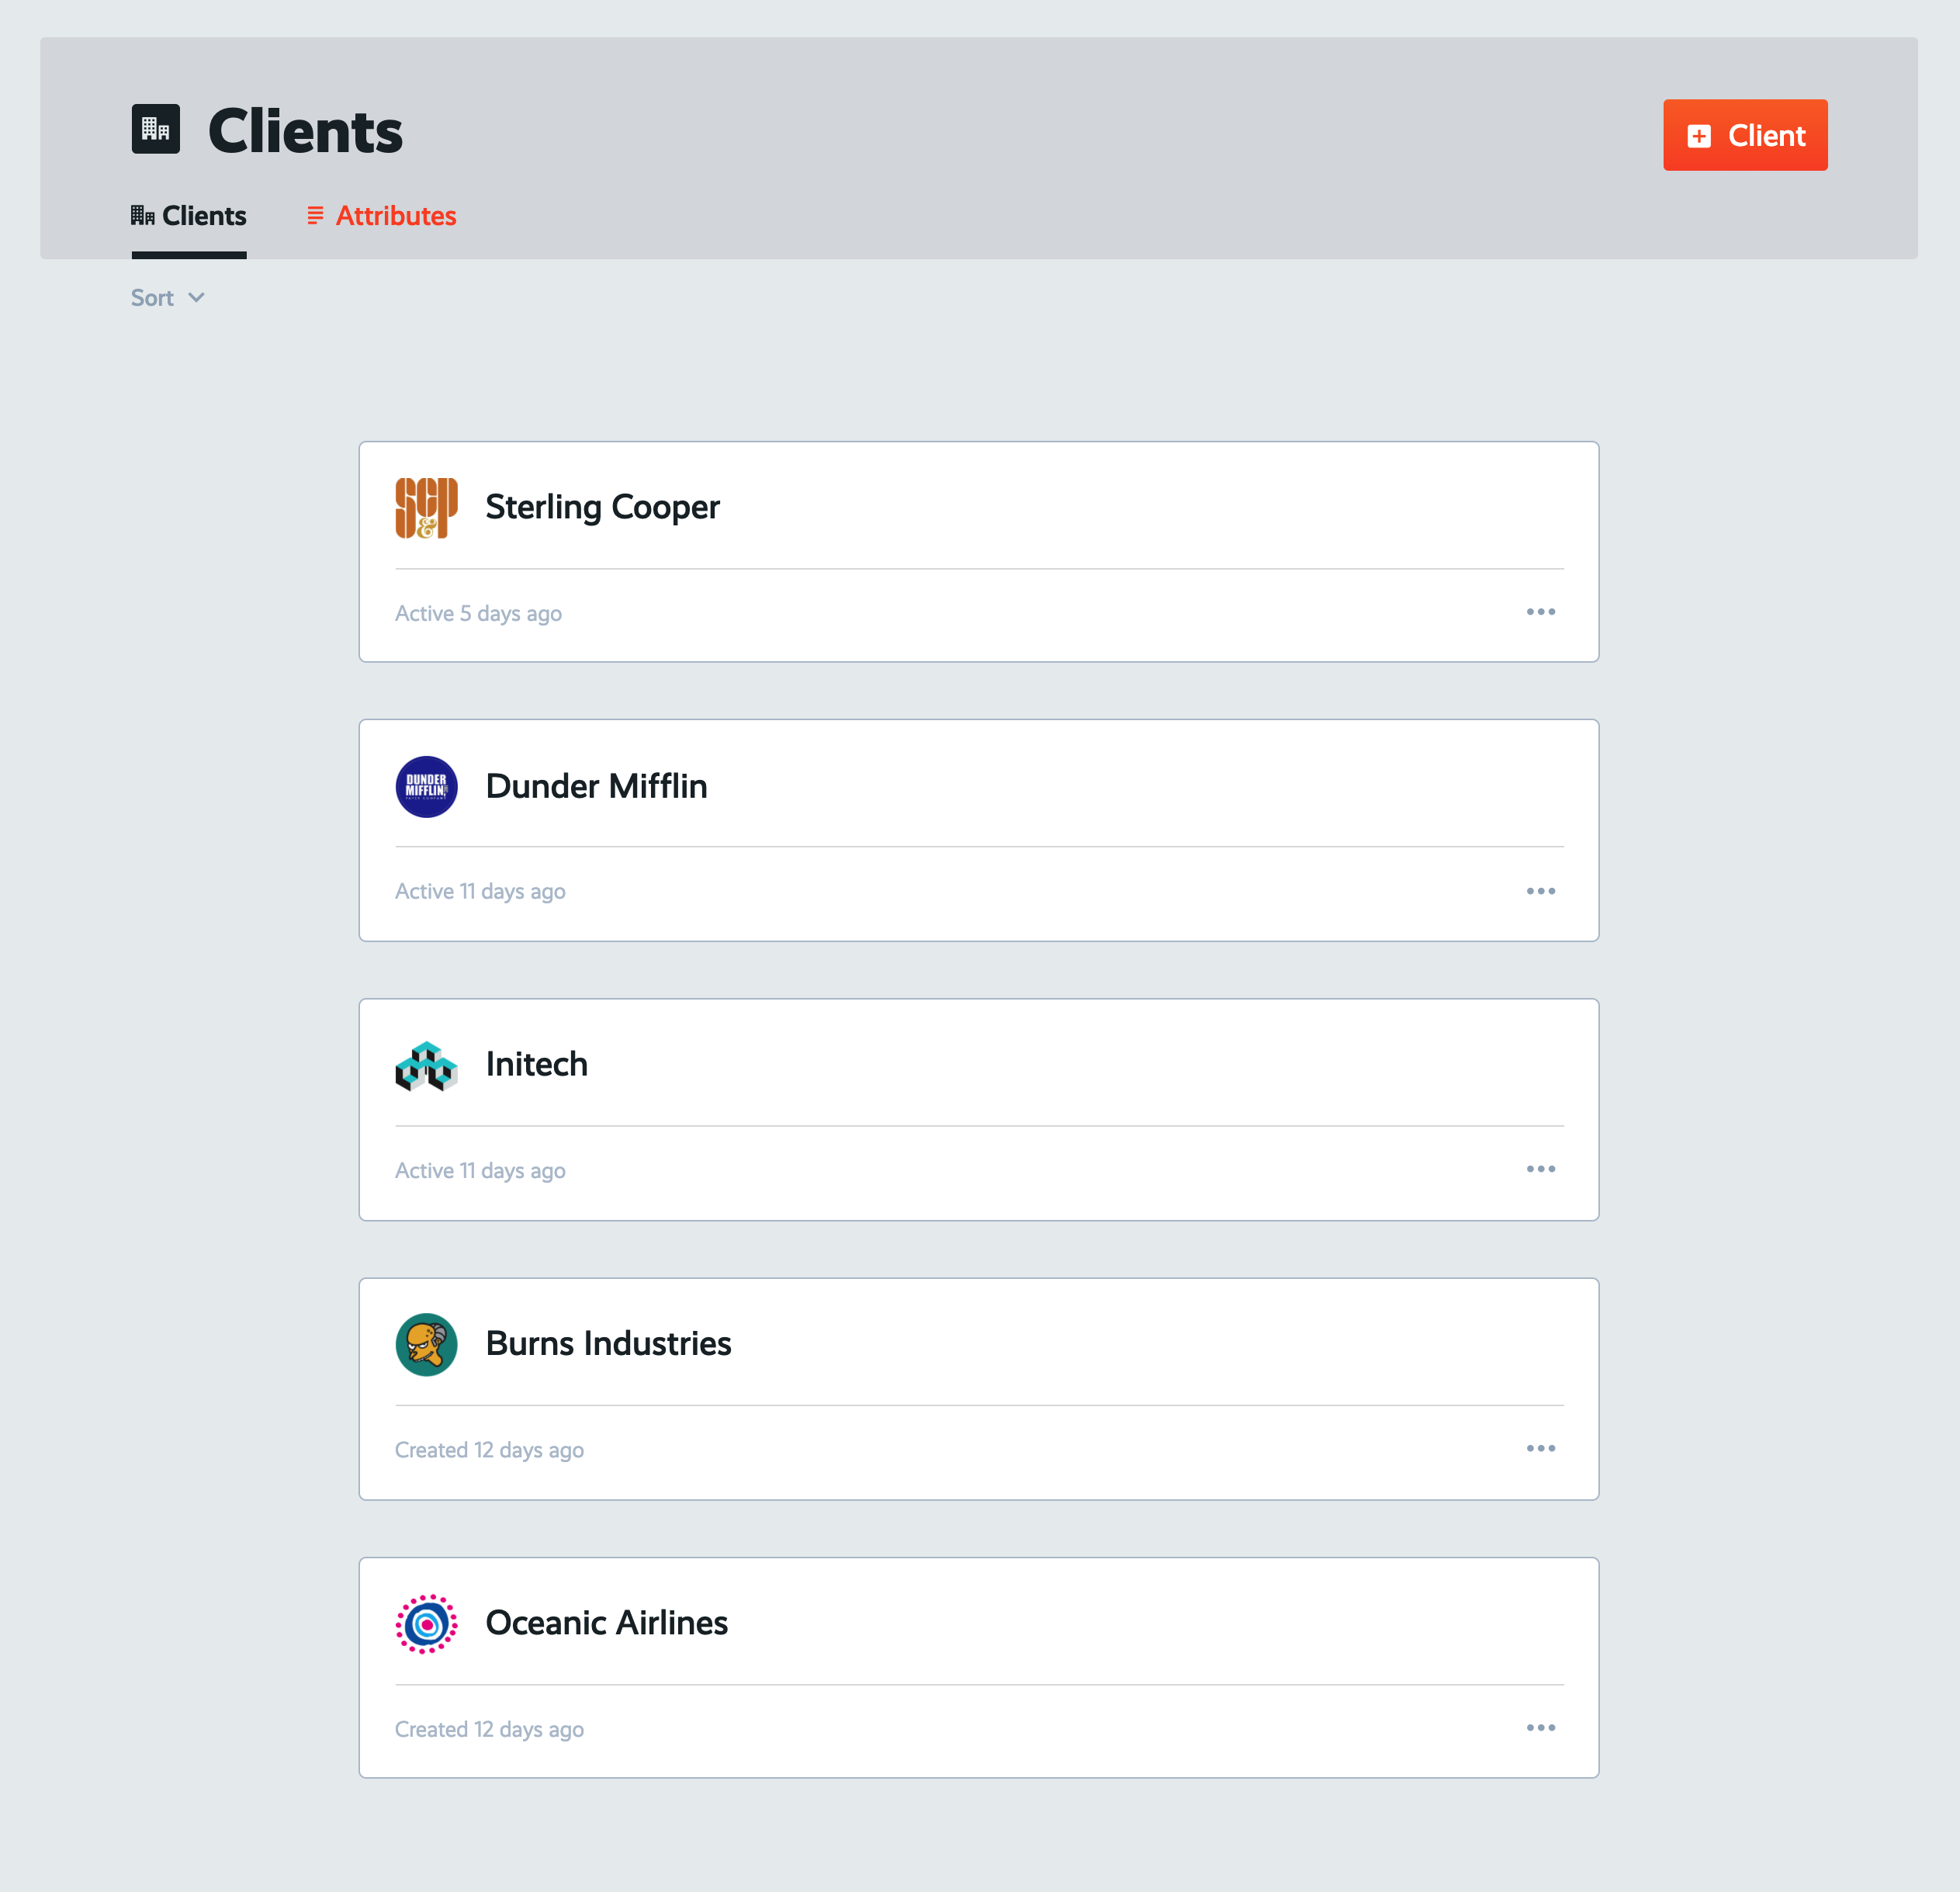
Go ahead and create a few more clients, each with different client attributes. When finished, you should see your list of clients shown like this:
Managing client deliverable projects
During the lifetime of a client engagement, you'll likely work on many different projects with all sorts of deliverables for this particular client. Oftentimes, these will be recurring projects, especially if you offer retainer-based services.
Associating clients with the individual projects you're doing for those clients is essential for keeping things organized, and for ensuring your processes can adapt to each project depending on which client it's for and their attributes.
How to associate projects with clients in ProcessKit
I have gone ahead and created a brand new board called "Marketing Campaigns". I have also created several "Campaign" projects within this board. Here's a look at this new board:
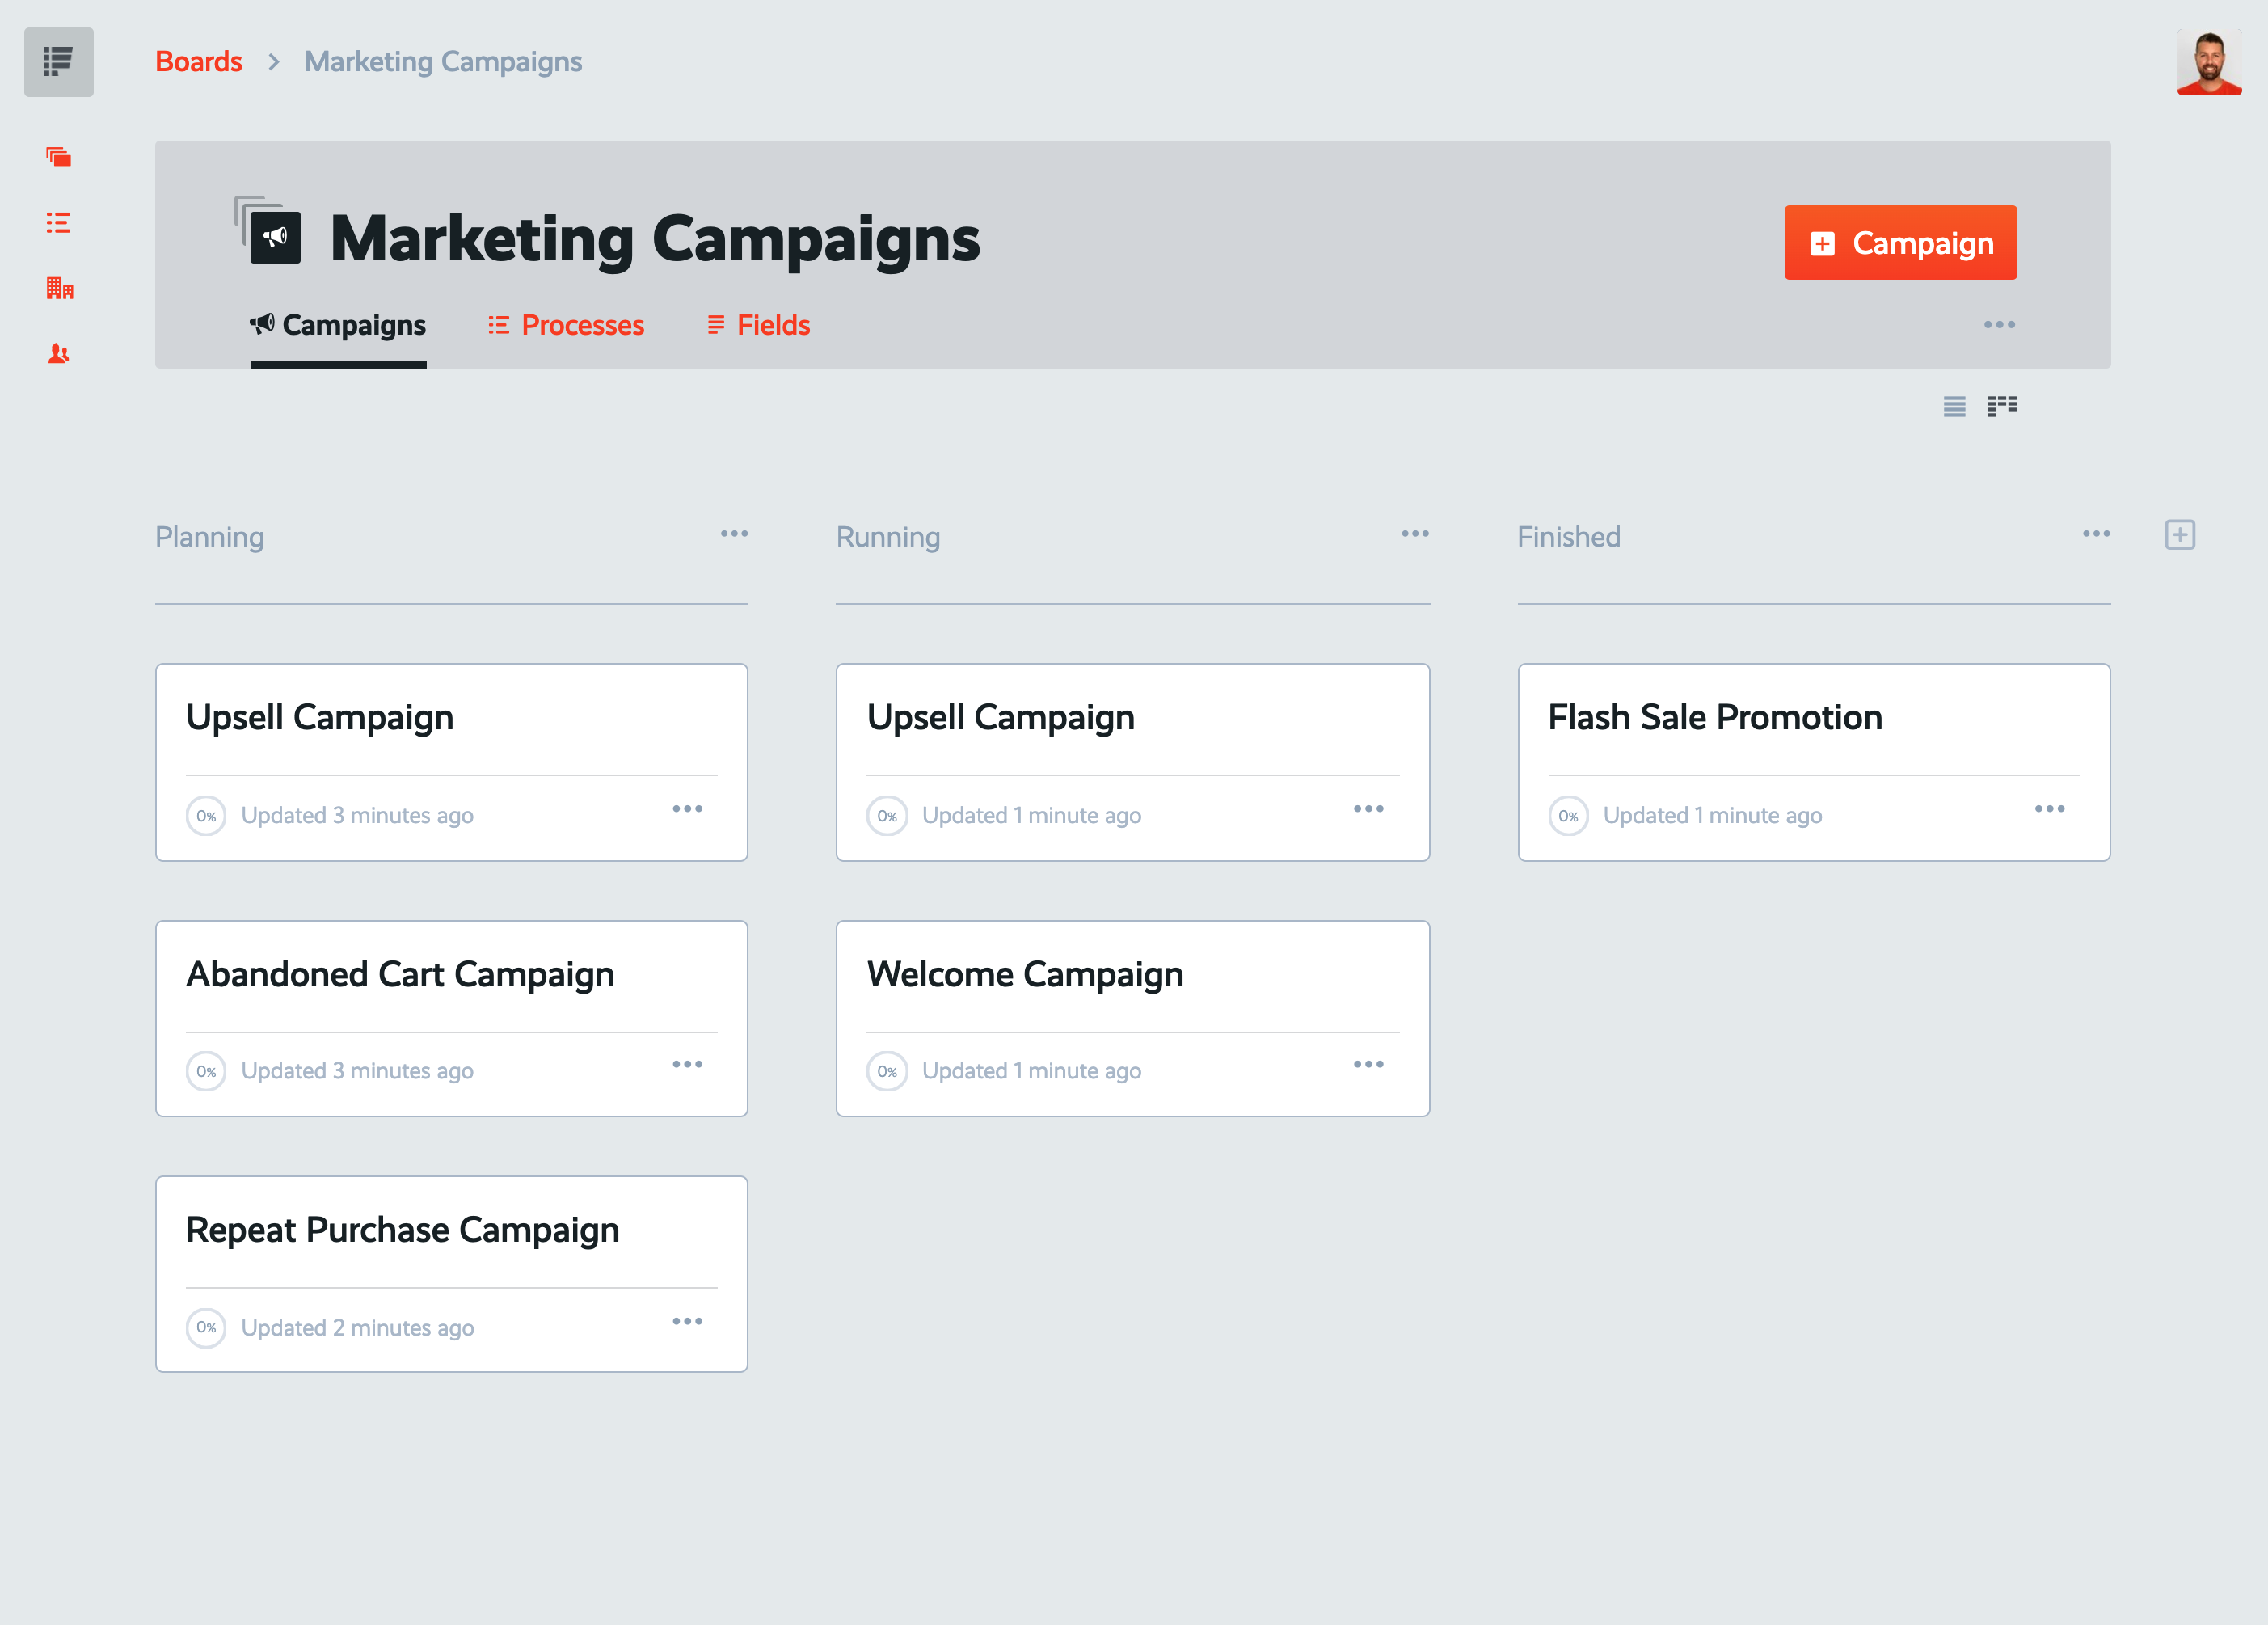
The projects in this board are marketing campaigns that we're creating on behalf of our clients. So naturally, we'll want to be able to see which campaigns are for which clients.
Here's how to associate each project with a client:
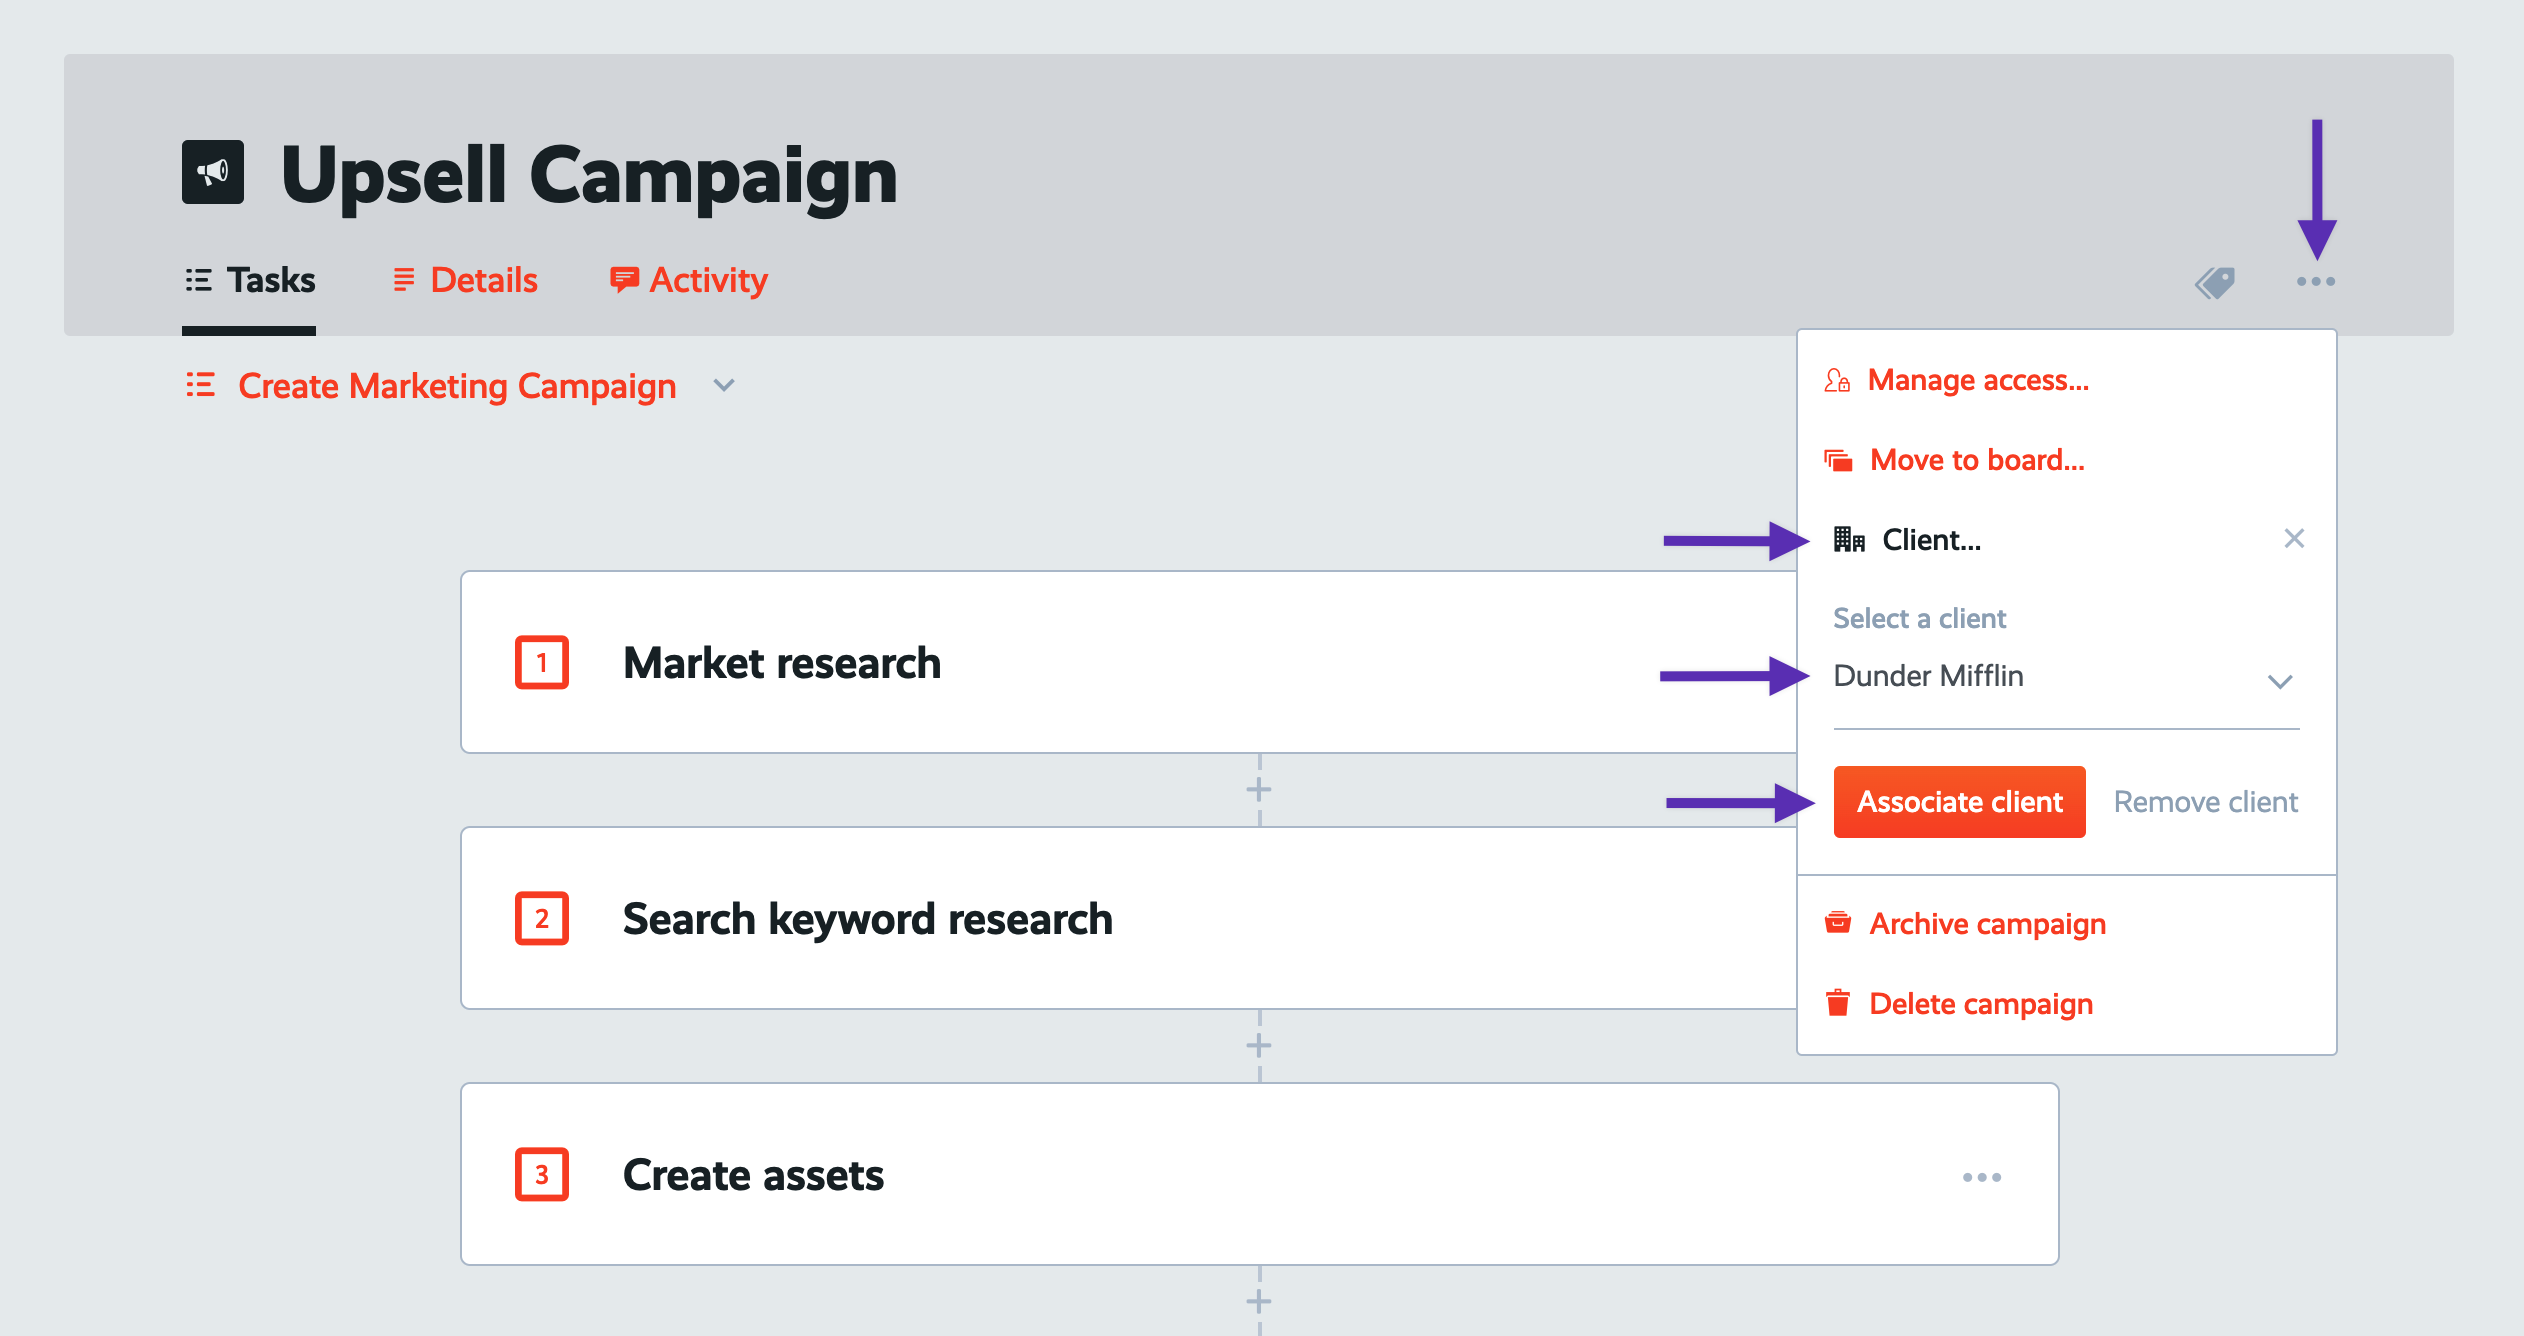
Open up one of the projects in this board, then open this project's settings, then click "Client...". Select a client, then click "Associate Client".
After you've associated a client with a project, you will a new tab appear on this project, labeled using this client's name (and their logo, if you added it):
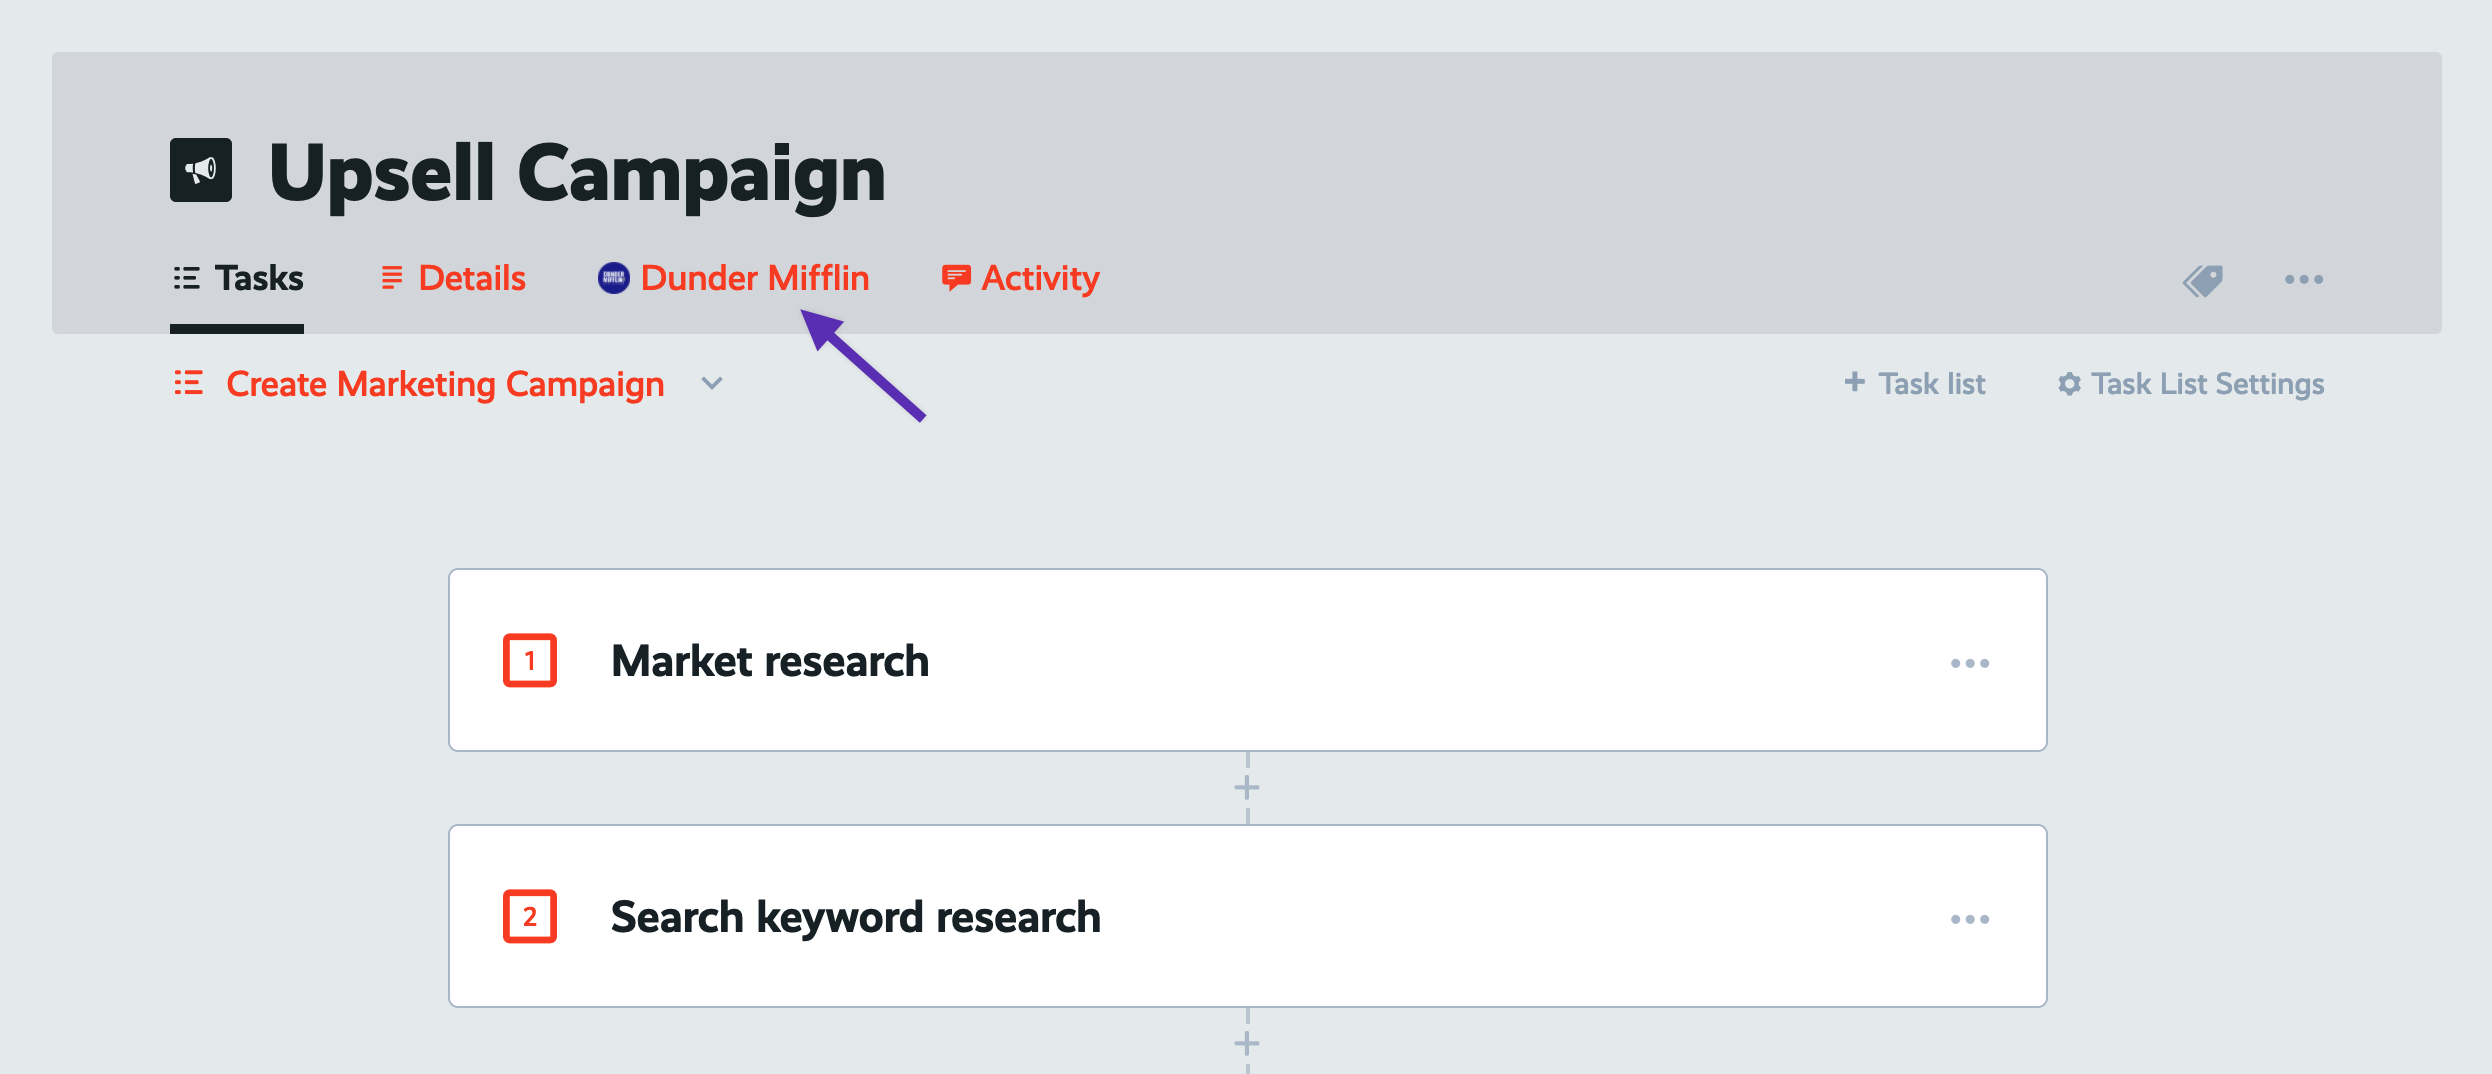
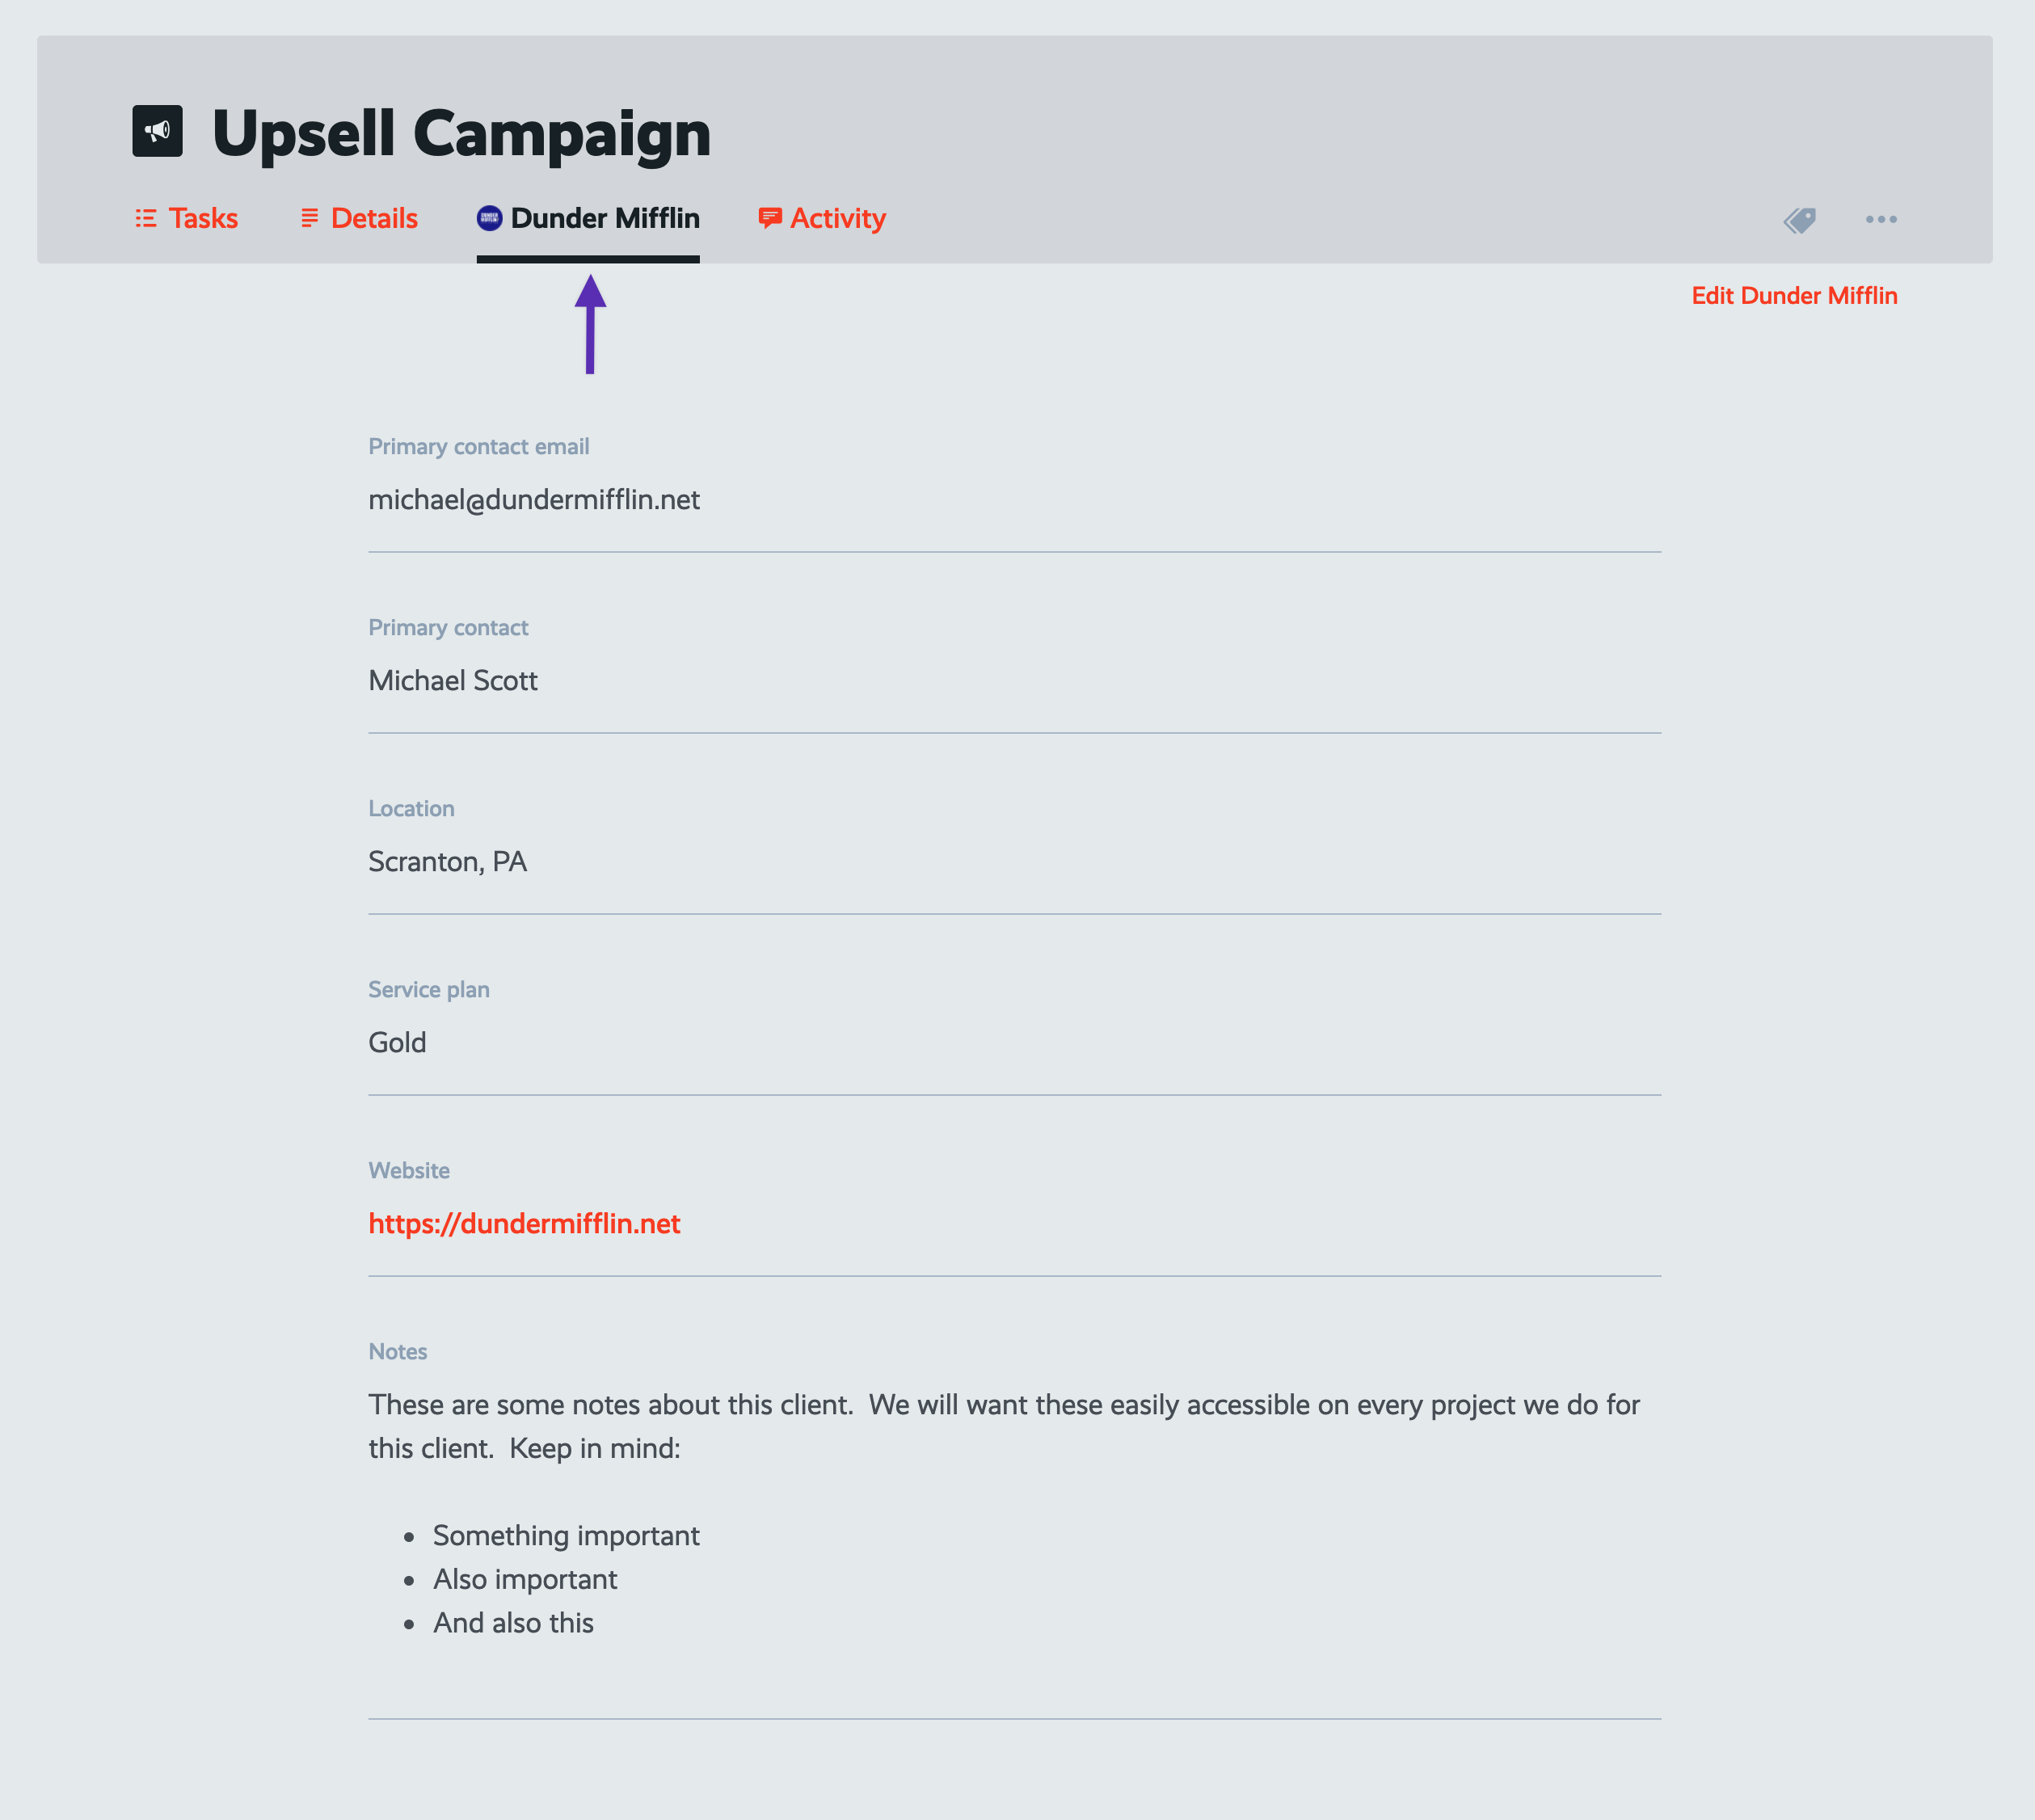
Click that client tab on this project to see all of this client's attribute information. That's right: Anytime you're working on a project for a client, you have easy access to that client's information. No need to go hunt for it elsewhere!
Now go ahead and open each of the other projects in this board, and associate the appropriate client to each.
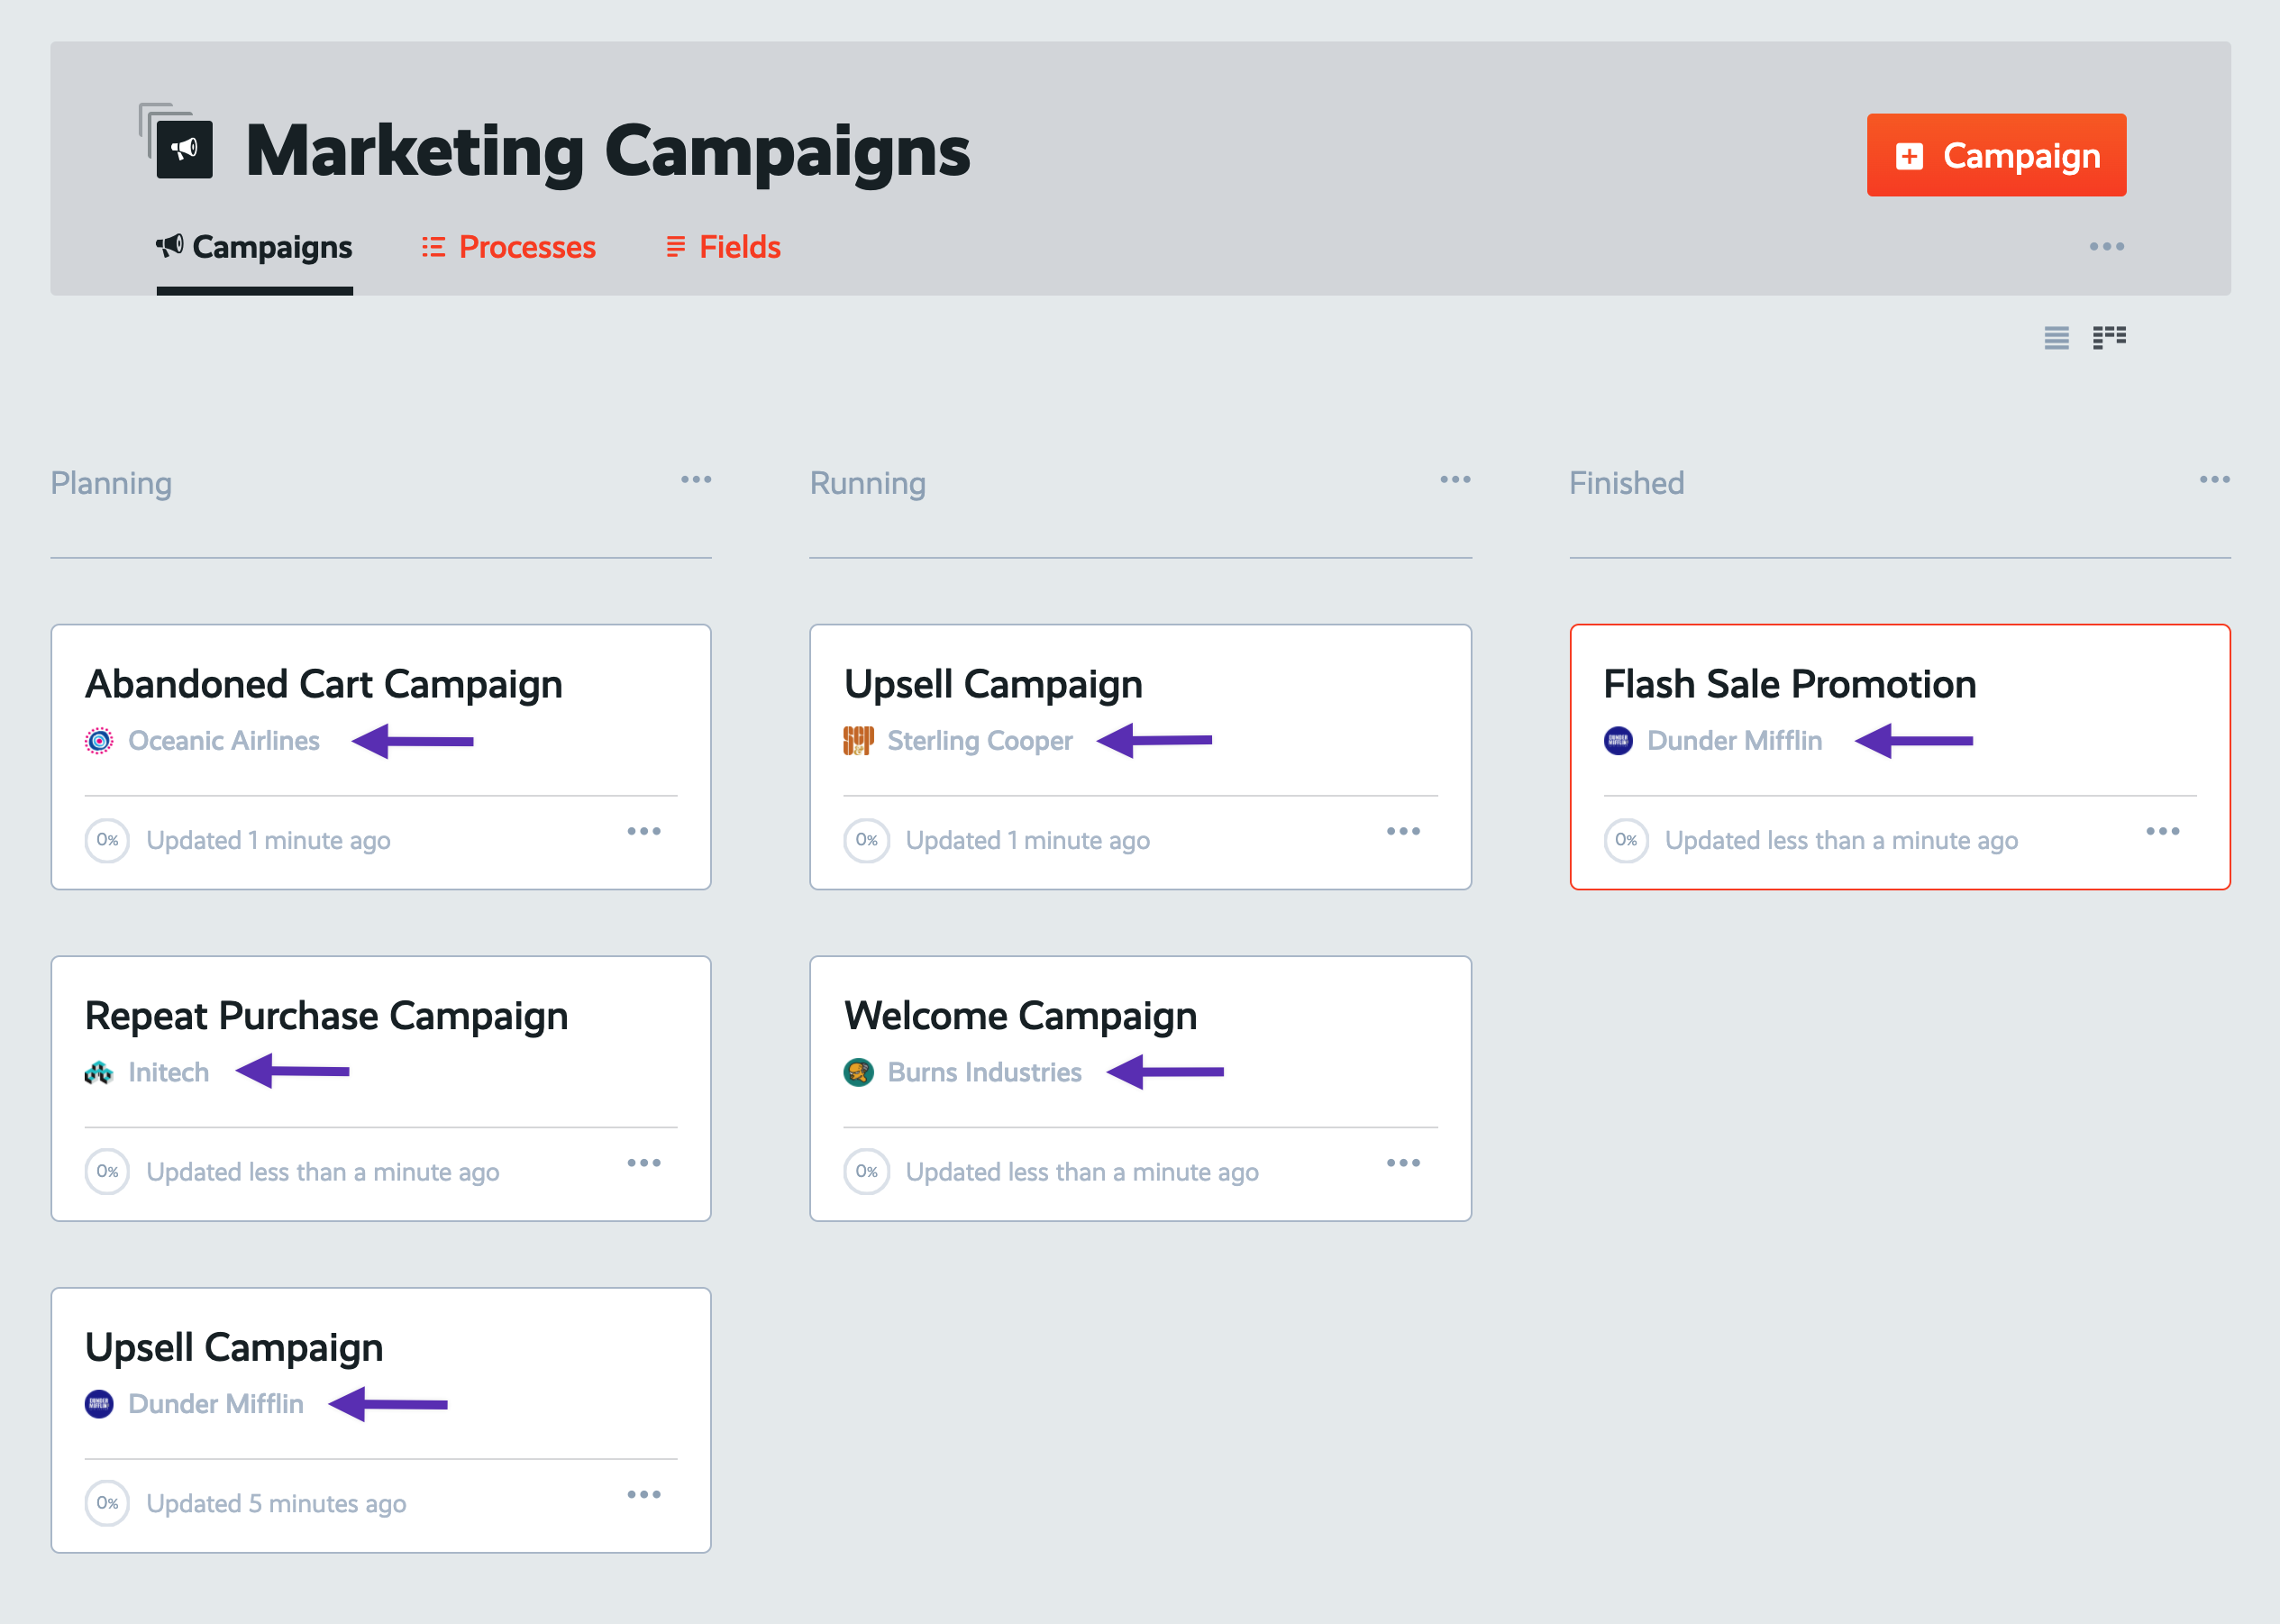
When you're finished, view your board again. Notice how the projects in this board now display the client that they're for.
How to filter your projects by a client in ProcessKit
There are two different ways to filter your projects by which client they're for.
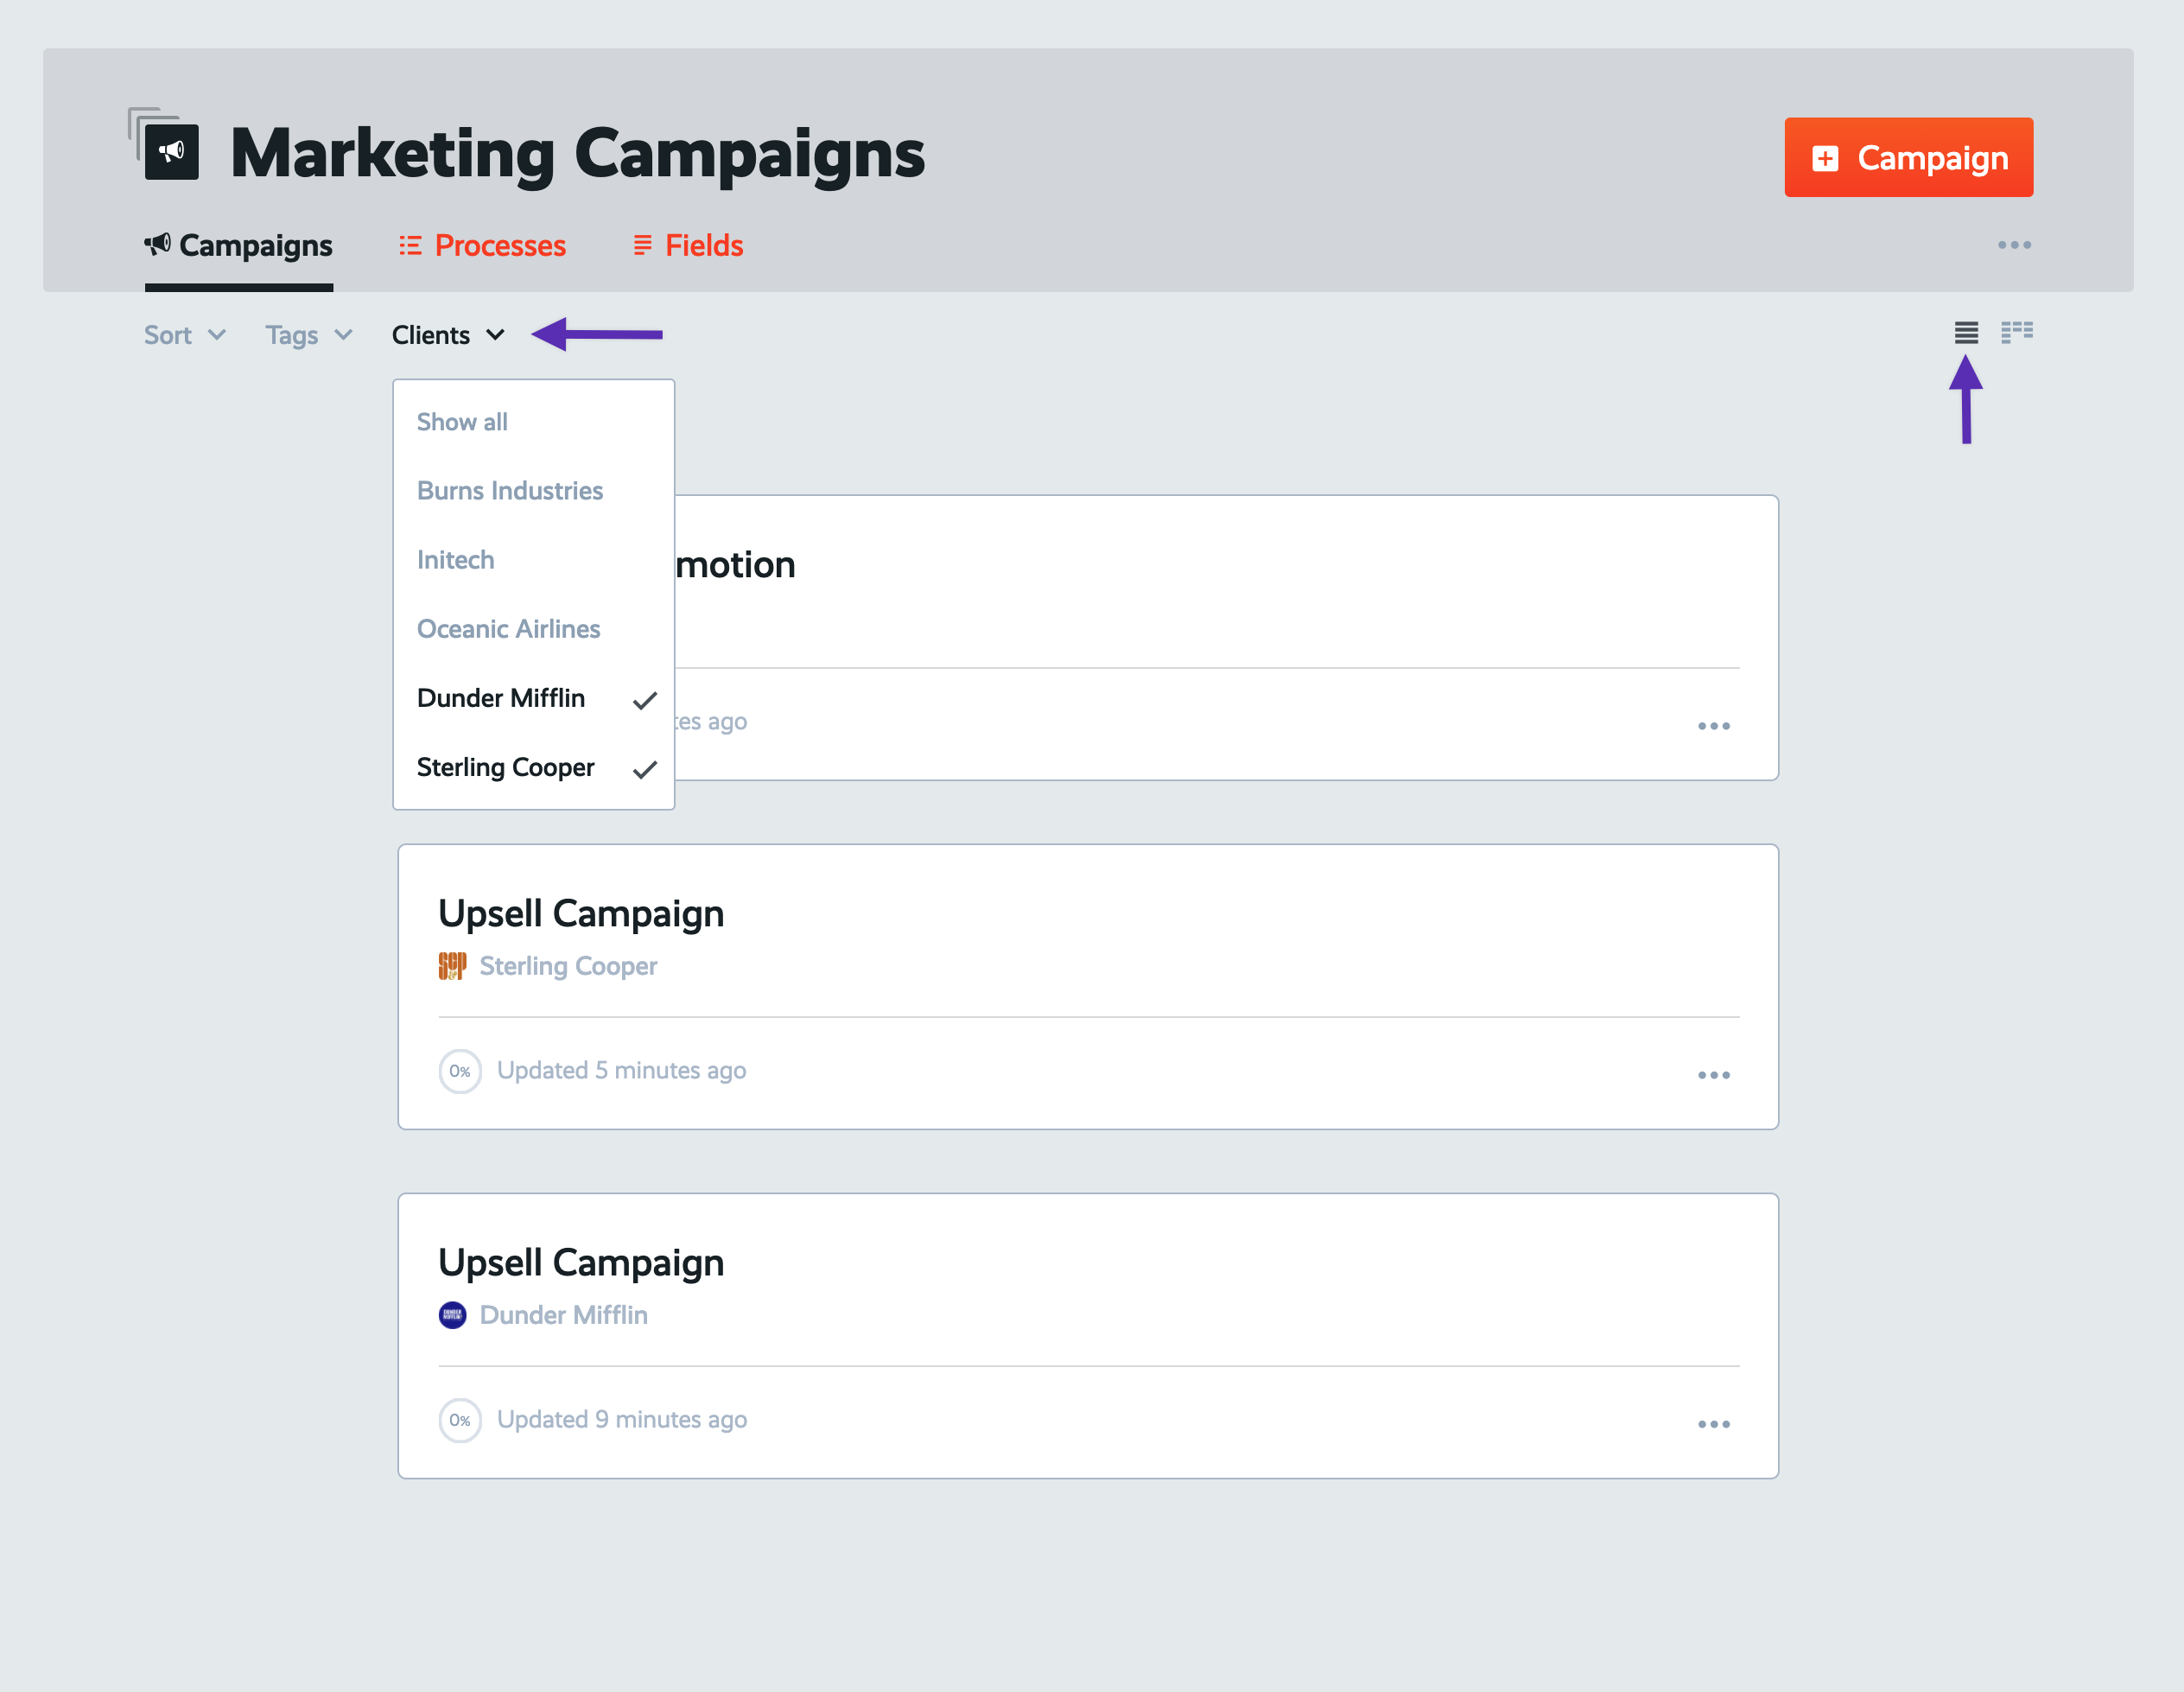
The first is here in the board view. If you switch to list mode, you can use the "Client" filter dropdown to select the client(s) to filter this list by.
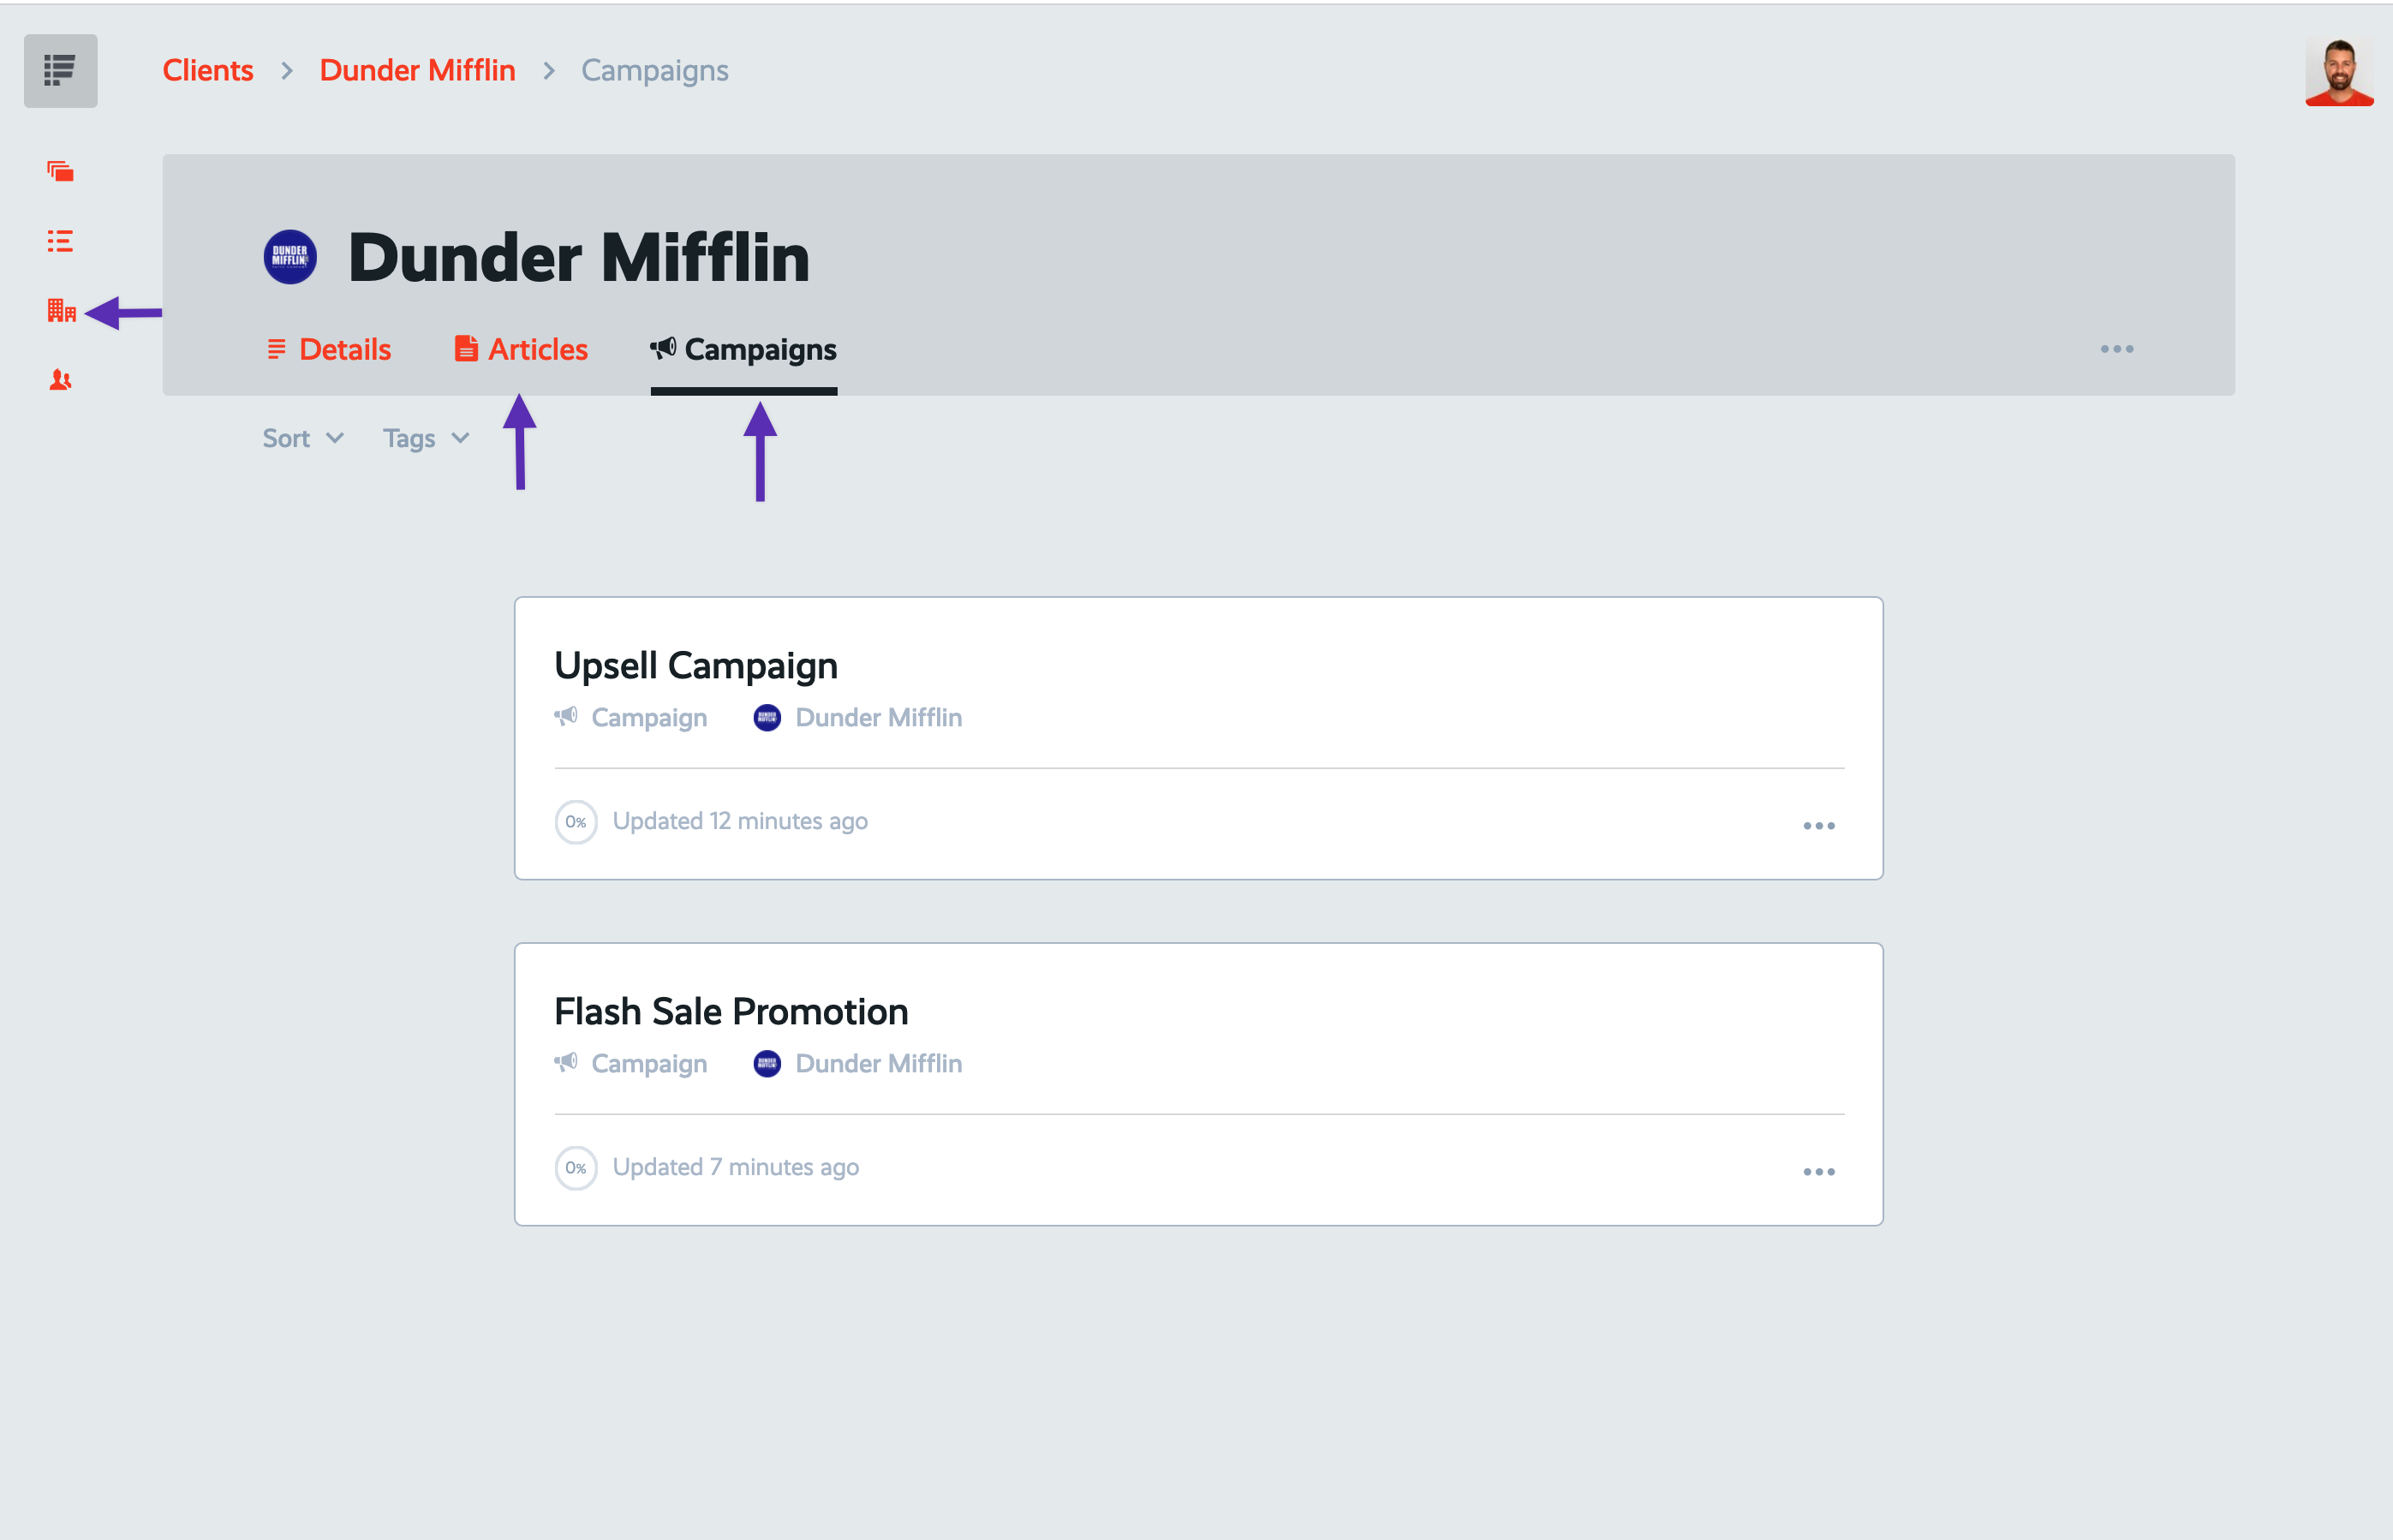
The other way to go back to your clients list and view a single client. Across the top are tab(s), each representing a board that this project has at least one project.
In my example here, our client "Dunder Mifflin" has a few "Campaign" projects and a few "Article" projects.
Automating tasks based on which client the work is for
Associating projects with clients does wonders for organizing your client work.
But we can take this a step further. What if you could automate your tasks based on which client the current project is for?
With "smart" processes and conditional logic in ProcessKit, you certainly can :)
Here's an example: Your marketing service offers a few levels of service packages: "Bronze", "Silver" and "Gold".
When a client has purchased the "Bronze" or "Silver" packages, then your team should only create image-based marketing assets for them. But if they've upgraded to your "Gold" package, then your team will also create video-based marketing assets.
You could create two versions of your marketing campaign process, one for "Gold"-level clients, and one for other clients, and maybe manage these in separate boards. But that's a lot of duplication and it's too much to manage.
Here's how we can stick to using our single marketing process, but make it adapt in a smart way based on the clients' current service package.
How to automate tasks based on client attributes in ProcessKit
I created a simple process called "Create Marketing Campaign". Notice step 4, "Create video-based assets":
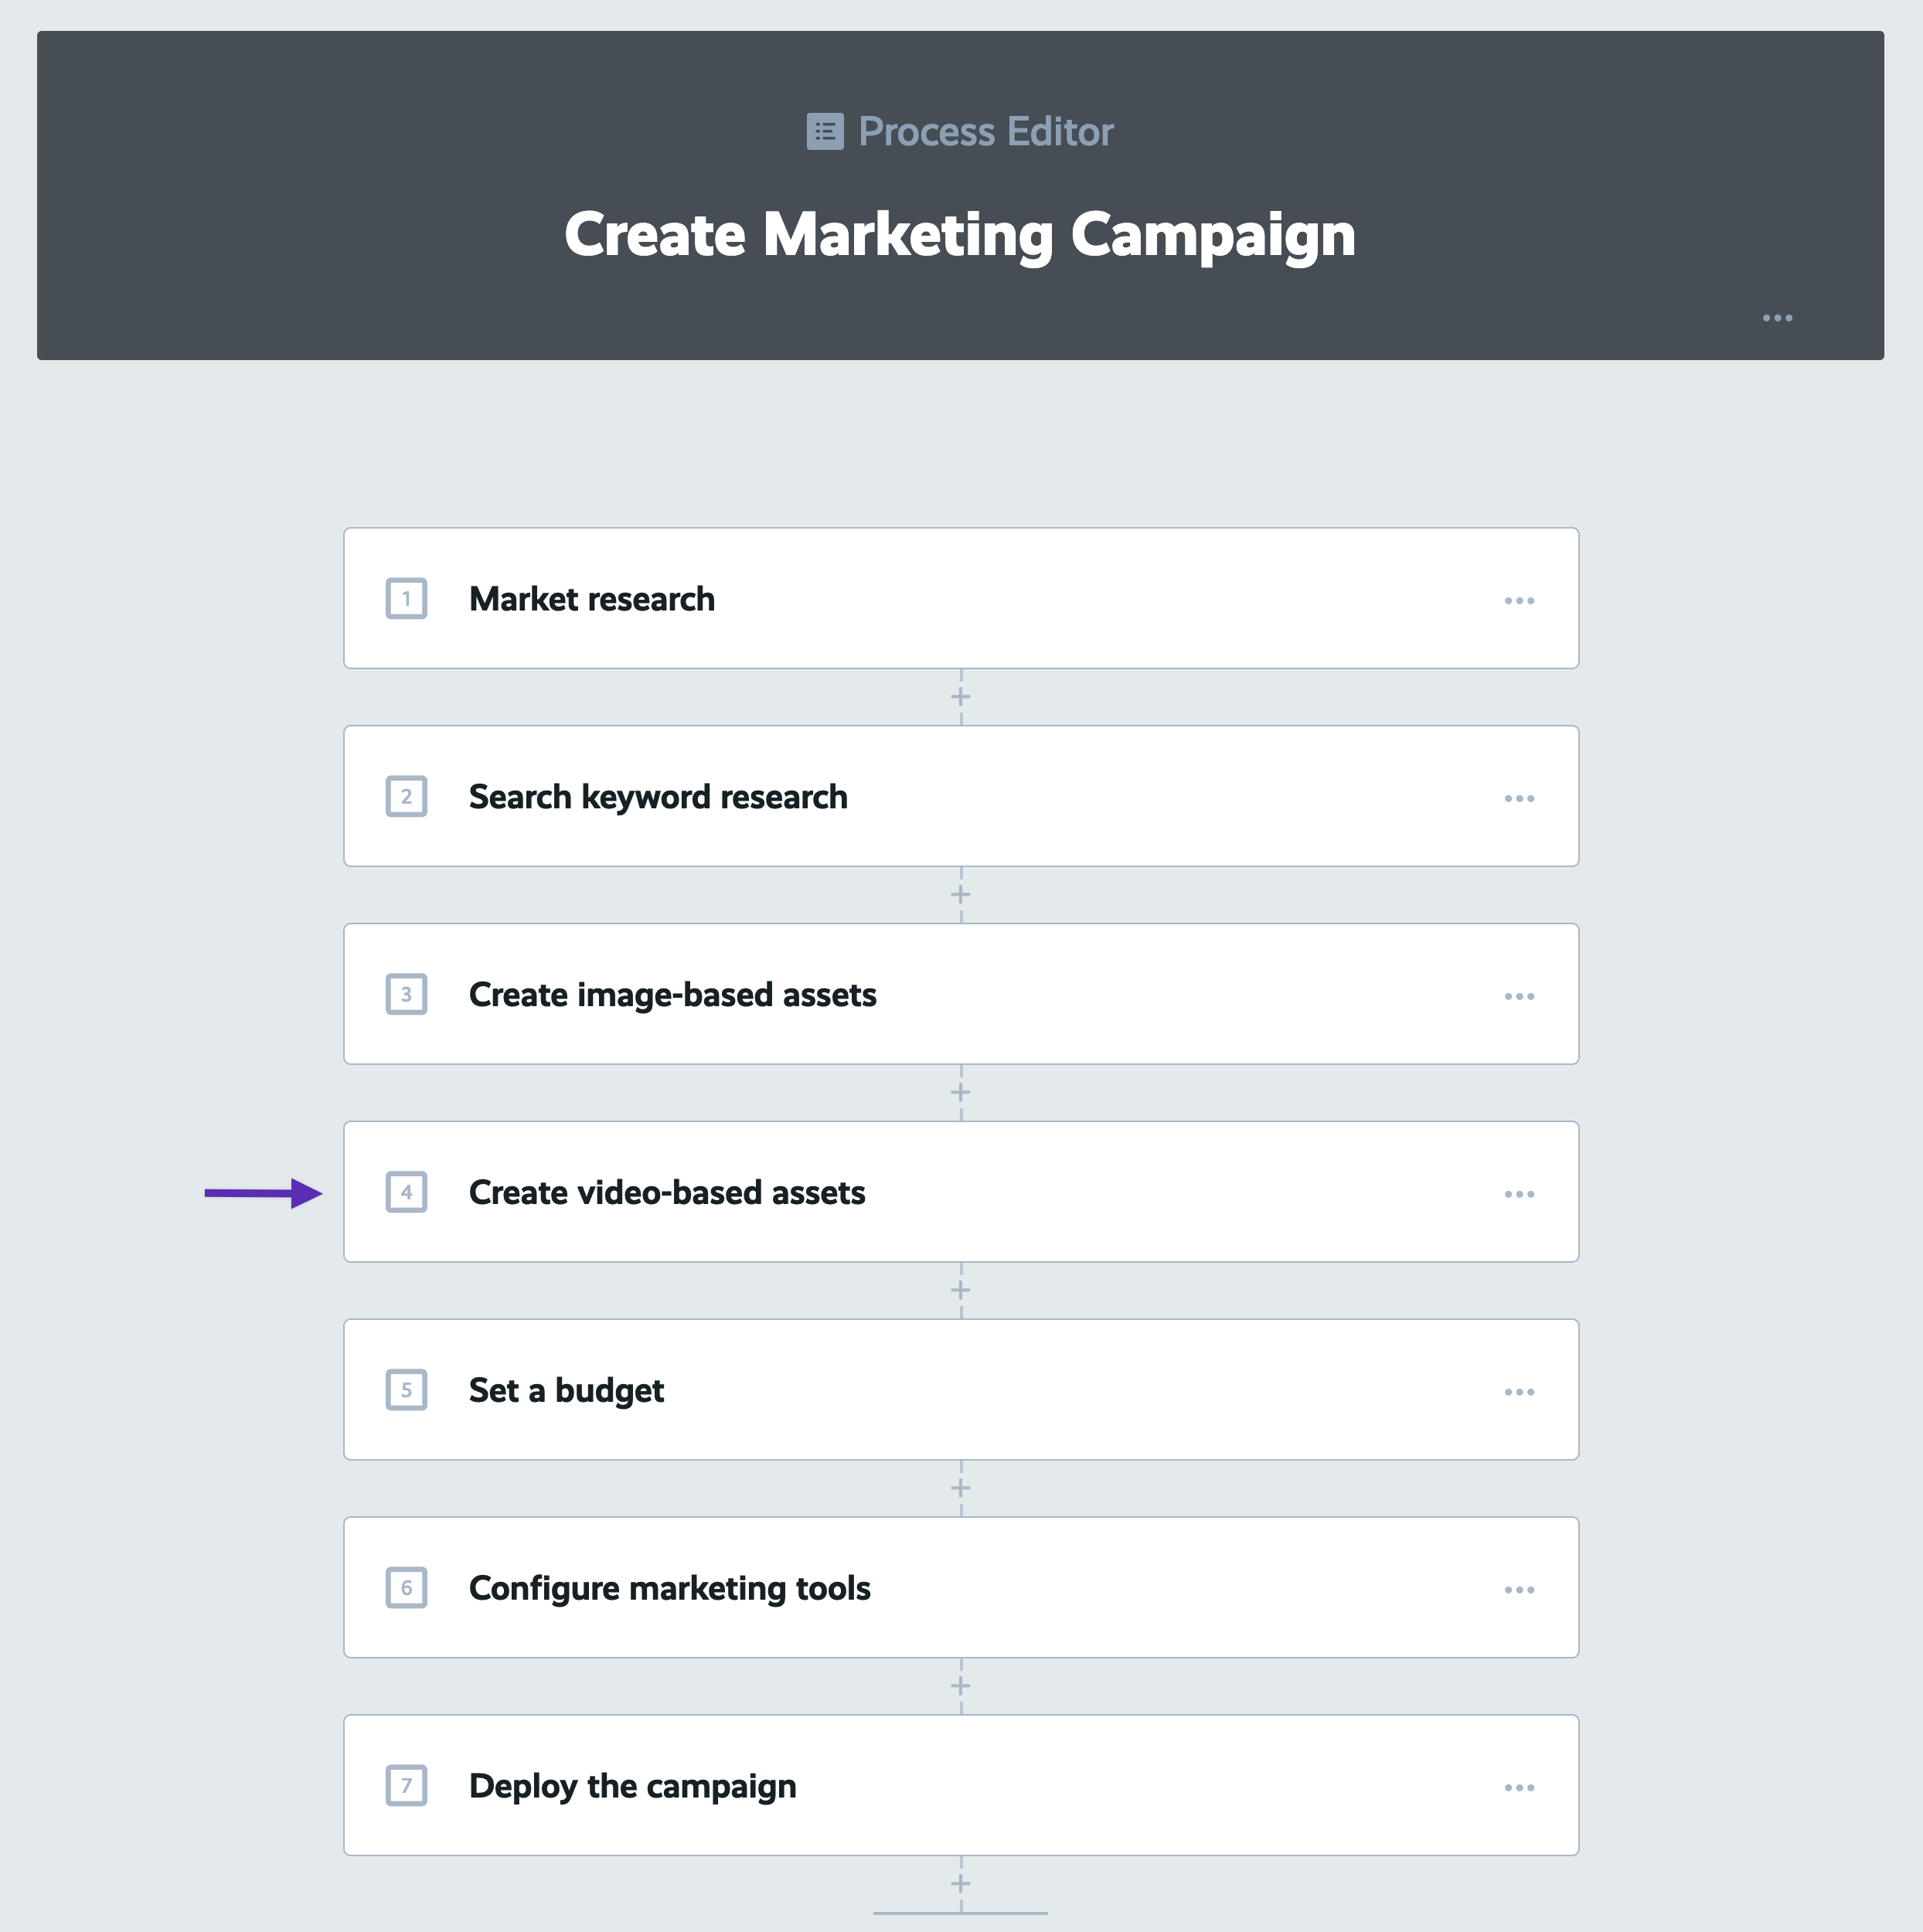
We don't want step 4 to be used on all on every marketing campaign project, right? We only want it to be used when we're creating a marketing campaign for a "Gold"-level client because only they've paid for that extra part of our service.
So let's set that up using a visibility rule.
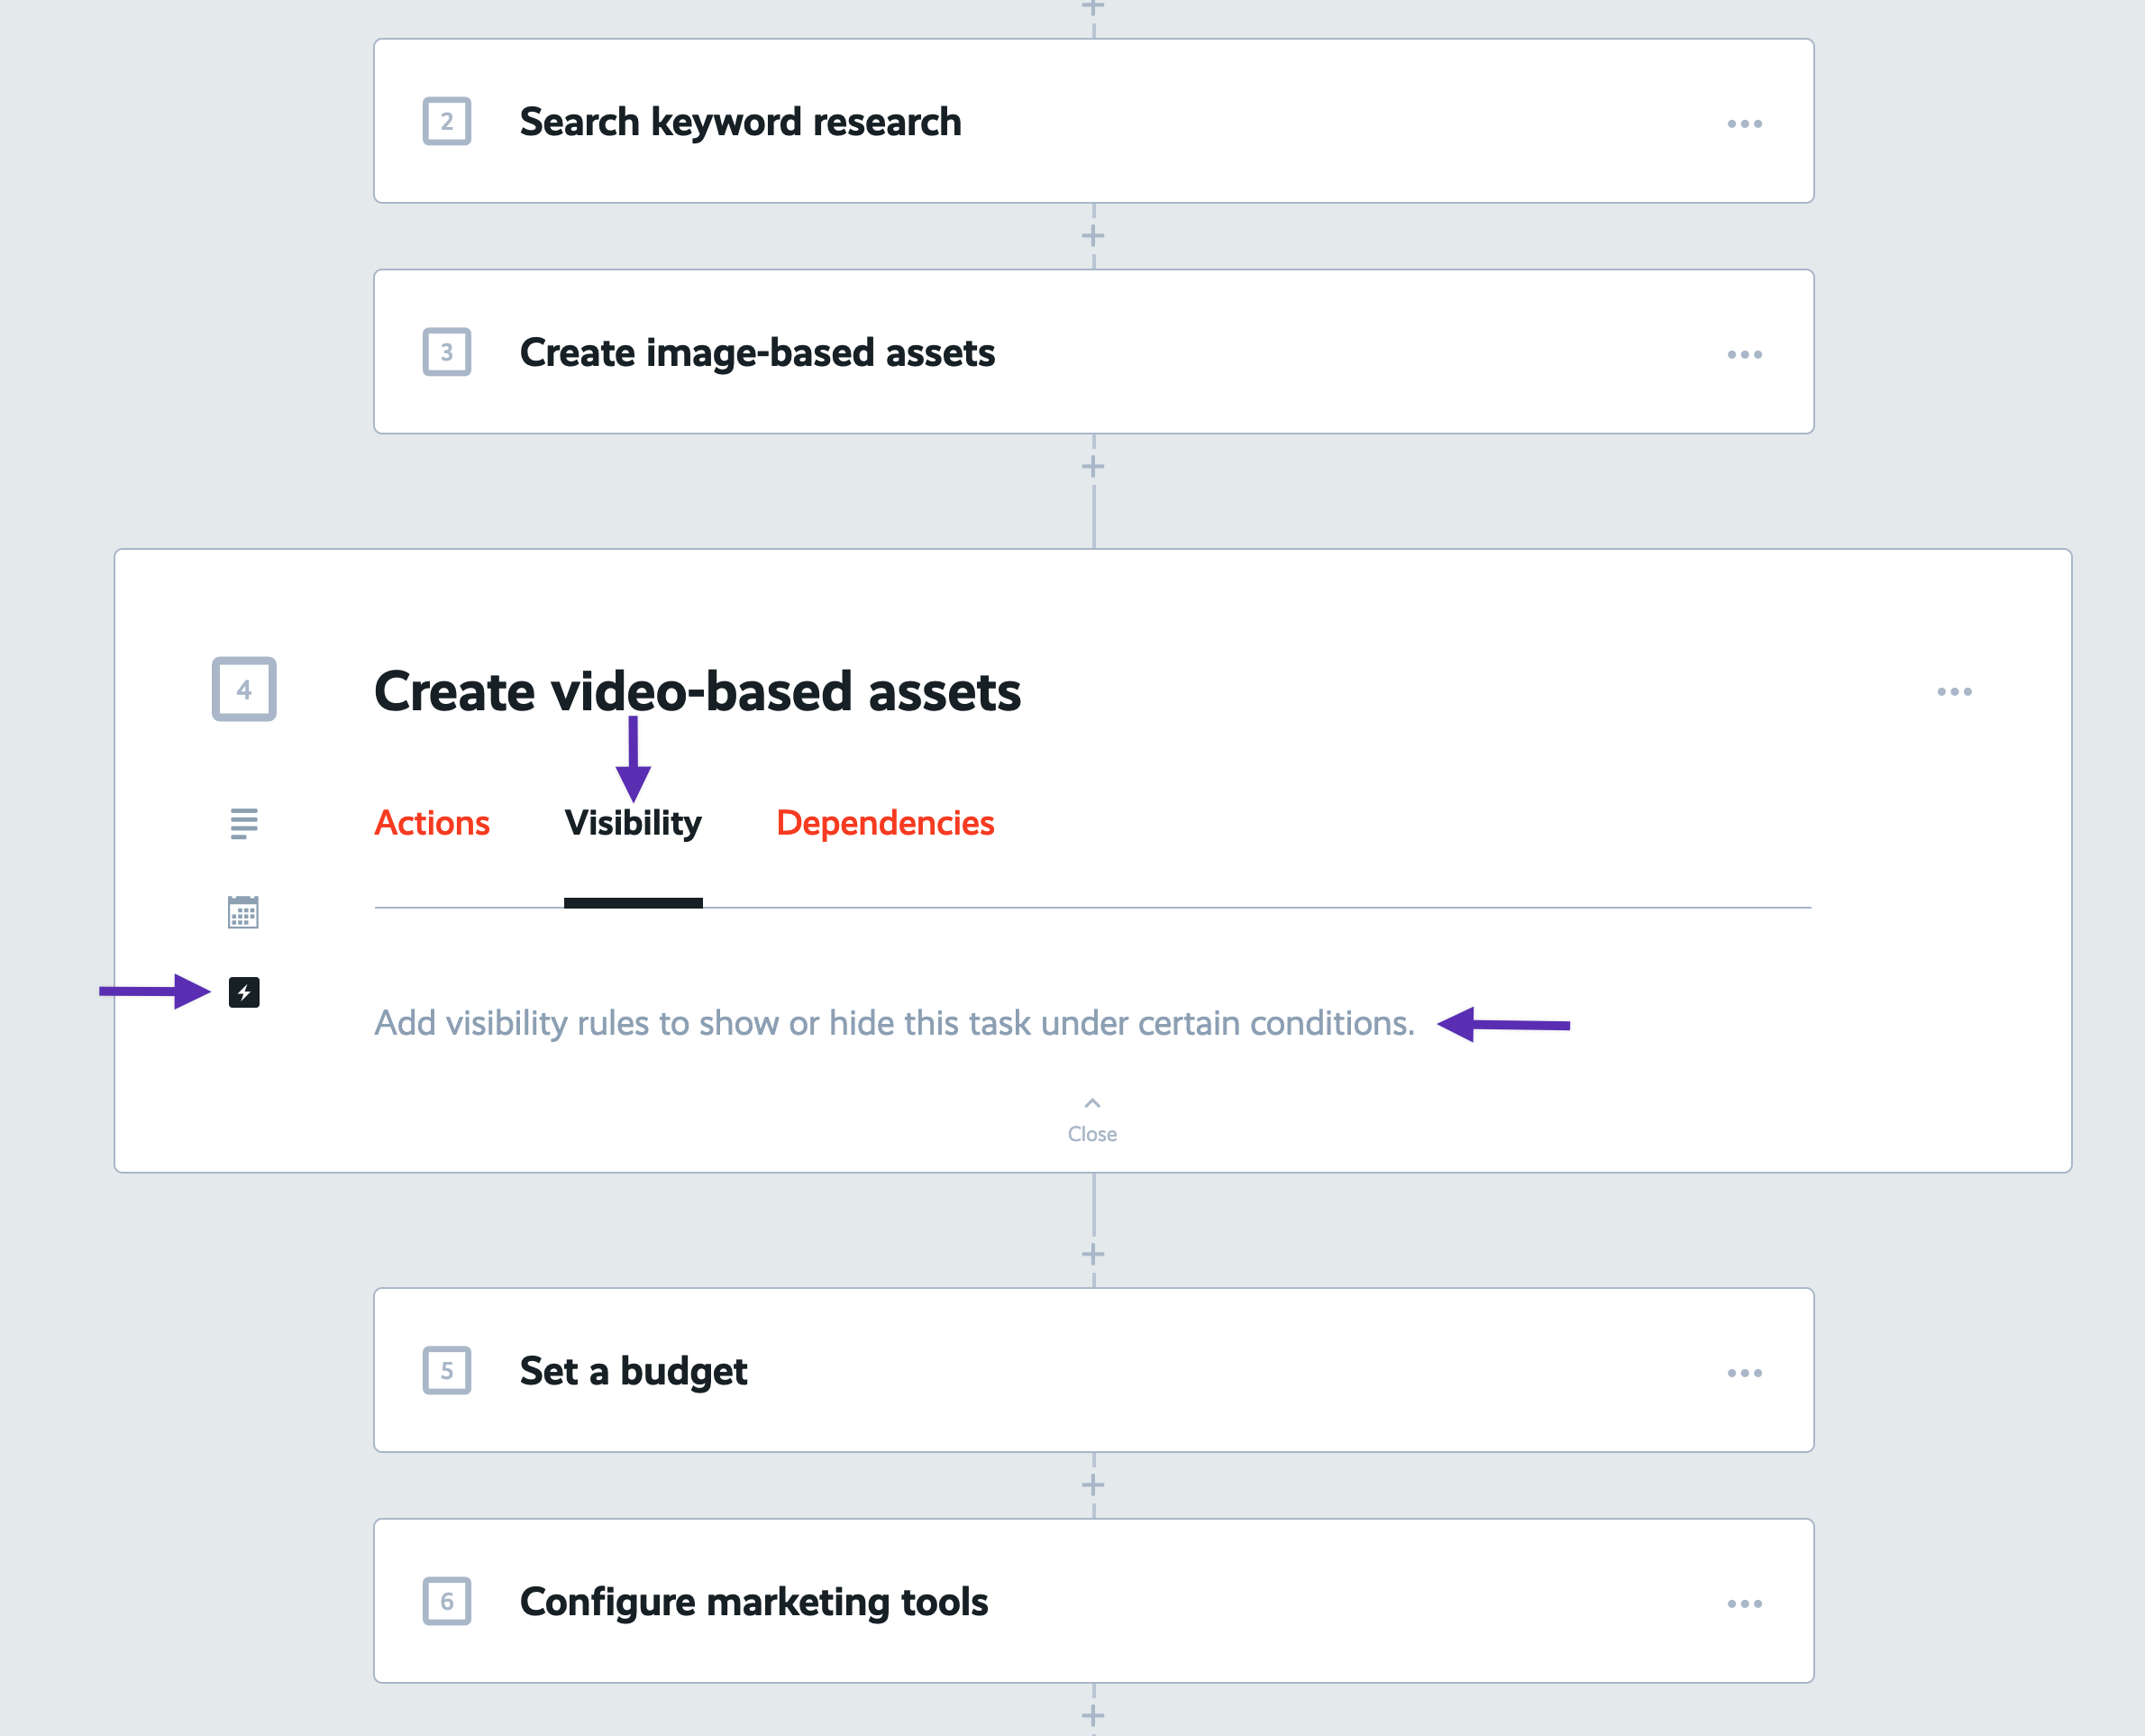
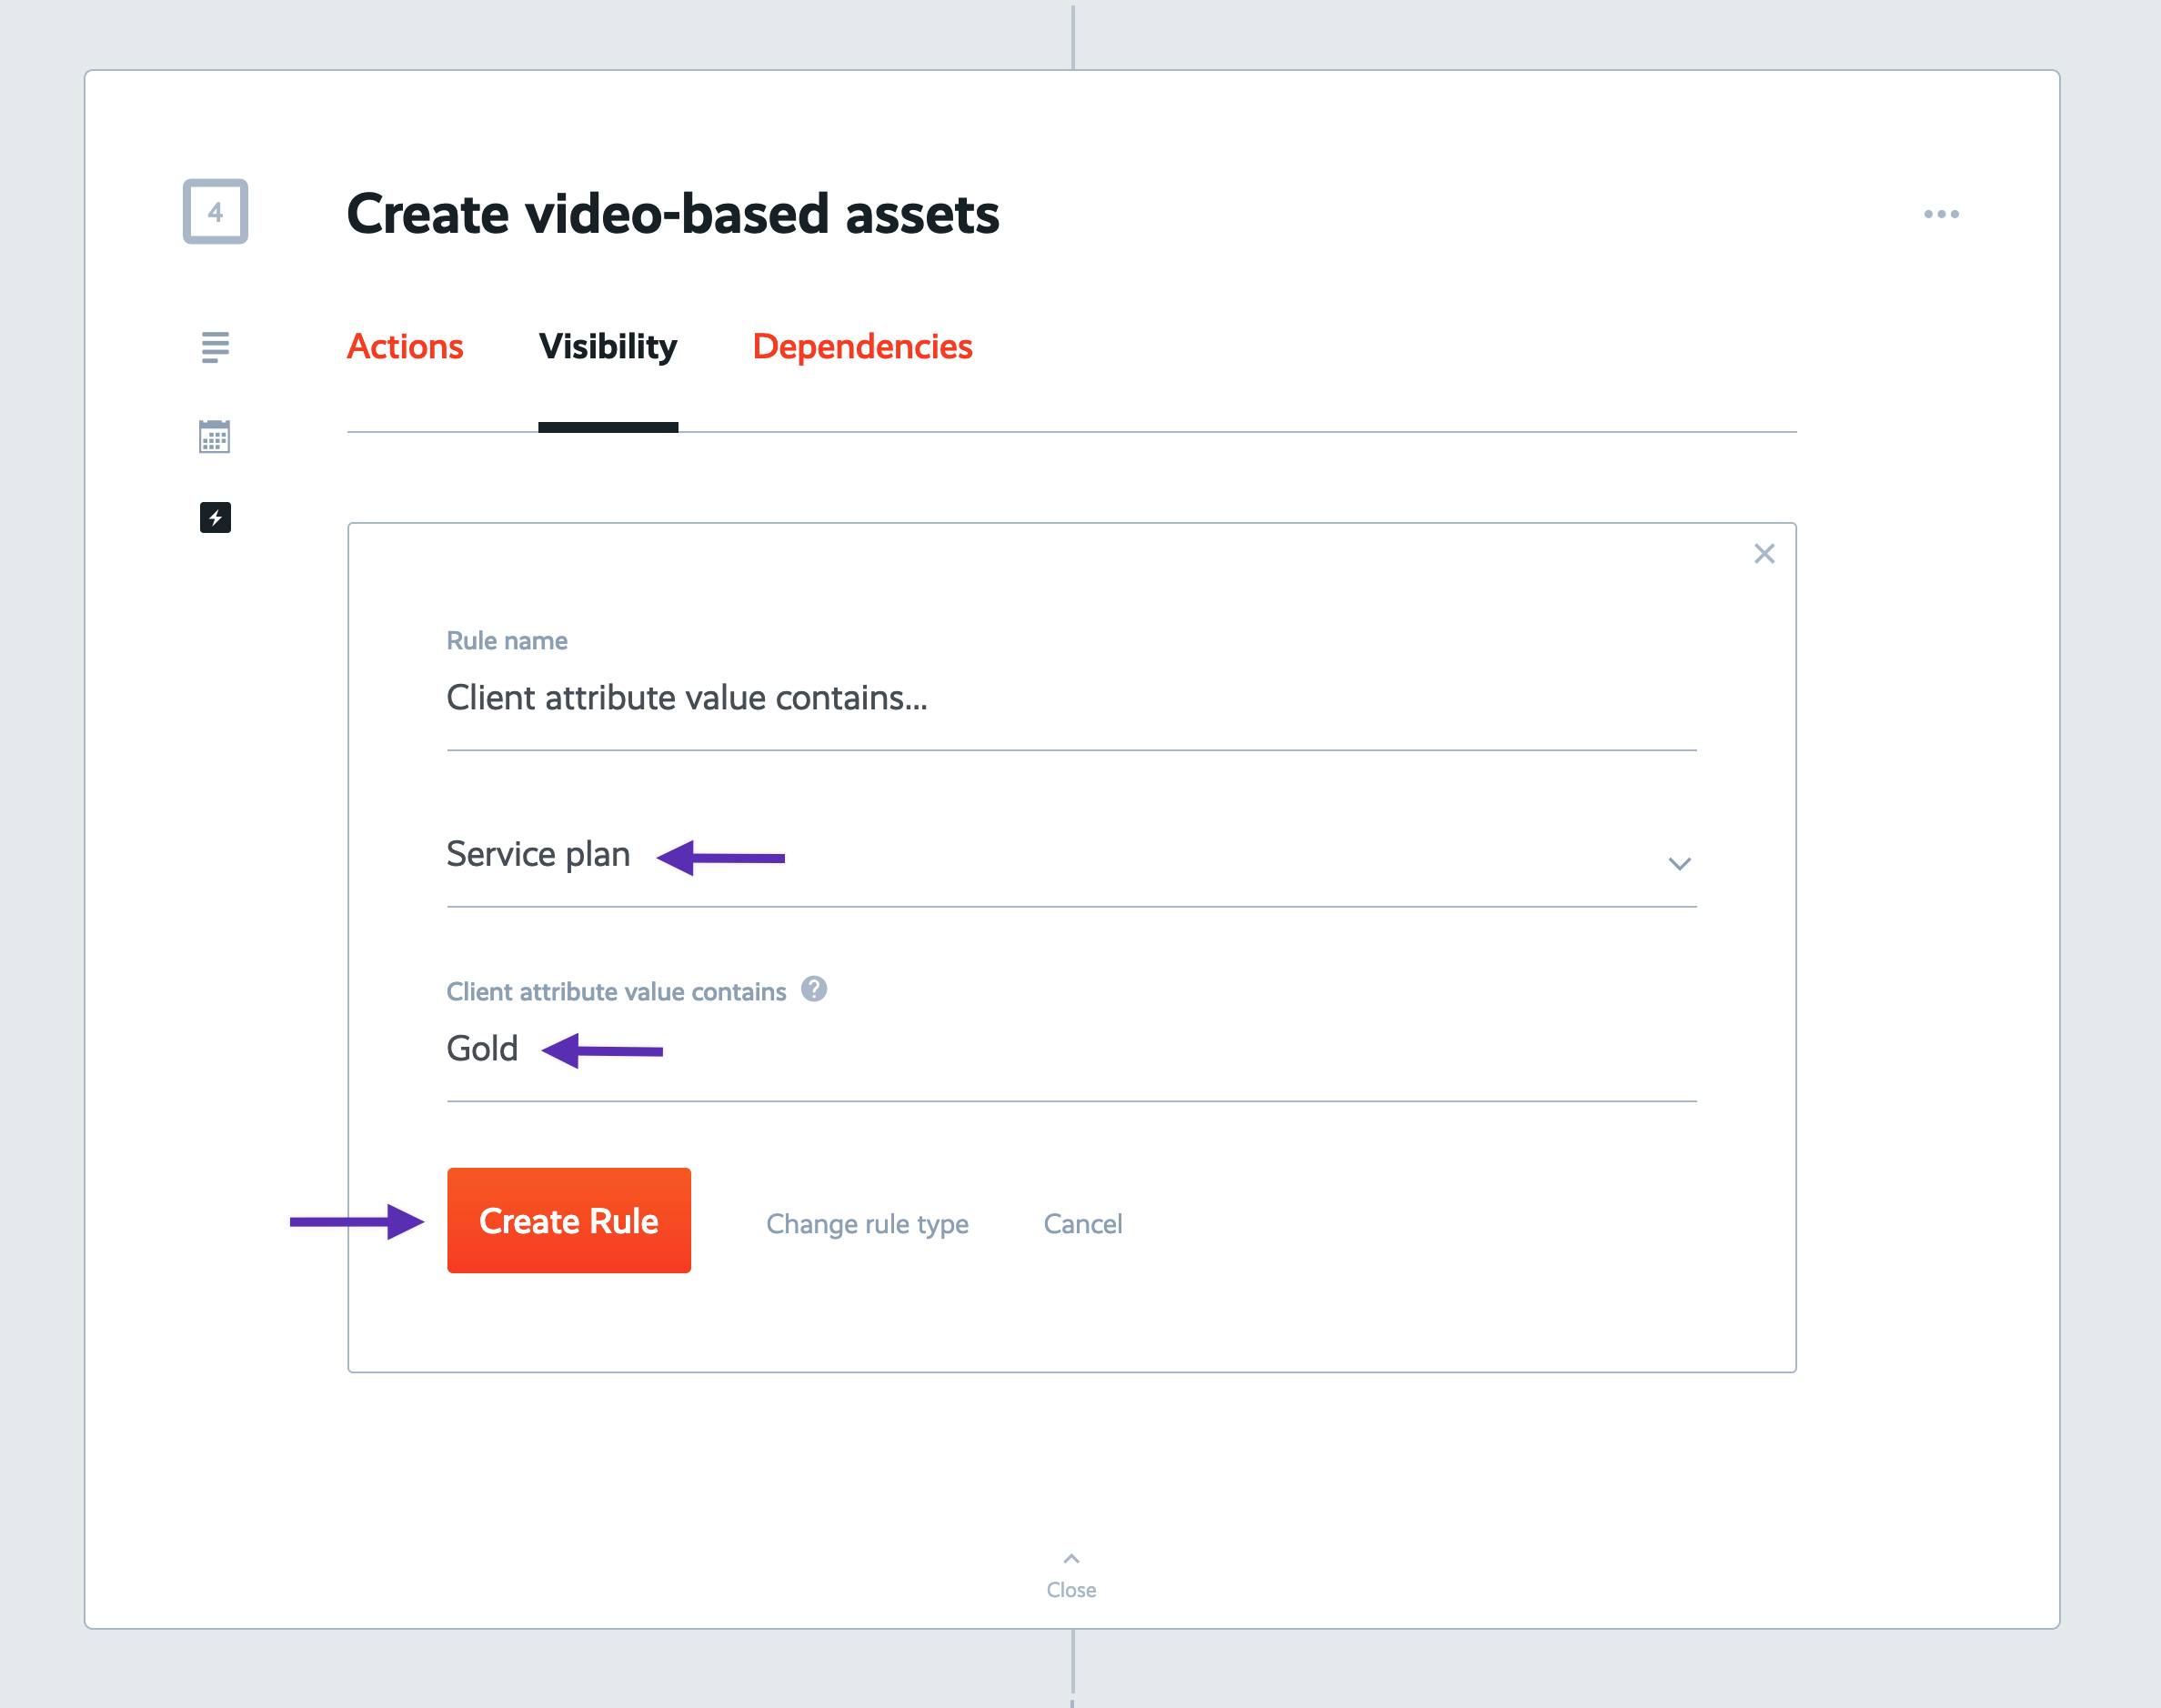
Open up step 4 and open its' automations settings, then click the "Visibility" tab, then click to add a new visibility rule.
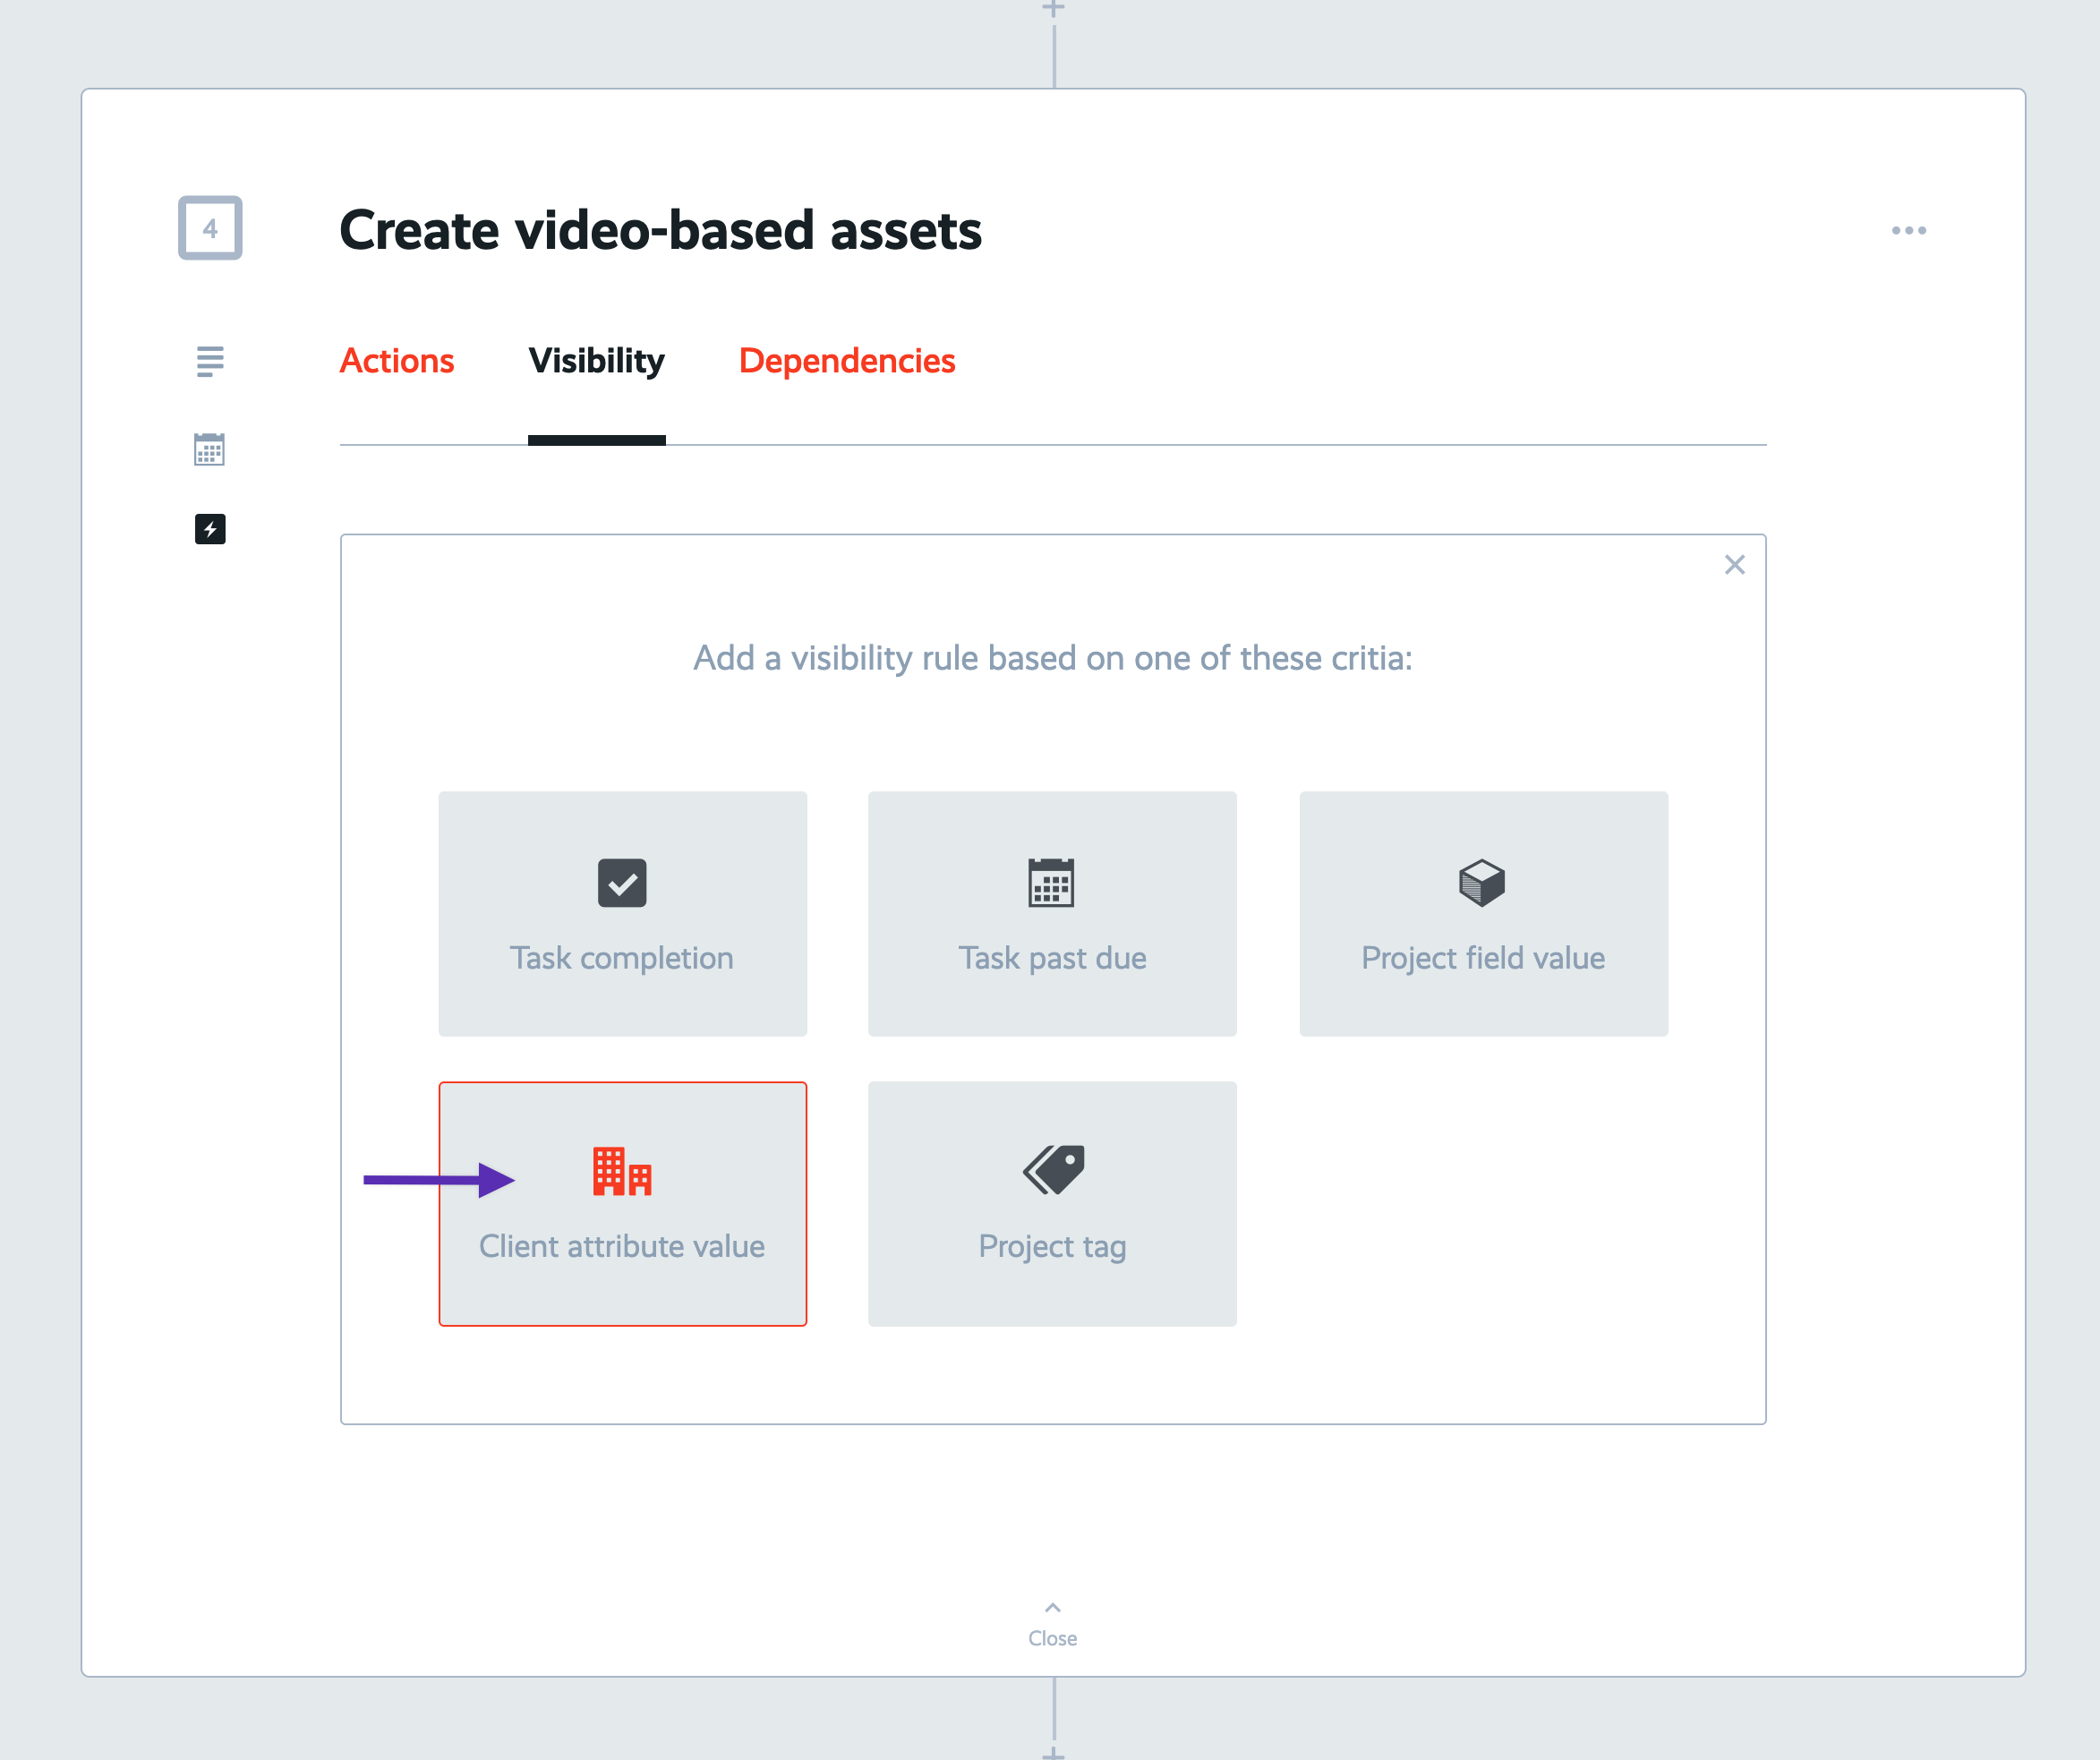
Click the "Client attribute value" rule type:
Select the attribute "Service plan". In "Client attribute value contains" type in the word "Gold" (no quotes).
Then click "Create Rule".
Now let's see this "smart" process work its magic!
First, keep in mind that our client "Dunder Mifflin" is on our "Gold" service plan. Our other client, "Sterling Cooper" is on our "Silver" service plan.
With that in mind, let's go ahead and create a marketing campaign project for each of these clients and see how the tasks automatically adapt.
First, go to your "Marketing Campaigns" board and create a new "Campaign" project. Before you create this campaign, click "More settings" to reveal additional options, including the client selection. Name this campaign "Advertising campaign" and associate it with our client, "Sterling Cooper".
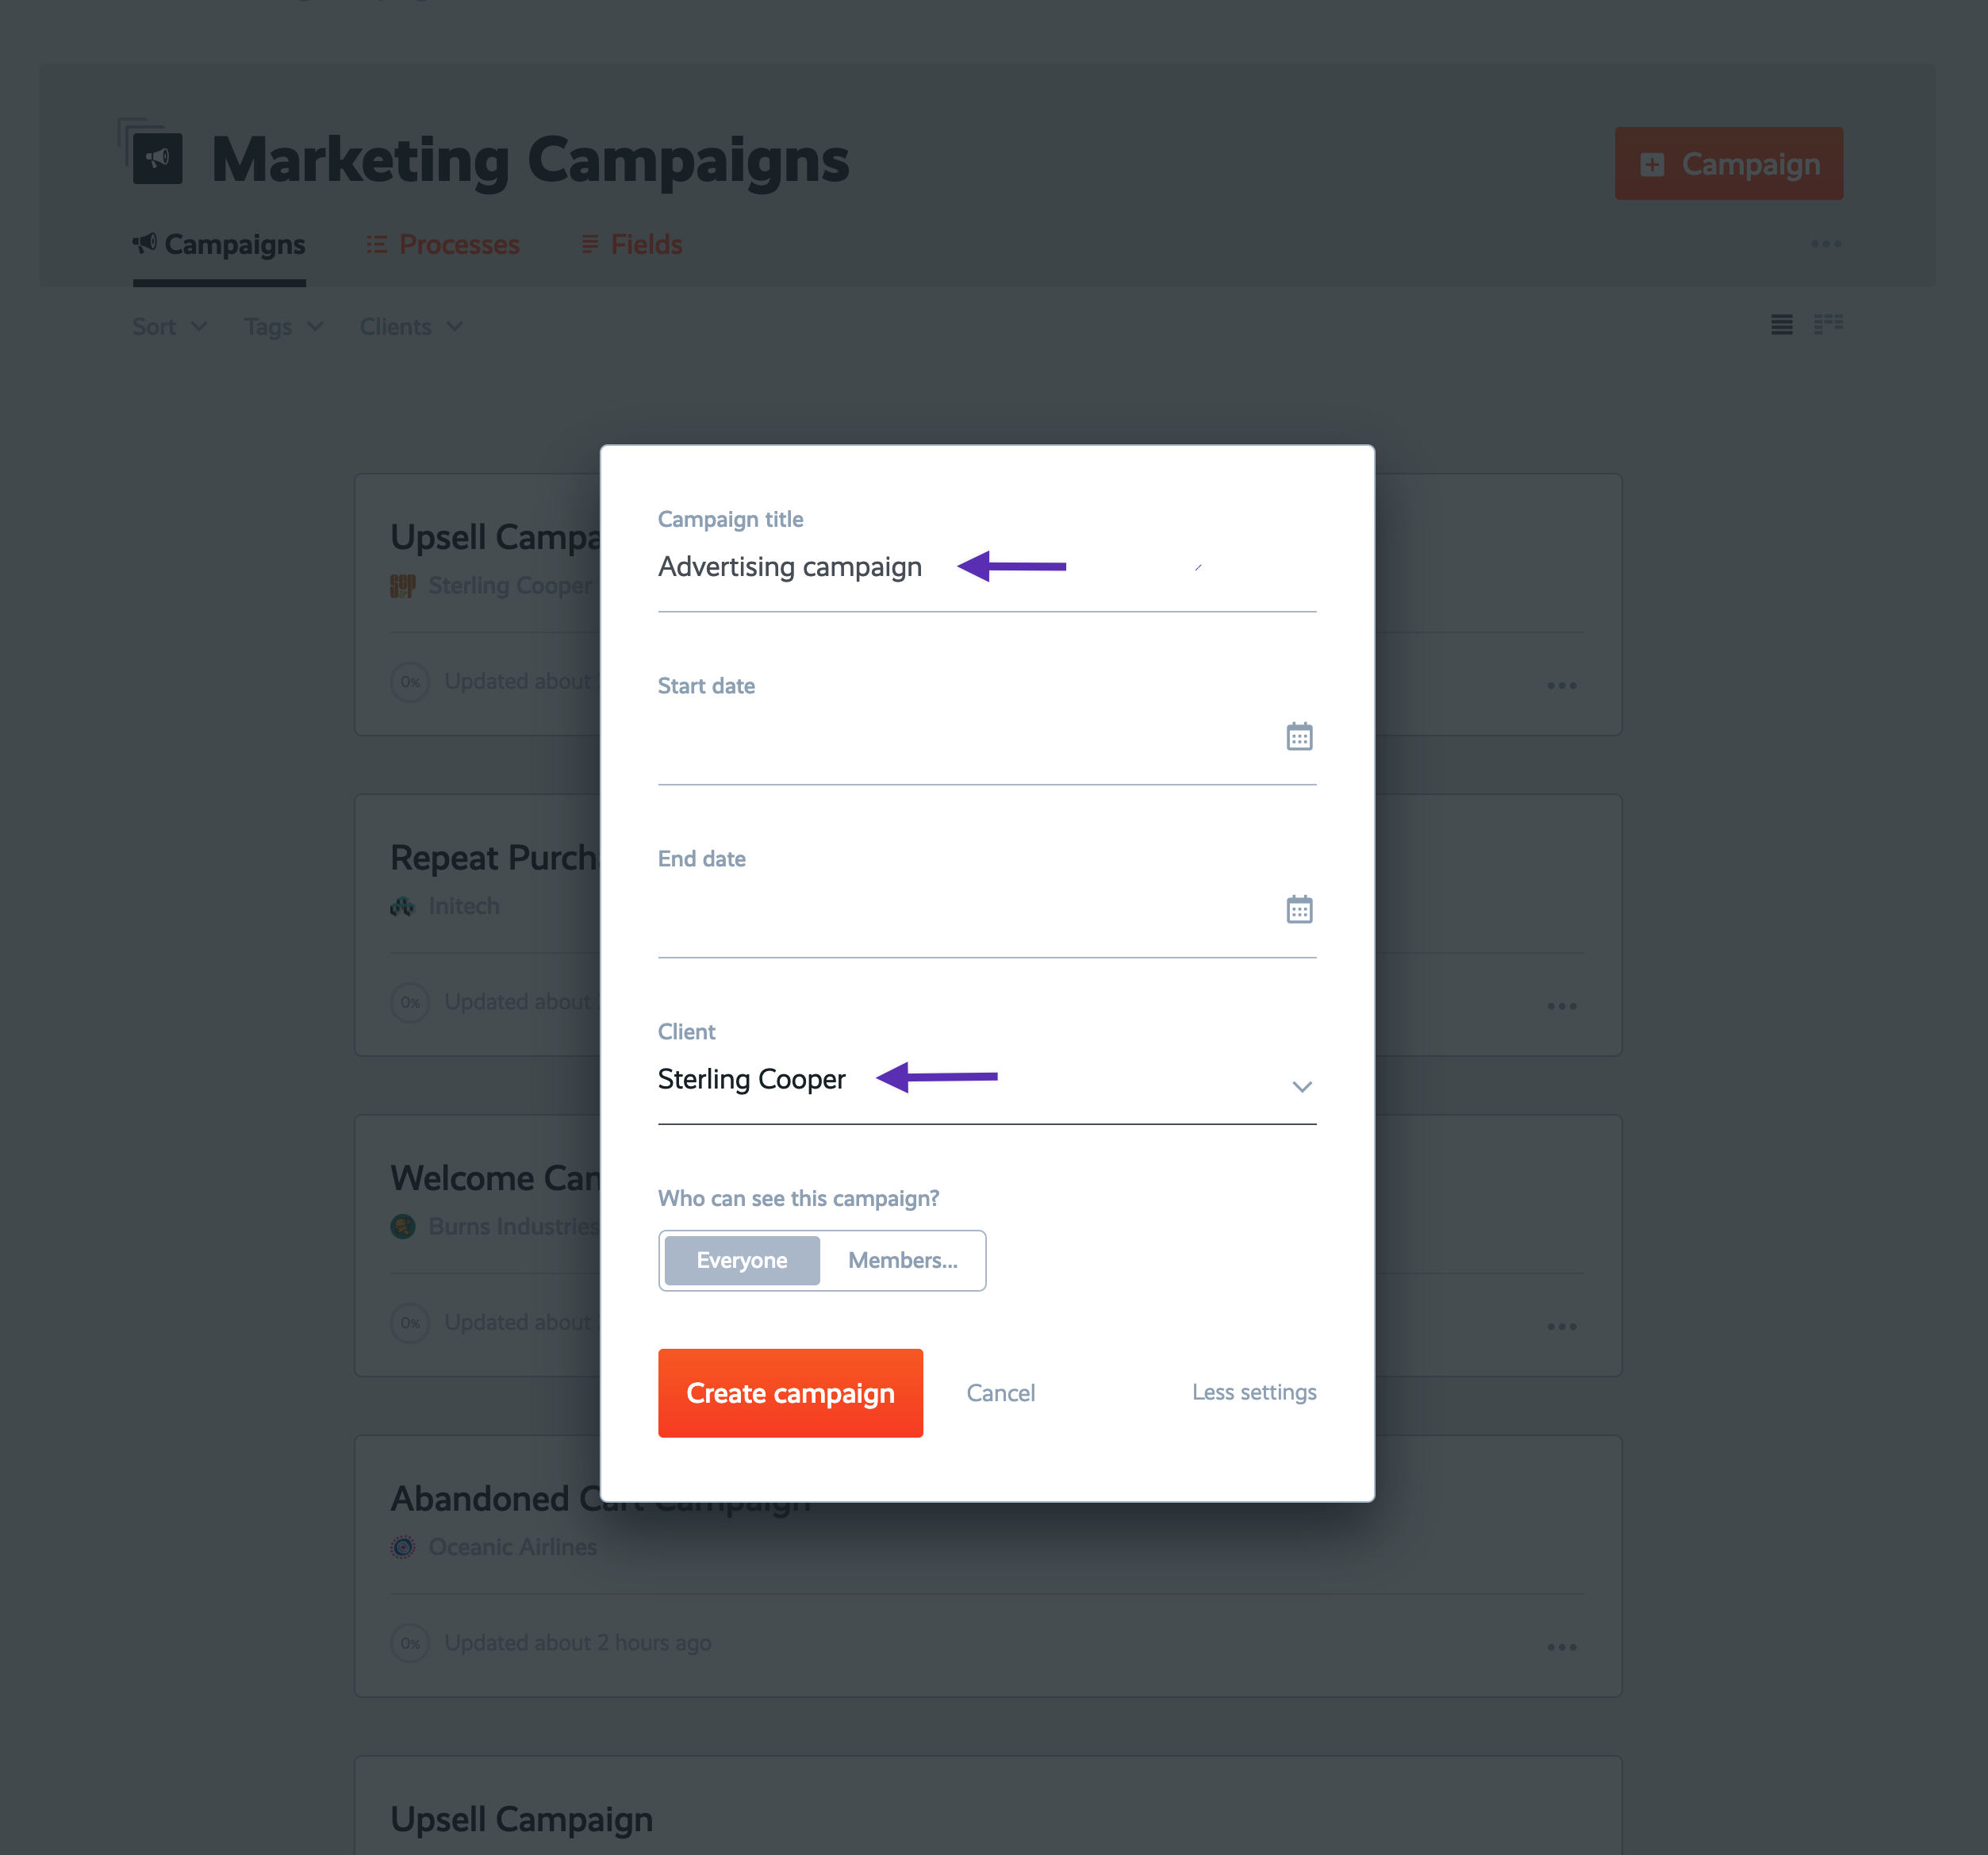
Now inside this new campaign project, you don't see that task "Create video-based assets", right? That's because the client, Sterling Cooper, has their service package set to "Silver", not "Gold".
Now let's see what this would look like for a "Gold"-level client.
Now back out to your "Marketing Campaigns" board and create another new campaign. Once again, click "More settings". Name it "Advertising campaign" again. This time select "Dunder Mifflin" as the client.
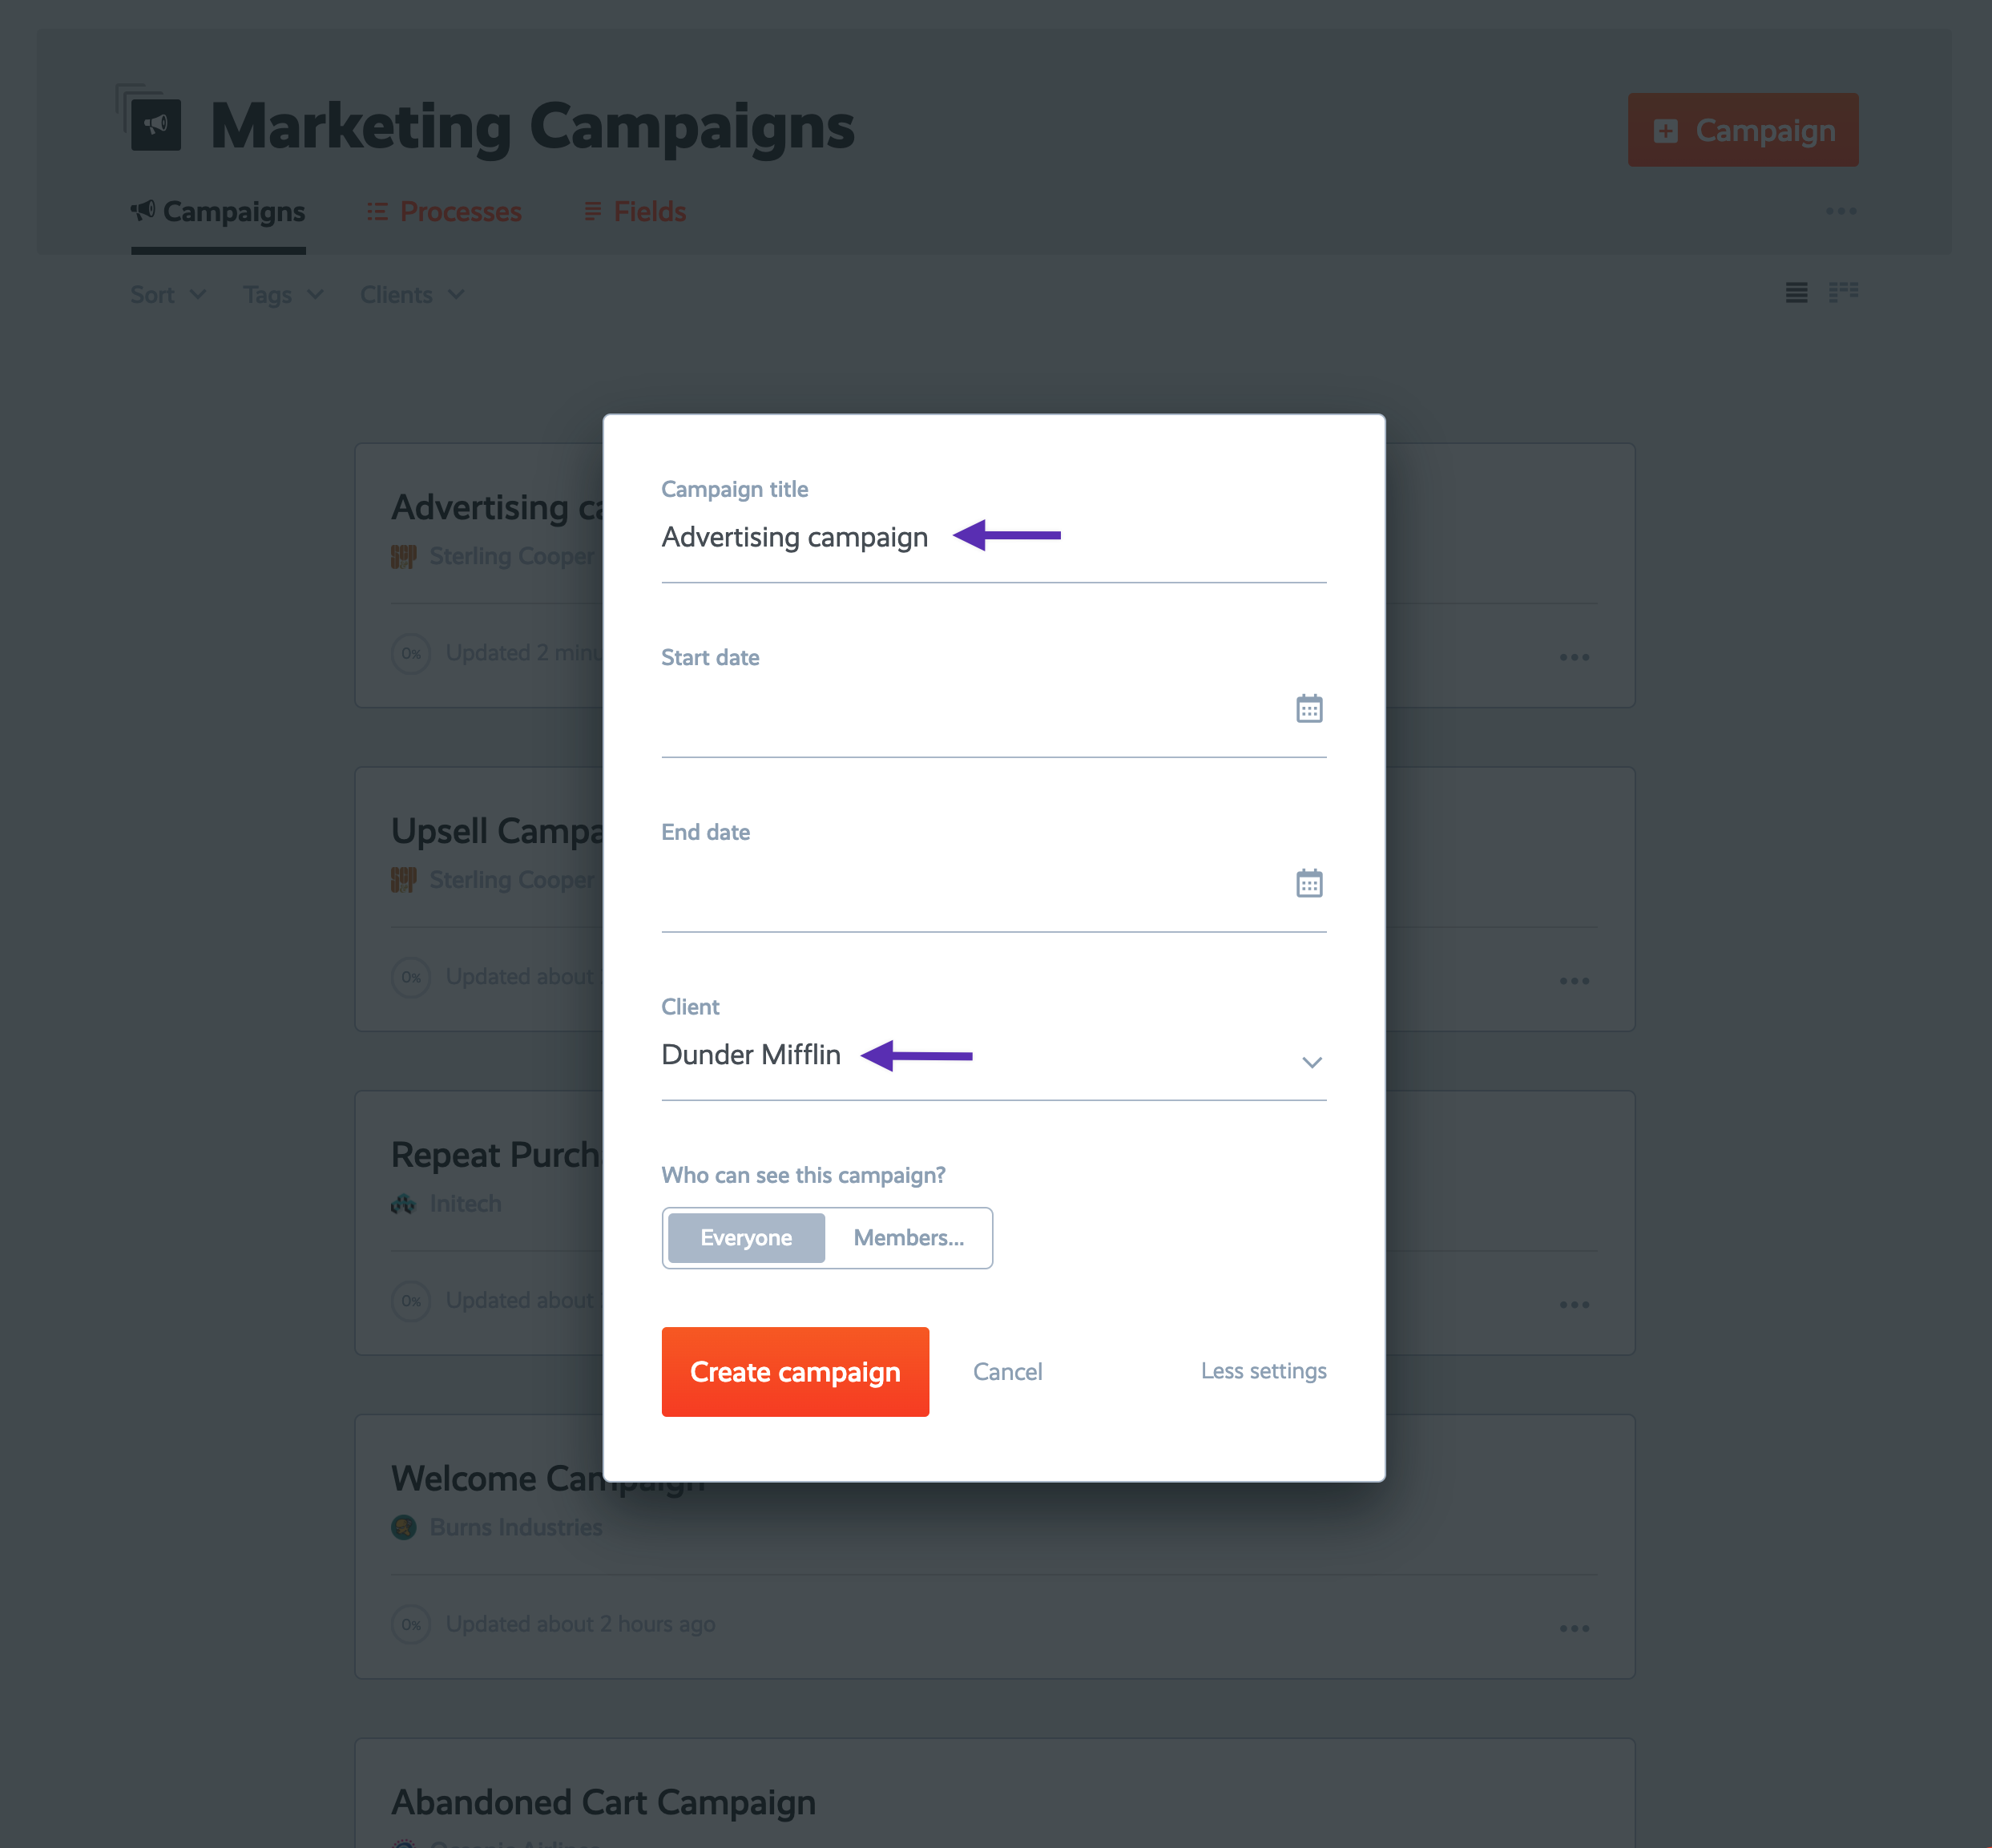
Now inside this new campaign project, you do see that task "Create video-based assets". That's because our client, Dunder Mifflin's service package is set to "Gold".
The process has automatically adapted to each individual project, depending on which client it's for. Perfect!
In the next lesson...
All the organization and automation in the world won't help you if you can't see everything from a birds-eye-view, or find what you need when you need it. Next lesson we'll cover visibility for your operation.
Have questions? Need help or advice on mapping out your processes in the right way? I love talking process! Get in touch and I'll be happy to work with you in your ProcessKit account.
Haven't started using your ProcessKit yet? Start your free trial.